Tag Archive for: vintage

Vintage Apron Skirt for the Sassy Girl

When life (Grandma) gave me aprons-lots of aprons…
I decided to make a skirt!
And I also believe that my stack of aprons are pro-creating with my original four. I keep finding more. Creepy.
I decided something must be done.
And this skirt popped in my crazy brain while I was sawing today.
This is super easy to make! And because it is a one of a kind, you will never be bummed at another church picnic because you are wearing the same exact thing Sister Susie is wearing.
Oh, isn’t that just the worst?


Here’s what you’ll need:
Iron & & Ironing Board
Scissors
Tape Measure
Seam Ripper
Straight Pins (although mine are a bit curvy)
Thread to match
Three aprons of similar length
Button Covers (if desired), or buttons-cute ones, please!


I chose these three adorable aprons because of the different patterns-gingham, stripes and floral print.
And they were pretty much the same length, too.
I decided that stripey would be my front of the skirt (the apron on the right), floral would go underneath the front as an accent (the apron on the left) and gingham (center apron) would be the back of the skirt.


Using a seam ripper, remove any pockets on the aprons that will be on the back of your skirt or is the accent pattern on your skirt.
Try not to poke your finger. Ouch.


Next, cut the apron strings (tee hee) from the aprons that will be the back of the skirt and the accent pattern. Keep these little suckers for later.


Make sure your apron is good and wrinkly.
Next, measure the center of the apron that will be the front of your skirt. Cut from the bottom of your apron towards the top, stopping at where the waist band is.


After you have made your cut, flip your front over and iron a seam allowance of about 1/4”.


Pin the apron strings that you had cut off of your accent pattern apron to the front of your skirt. Fold a 1/4” under for your seam and iron the strings into place.
Sew your strings to the front of your skirt.


Place the front of your skirt right side down. Center and pin to it, with the right side down, the accent pattern apron. Sew into place.


This is how the front of your skirt should look by now. See the peekaboo accent pattern? Isn’t it precious?
Moving on.


On the right side of the skirt, pin the front of your skirt to the back of your skirt, using a 2” seam allowance. Place a pin 4” below the waistband.
Sew into place, stopping at the 4” pin. Slip on your almost done skirt and pin the left side into place, top to bottom.


Sew from the bottom to the top on the left side of your skirt.


I made my own buttons using the material leftover from the apron strings. But you can use any ol button your heart desires. I made one real button hole on the right side and attached a matching button on the left side of the skirt, just to bring symmetry to the situation.
I also added a hook and eye on my right side, for more concealing power. But you can use a second button, or forgo the whole button thing and throw in a zipper.
Get crazy! I dare ya!


And here’s the finished front of the skirt, once more. Isn’t it cute, sassy and vintage all rolled into one? I think so, and I think I will wear it tomorrow night.
And below is my backside.


My very wrinkly backside. Please ignore the fact that I did not iron this apron. I wanted cheddar whales, hubby and a little snuggle time.

Let me know if you make an Apron Skirt. I would love to see it!

Read more

Mod Log Table

I have been dreaming of an outdoor end table for quite some time. When my neighbor decided to chop down his very dead pine tree, the opportunity afforded itself.
I love neighbors with chainsaws.
Here’s a view of the finished Mod Log Table. Yes, it’s inside my house. No, it hasn’t spent a day outside yet. I think it’s kind’ve pretty inside…


In order to make your own Mod Log Table, you’ll need a dead tree-preferably very dead. I hopped the fence into my neighbors yard and picked out my victim from amongst the carnage laying before me.


I let my Little Mini chainsaw rest while I borrowed the neighbor’s beefier chainsaw. I tried to make the cut as even as possible, knowing I would have to sand down any high points on the wood later on.


I had some vintage legs laying around, but you can use pre-made legs that you can buy at Lowe’s. You’ll also want lag screws to fasten your legs to the log, polyurethane, a foamy brush, and gloves. You’ll want some steel wool & a microfiber cloth for in between your poly layers.


You’ll need a drill with a drill bit slightly smaller than your lag screw and a belt sander with 40 & 80 grit sandpaper, a socket set and a level(not pictured-sorry!).


Sand the top and bottom of your log until it’s smooth, starting with the 40 grit. Use the 80 grit for your fine sand.
That’s fine, baby, that’s fine….


Once your log is smooth, use small set screws to temporarily attach the legs to the underside of the log. Outline the table legs (so when you remove them later on, you’ll know where they go) and flip your table over to check for it being level.


Using your level as shown, ‘shim’ up your table leg until the table sits level. Measure the amount you will either need to router out of the underside of your table, or shim up with scrap plywood.
Or you can choose to sand it even more until your shoulder falls off.
Flip your table back over and remove the legs.


I cut out pieces of plywood with a jigsaw to make up the difference I had measured earlier in order for the table to be level. I chose to shim up my legs, mainly because I do not own a router. This doesn’t look quite as finished, but for an outside table, I was ok with it.


Drill pilot holes for your lag screws or for your pre-made table legs using a drill bit that is slightly smaller than the screw you’ll be using.


Use a socket set to insert your lag screws, if you have legs like mine (tee hee). If you have pre-made legs with the screw already sticking out of the end, just screw them into where you drilled your pilot holes.


Wipe the table down with a microfiber cloth-get all the nooks and crannies. Now it’s time to make it pretty! Enough of the functional stuff. WOO-HOO!


Apply your first layer of polyurethane and let dry according to the manufacturer’s instructions. It’ll be so purty when you’re done with the first layer!


Use your steel wool to get any of the bubbles out by ‘sanding’ it lightly.


Use your steel wool to get any of the bubbles out by ‘sanding’ it lightly.
Wipe the entire thing down again with your microfiber cloth. Apply another coat of poly and let dry.


You now have such a cute table, you may not be able to bring yourself to put it outside. Mine hasn’t made it outside yet. I keep telling myself to let go…but I’m worried it will be lonely outside…

Read more

Sassy ‘Dress Shirt’

Typically the vintage dresses I come across have been ripped, stained or eaten by evil moths. Instead of parting with the abused garment, I hide the problem areas with a little creativity and turn it into a sassy
one-of-a-kind shirt.

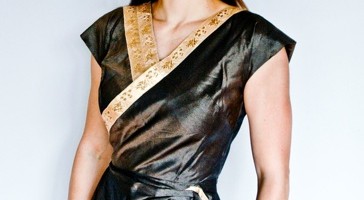
This is what my finished product looked like, but each ‘Sassy Dress Shirt’ will be unique! Read on to learn how to make your very own ‘Sassy Dress Shirt’.


What you will need:
An old dress
Seam Ripper
Iron & Ironing Board
Straight Pins
Sewing Machine
Ribbon to match the dress (if desired to cover holes, etc)


Assess how long you would like your ‘shirt’ to be and cut the excess off, leaving about two inches for hemming. I don’t subscribe to the midriff look from the late 90‘s, so I hem my ‘shirt’ to fall a couple inches below my hip bone.


Turn your ‘shirt’ inside out and measure your hem all the way around, pressing and pinning it as you go. Sew your new hem with a blind hem stitch or whatever you normally fancy when you hem something up.


If you have ribbon or embellishments that match your new ‘shirt’, now is the time to hide those stains or moth holes. No one will be the wiser! In the past, I’ve made little fabric flowers out of the left over material to cover the problem areas.


For this shirt, I removed the ribbon that was once around the bottom hem of my dress to cover over a stain on the front, following the neckline.


I opened the seam where the zipper stopped on the backside and followed that opening with more ribbon. This allowed me a little more booty shakin’ room.
Sew all of your ribbon and your embellishments in place.


Here’s my backside… of the shirt. What were you thinking I meant? Scroll down to see the front again.


Ta-Dah! I love wearing this cute little number out on the town. Let me know if you try making your own Sassy Dress Shirt. I would love to see how yours turns out!
Read more

My Home Tour

I love being on the road with Biceps.
But the smelly bars, graffitied bathrooms and late nights
can take a toll on a woman.
I love my safe oasis, my clean house.
I need my nest. Tweet, tweet.

And as they say in Oklahoma:
“Ya’ll Come On In and Throw Your Feet Up!”


Our kitchen is the hub of any and all activity. I spend 99.99% of my
time here. Maybe a little more. Either I am cooking, cleaning up my mess from cooking , or I am merely entertaining guests that drop by. The countertops are trowel finished concrete and the floors are the recycled haymow flooring from Bicep’s family’s century barn.
The cabinets? Well…Ikea, of course.


This is a little sitting room off of our kitchen. I picture our children (not that we have any) playing intelligently with blocks and reasoning out conflicts amongst themselves while listening to Mozart.
But for now, this is our workout area every morning. We just scoot everything out of the way and get crazy.


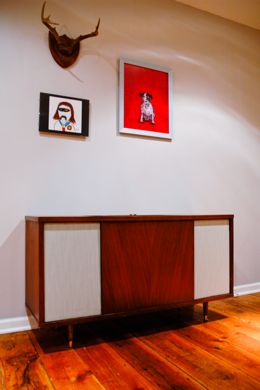
In the same room sits this little disguised piece of furniture. I gutted this stereo cabinet to house all of our workout equipment and our weights.
Aren’t I a sneaky little devil?


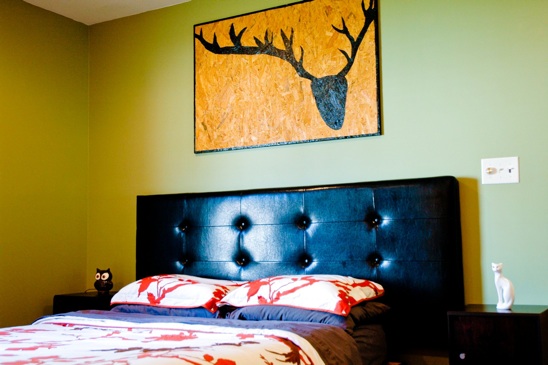
Ah…my bed. Nothing is better than coming off the road, leaving behind hotel rooms and not-so-sure-if-they’re-clean sheets…to this room. It may be plain, but it is complete serenity for me.
Learn how to make the Scrappy Art hanging over our bed.


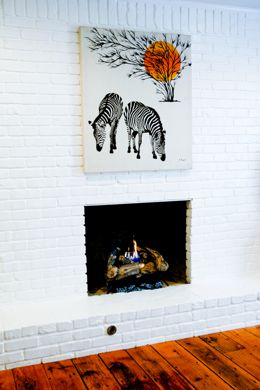
We reconfigured a huge ‘bonus room’ to be our master bedroom. And wouldn’t you know it, we got a fireplace out of the deal? I love lighting this sucker in the winter, drinking tea and eating my homemade ginger snap cookies. I just might have to share my secret ginger snap cookie recipe. Those cookies make me salivate just thinking about them. Yum…I think I need a moment.


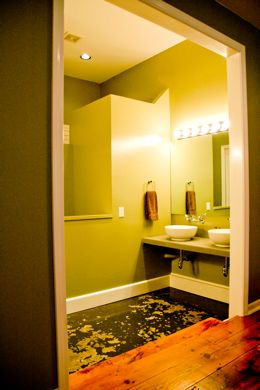
We made a dream bathroom out of a weird stinky moth-ball hallway and some wasted space in a ‘sauna’ room.
I love our bathroom-concrete floors and countertops, two sinks, a huge walk-in shower with two shower heads…


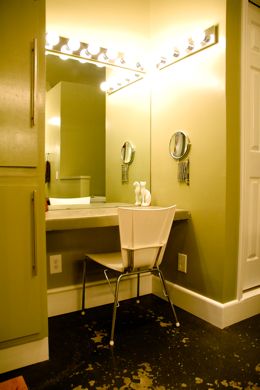
…and my own make-up area that Biceps has no reign over.


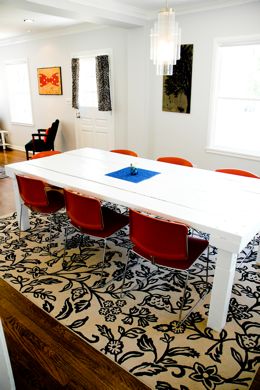
Little known fact: I like to throw parties, I like to entertain, I like to feed people until they can’t eat anymore.
The size of our dining room table was therefore very important to me. I wanted something to seat twelve while the entirety of the menu sat in the middle of the table for those second-helping kind of people.
We made the table from more barn wood salvaged from the in-laws
family barn.


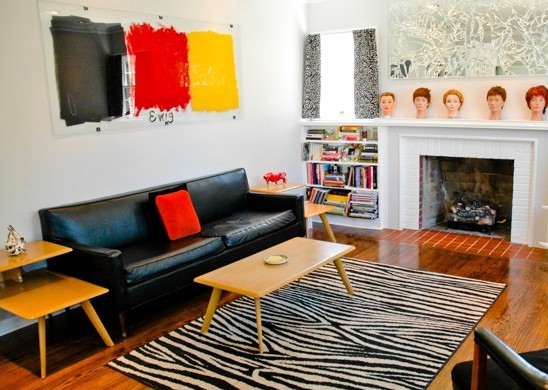
Our living room is perfect for us. There’s a great amount of space to expand into, the fireplace is perfect for those cold Tulsa winters….

(Learn how to make the Mirror Art hanging above the fireplace.)


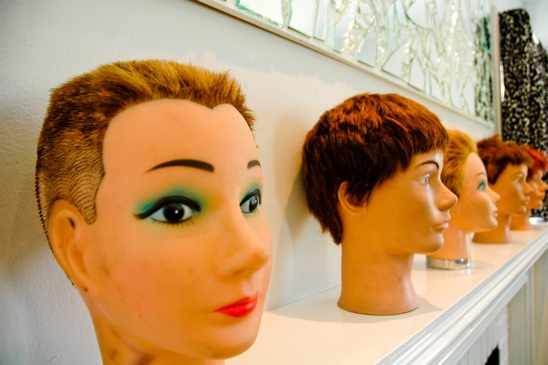
And the mannequin heads on the mantle watch over us all. And they tend to creep out our more delicate guests that aren’t used to this sort of thing.


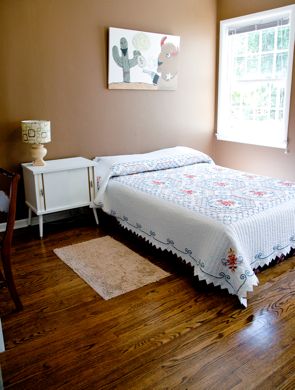
Our guests stay in our ‘Cowboy Room’. There is no relationship to this name and our weirdo cat. Cowboy the Cat is not allowed in this room. It is a fur-free zone.
I like retro cowboy-esque type stuff and Biceps let me pretty much do what I wanted to in this room.
Very unusual…..


Three vintage finds-the lamp, the shade and the nightstand. I repainted the nightstand and added the stripes. Total invested in this picture-$14. Boo-yeah.


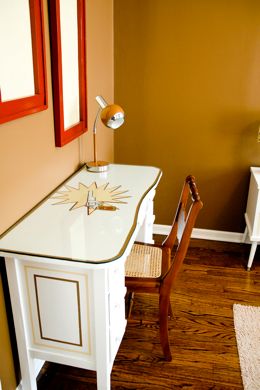
The desk was left behind in the shed when we purchased the house. I sanded and then spent hours painting this thing. I don’t think I have ever painted a gun on anything before.


Well, thanks for stopping by.
There’s more, but no need to bore you.
Come back anytime. I like guests.

Read more