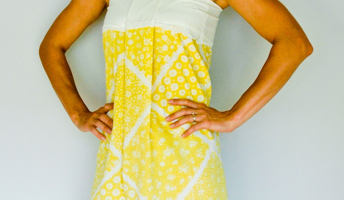
Vintage Embroidered Pillow Case Shirt
This pretty little pillowcase has been lingering in my linen closet for years; very much neglected.
I liked it so much that I didn’t want to risk
ruining it…by using it.
Once I realized how crazy that logic was, I decided to put it to good use.
I mean, what’s next? Covering my couch in plastic?

I wear jeans with this cutesy little shirt because it hits me about mid-thigh.
It’s almost long enough to be a dress, but being an ORU graduate…I have been trained that ‘modest is hottest’.
HAH HAH HAHAHAHAHAHH!
Phew…had to get that out of my system….

Here’s what you’ll need for your own pillowcase shirt:
2 feet of 2”+ stiff lace-I added a decorative 1/4” lace on top of the 2” lace
Iron on hem tape-only if you add decorative lace as I did
Thread to match
Scissors
Tape measure
Pillowcase

First step: make sure your cat approves of the pillowcase. You can test this by allowing him to make a nest on the material.

Cut the seam from the end of the pillowcase.

Fold under and iron 1/4” on the cut end of the pillowcase.

Fold the 1/4” over 1” more and iron. This will be the top hem of your shirt. Sew that sucker in place, stitching as close to the bottom and to the top of the 1” of material-creating two seams.

I slipped the pillow case over my head and found that I had 9” of excess material around my chest. Starting from the front and center of my shirt, I divided the 9” of excess material into 7 equal pleats-one center pleat and three pleats on either side of center.
I pinned all of the pleats into place and ironed them flat.

I sewed on top of my old seams, making the pleats permanent.

Using an iron-on hem tape, I added a 1/4” decorative lace on top of my 2” lace, just for kicks and giggles.
Make sure your ironing board cover is absolutely disgusting like mine is.

These pretty little things will be the straps to my shirt.

Find center of your shirt, measuring out 4” on either side.
Find center of your straps and pin them at the 4” mark.
Do the same for the back of the shirt.

Following your old two seam lines, stitch your straps into place on the front and back of your shirt.

Sometimes, when I am really sassy, I’ll throw a belt around my shirt.
See what I mean about it almost being long enough to be a dress?
It’s just a little more thigh than I am comfortable with in public.
And sorry you had to see so much thigh.

Here’s the back of my cute shirt.
I have worn it mostly without a belt because I like the free and flowy feeling.
Also without a belt, I am able to gorge myself on chips and salsa. Or be pregnant with no one the wiser about my ‘condition’. Or smuggle in snacks to a dollar movie. Not that I I would do any of that.
But, it’s nice to know I have options.
Hope you like it!


