Tag Archive for: lace

Easy Lace Cape-Shirt

My lovely sis-in-law gave to me a set of lace curtains that she could no longer use. What’s a girl to do but make a shirt from them? (This idea works fine with a lace tablecloth, too.)


Within an hour or so, I had a sweet new shirt that goes with just about anything. This may seem like a lot of steps, but it’s just that I’m a little overboard on details, sometimes.


Here’s what you’ll need to make your very own Lace Cape-Shirt:

Fabric Lace-at least 40″ in width, 25″ in length
Thread to match
Scissors
Tape Measure
Straight Pins
Sewing Machine
Heat ‘n Bond Tape
Iron
Lace Edging


First, fold the material in half from top to bottom.
Then fold the material in half from the left side to the right side.
To make the circle that will be your cape, begin by measuring 20″ from the corner fold across the top fold. Place a straight pin at the 20″ mark.
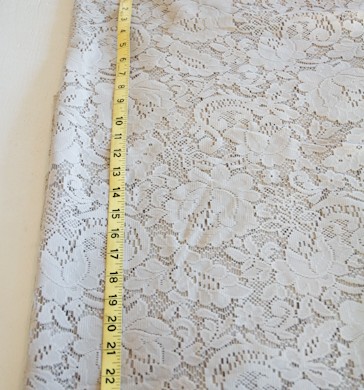
 

Measure 24 1/2″ from the corner fold down the side fold. Place a straight pin at the 24 1/2″ mark.


At a 45 degree angle from the corner fold, measure out 23″. Place a straight pin at the 23″ mark.
Alternately on either side of the 45 degree angle, measure 20 1/2″ at a 22 1/2 degree angle, and 24″ at a 67 1/2 degree angle.


Following your pin marks, cut out the quarter circle shape.


At the corner fold, measure down 2″ and across 2″. Cut out the tiny quarter circle shape. This will be the start of the neck hole.


Unfold the quarter circle to the left, leaving the top folded. This should now be the bottom half of a circle.
Measure and pin 6 1/2″ across the top fold of the lace, centered over the 2″ mark already cut for the neck hole. Increase the neck hole by cutting along these guides making the hole now 6 1/2″ wide.


Measure 2″ down from the already snipped portion of the fabric on only ONE side of the shirt. To increase the neck hole on only the FRONT side of the shirt, deepen the plunge the additional 2″.
Leave the back side of the shirt as is.


With the front of the shirt folded to once again create the quarter circle, measure down from center 4″.


Cut the 4″ slit on ONLY the front side of the shirt.


I used a hem stitch to finish off all of the edges of my lace. You can do whatever you want, but this seemed to work the best for me. So there.


Sew all of the edges on the shirt, including the neck hole.


Once all of your edges are sewn, fold the shirt once more with the neck hole in the front, a fold across the top, creating the bottom of a circle.
On each side, measure 10″ in across the top fold and pin (yellow pin in picture). Then measure from that pin 13″ down and pin (white pin). From that pin, measure back towards the edge 7 1/2″ (pink pin).
(This shouldn’t change the location of the 13″ pin, it’s just a double check that you measured correctly).
Sew two 1/4″ “stays” at the 13″ mark with a quick zig-zag stitch through both pieces of material. This will keep the cape in the right place on the body.


I decided to trim out the neck hole with lace edging. I followed the package directions on the Heat ‘n Bond to apply the edging to the shirt.


I liked using a darker color to offset the gray lace. But, the same color of lace would be just as pretty to make a plainer shirt.


Tah-dah! That’s all there is to it. Slip the Lace Cape-Shirt on over a bold colored cami and call it a day. Below is the back of the shirt.


Simple. Cute. Cheap. Fun.
That’s the way I like my crafts (or crap, whatever…).

Read more

Vintage Lace Fall Wreath

With the change in weather comes a change in wreaths for most front doors. My front door needed-nay-demanded a fall wreath. Armed with some lace and an old tablecloth, I hot-glued my way to a Vintage Lace Fall Wreath.

I’ve been hanging onto a vintage lace curtain (given to me by my beautiful sister-in-law) and a vintage embroidered tablecloth full of holes and stains. They were perfect for the demands placed before me by my front door.


Here’s what you’ll need if you’d like to create your very own Vintage Lace Fall Wreath:
Lace Curtain or section of material
Embroidered tablecloth, or something similar
Foam Wreath (mine is silver because it’s recycled from my Whimsical Wreath I made last year)
Hot glue gun and glue sticks
Scissors

It’s that simple-let’s get started!


I cut my lace to be about 12″ wide, leaving it as long as the curtain already was-about 8′. Hot glue an end section of the lace to the backside of the foam wreath.
Now, grab your partner and wrap the lace ’round and ’round the foam wreath.


Here’s the wreath all wrapped up in the lace. On to the embellishments (from the vintage tablecloth/fabric) that make it cute!


Cut out your desired embellishment from your tablecloth or fabric.


Wrap the raw ends of the fabric underneath, hot glueing the embellishments around the wreath however you see fit. Leave enough of a section on the side of the wreath for a bow.


With your remaining lace, cut out a 12″ square of fabric.


Gather the raw ends of the lace together, making a bow. Hot glue the bow to the side of the wreath you earlier left blank.


Add another embellishment in the center of the bow, if you so desire. I did-so I did.


Here’s a little up close and personal of my finished product.


My pretty Vintage Lace Fall Wreath is finished and ready to serve its purpose on my front door!

Read more

A Bird in the Headband….

The whipping fall wind brought about the need for a hair taming device. I dug around my sewing scraps and found a piece of lace that happened to be long enough to wrap around my noggin’. I liked the simplicity of the lace, but decided to add a touch of cute factor with feathers and a mini bird. In five minutes, I had a simple solution to the crazy hair-all-over-the-place problem.

If you don’t like the feathers and bird look, the options for the headband are endless:
replace the feathers with fabric or scrap ribbon and fray the ends, replace the bird with a button or a jewel…Get creative, get crazy!


Here’s what you’ll need to make your very own Feather and Lace Headband (or a similar version):
Piece of lace, ribbon or material long enough to fit around your noggin’
Two rubberbands
Feathers, scrap ribbon
Mini birds (found in the hobby section), jewels, buttons
Hot glue gun and glue sticks
Thread to match your lace and a needle or a sewing machine


While your bird is watching (see upper right corner of photo), intertwine your two rubberbands as pictured above.


Loop each end of the lace around one side of the rubberband, sewing the loop closed.


Group together the feathers, frayed ribbon or fabric and cut a piece of lace to ‘corral’ the objects. Wrap the lace around the entire bottom of the ‘corralled’ objects and hot glue it together.


Add a bird, button or jewel to the top of the ‘corralled’ feathers.


Hot glue the ‘corralled’ object where it suits you on your lace headband. I chose the right side of the headband, halfway between my ear and the crown of my head.


I’ve also been known to wear this like a hippie would, and it looks just as cute-at least to me, it does. You may not agree and that is quite alright. I know that I am weird. But, if you are also weird…then….
All hail birds of a feather!

Read more