Tag Archive for: headband

A Bird in the Headband….

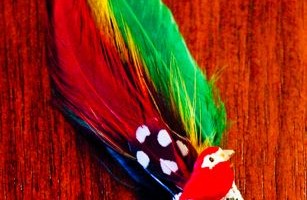
The whipping fall wind brought about the need for a hair taming device. I dug around my sewing scraps and found a piece of lace that happened to be long enough to wrap around my noggin’. I liked the simplicity of the lace, but decided to add a touch of cute factor with feathers and a mini bird. In five minutes, I had a simple solution to the crazy hair-all-over-the-place problem.

If you don’t like the feathers and bird look, the options for the headband are endless:
replace the feathers with fabric or scrap ribbon and fray the ends, replace the bird with a button or a jewel…Get creative, get crazy!


Here’s what you’ll need to make your very own Feather and Lace Headband (or a similar version):
Piece of lace, ribbon or material long enough to fit around your noggin’
Two rubberbands
Feathers, scrap ribbon
Mini birds (found in the hobby section), jewels, buttons
Hot glue gun and glue sticks
Thread to match your lace and a needle or a sewing machine


While your bird is watching (see upper right corner of photo), intertwine your two rubberbands as pictured above.


Loop each end of the lace around one side of the rubberband, sewing the loop closed.


Group together the feathers, frayed ribbon or fabric and cut a piece of lace to ‘corral’ the objects. Wrap the lace around the entire bottom of the ‘corralled’ objects and hot glue it together.


Add a bird, button or jewel to the top of the ‘corralled’ feathers.


Hot glue the ‘corralled’ object where it suits you on your lace headband. I chose the right side of the headband, halfway between my ear and the crown of my head.


I’ve also been known to wear this like a hippie would, and it looks just as cute-at least to me, it does. You may not agree and that is quite alright. I know that I am weird. But, if you are also weird…then….
All hail birds of a feather!
Read more

Blooming Flower Headband

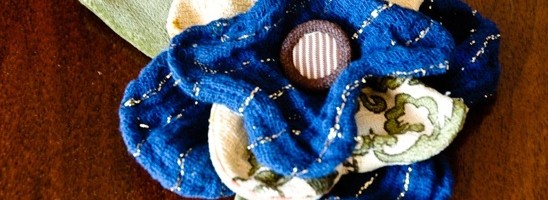
Using a few pieces of scrappy vintage material and green floral wire, I made a bendable flower hair piece that will bend to the shape of whatever my little heart desires. And, as an alternative I can wrap this around a pony tail or even around my neck as a choker.
So many options, so few opportunities to leave my house to show them off….


Here’s what you’ll need to make your own Blooming Flower Headband:
Two to three different colors of scrap fabric (I used a yellow and a blue)
Green fabric for leaves (if desired)
Thread to Match
A fun button
1/4” Ribbon or thin piece of hemmed fabric (30”+ long-this will be the tie that the flower is attached to)
Light duty floral wire
Wire cutters
Scissors
Straight Pins


Cut two identical circles from the material of your choice, each measuring: 4”, 6” and 8”.
I used the blue material for my 4” and 8” circles. I used the yellow material for my 6” circles (pretend the one in the center is yellow).


Sew the identical circles together, wrong sides together and leaving a small opening.


Turn each of your circles right side out, using the small opening.


For each circle, cut floral wire three inches larger than the diameter of the circle.


Feed the floral wire inside each of the circles, molding it to be on the outermost edge of the circle. Twist the ends together and cut off any excess.


Sew a seam to encase the floral wire about a 1/4” from the edge of the circle. Turn under the fabric on the small opening and seam close the circle.


You should have three bendable circles at this point. They’re so cute.


I bent my circles to have four ‘petals’, which looked the best to me. (But do what you think looks good-I know you will). I added a button to the center of my flower by sewing from the bottom up.


Cut out four sets of matching 2”-3” long ‘leaves’ if you like that ‘earthy look’. I know I do.


Sew each leaf together, right sides together, leaving an opening at the bottom of the leaf. Turn the leaf right side out and sew closed the opening.


Hand stitch the leaves where your little heart desires on the bottom of the ‘flower’.
I tacked down the top ‘petals’ to the bottom, just to keep the flower from shifting around.


Lastly, hand stitch the 1/4” ribbon or thin hemmed material to your flower.
I placed the flower on my head and determined where I wanted it to land on the ribbon. Then I hand stitched it in place on the ribbon.


Lastly, tie that sucker on your head, your pony tail or around your neck and strut about the neighborhood until someone tells you how cute your blooming flower headband is.
Or not…


You could just do what I did in this picture and wear it around the house with pajama bottoms and flip flops. Either way, you have a cute Blooming Flower Headband.
And all is right in the world.

Read more