Tag Archive for: dress

Vintage Embroidered Pillow Case Shirt

This pretty little pillowcase has been lingering in my linen closet for years; very much neglected.
I liked it so much that I didn’t want to risk
ruining it…by using it.
Once I realized how crazy that logic was, I decided to put it to good use.
I mean, what’s next? Covering my couch in plastic?

I wear jeans with this cutesy little shirt because it hits me about mid-thigh.
It’s almost long enough to be a dress, but being an ORU graduate…I have been trained that ‘modest is hottest’.

HAH HAH HAHAHAHAHAHH!
Phew…had to get that out of my system….


Here’s what you’ll need for your own pillowcase shirt:
2 feet of 2”+ stiff lace-I added a decorative 1/4” lace on top of the 2” lace
Iron on hem tape-only if you add decorative lace as I did
Thread to match
Scissors
Tape measure
Pillowcase


First step: make sure your cat approves of the pillowcase. You can test this by allowing him to make a nest on the material.


Cut the seam from the end of the pillowcase.


Fold under and iron 1/4” on the cut end of the pillowcase.


Fold the 1/4” over 1” more and iron. This will be the top hem of your shirt. Sew that sucker in place, stitching as close to the bottom and to the top of the 1” of material-creating two seams.


I slipped the pillow case over my head and found that I had 9” of excess material around my chest. Starting from the front and center of my shirt, I divided the 9” of excess material into 7 equal pleats-one center pleat and three pleats on either side of center.
I pinned all of the pleats into place and ironed them flat.


I sewed on top of my old seams, making the pleats permanent.


Using an iron-on hem tape, I added a 1/4” decorative lace on top of my 2” lace, just for kicks and giggles.
Make sure your ironing board cover is absolutely disgusting like mine is.


These pretty little things will be the straps to my shirt.


Find center of your shirt, measuring out 4” on either side.
Find center of your straps and pin them at the 4” mark.
Do the same for the back of the shirt.


Following your old two seam lines, stitch your straps into place on the front and back of your shirt.


Sometimes, when I am really sassy, I’ll throw a belt around my shirt.
See what I mean about it almost being long enough to be a dress?
It’s just a little more thigh than I am comfortable with in public.
And sorry you had to see so much thigh.


Here’s the back of my cute shirt.
I have worn it mostly without a belt because I like the free and flowy feeling.
Also without a belt, I am able to gorge myself on chips and salsa. Or be pregnant with no one the wiser about my ‘condition’. Or smuggle in snacks to a dollar movie. Not that I I would do any of that.
But, it’s nice to know I have options.
Hope you like it!

Read more

Vintage Pillow Case Dress

I was minding my own business one day while shopping at a thrift store, when out of nowhere, a pillow case shouted at me from amidst the sheets. It ordered to be taken home and ‘re-purposed’ into something grand. It wanted a second chance on life. I noticed its lovely yellow hue, its vintage pattern, its affordable price and took the stranger home with me.

For 79 cents, the pillow case became mine forever to do with as I pleased…and it pleased me to make a dress out of it.


Here’s what you’ll need to make your very own Vintage Pillow Case Dress:
Extra Long Pillow Case
Scissors
Seam Ripper
Thread to match
Iron & Ironing Board
2” Ribbon-2 feet or more
Tape Measure
Sewing Machine
Straight Pins


First things first, cut the closed end (the bottom) of the pillow case off. This will be the bottom of your dress.


Fold the bottom of your pillow case up to your desired hem length. I chose to have my hem land at the top of my knee, taking it in 4 1/2”.
Iron and pin your hem.


Sew up your hem, using a blind hem stitch. I learned how to do a blind hem stitch by watching you tube videos.
What is this world coming to?


My pillow case had been apparently designed to house one gigantic pillow.
I had excess material and decided to give my dress a pleat down the front, rather than cutting out the excess and installing a zipper.
I measured out 3 1/2” from center on the left and the right, and pinned where I wanted each pleat to begin.


I folded the 3 1/2” of material under on each side and ironed the pleat flat.
Sew your pleat into place.


Using your 2” ribbon, measure an equal distant from the center of the dress on the front and the back and pin a strap on either side of center, approximately 3 1/2”.
I recommend trying your dress on and making sure the ribbon will cover your bra straps and double checking the length is enough to go over your shoulders comfortably. I used Biceps’ help for this one.
Sew your straps into place.


The backside of my dress looked boxy, so I decided to add pleats on the left and right side of my spine.
I measured the center of the back of the dress, and marked about 3 1/2” out on either side.


I started the pleat 4” down from the top of the dress. I began the pleat width at 1/8” and expanded it to be 1/2” at the small of my back, stopping just above my derriere.


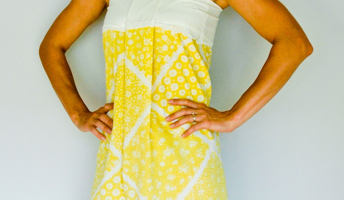
Here is the front of my cute little number. And below is the back.


I can’t believe this cost me 79 cents. A girl can’t even get fries for that.

Read more

Va-Va-Voom Vintage Tablecloth Dress

Grandma Greiman sent me away from her farm with a trailer full of treasures.
This old tablecloth was barely holding on to its original embroidered flowers and I couldn’t bear to throw it out or tear it up into scraps.
So, why not throw in a scarf for good measure and make a dress?

Scarves have become one of my favorite fabric pieces to re-invent.
They are the perfect material for molding into free-flowing sassy pieces. And boy am I into the sass. You have no idea.


I created my own pattern for this dress by trial and error. (My pattern was made for me, and I am a size two. If you would like to increase the size, a general rule is to add 1/4” all the way around per size increase.)

To Make this Dress, you’ll need:
Four Pattern Pieces (Front Piece #1, Front Piece #2, Back Piece, Middle Piece)
One Large Silk Scarf
Cotton backing fabric the same size as the scarf
Round Tablecloth (mine was 66” in diameter)
20” Zipper
Straight Pins
Scissors
Seam Ripper (If your expertise is anything like mine)
Thread to Match
Sewing Machine

Fold your scarf in half and lay your pattern on top of it. Cut out two ‘back pieces’, two ‘front pieces’ and one middle piece.

Repeat this procedure with the cotton backing fabric.


With the right side of your fabric down, pin the pleats in your two front pieces and iron them flat.
Then pin the two front pieces to your middle piece and sew.
Make sure you sew the neck pieces together as well.


Pin & sew your two ‘back’ pieces to what you had just sewn together.


We are going to repeat this process with your scarf. But since I am a visual learner, I will go ahead and do it all over again for you. With the right side of your scarf fabric down, pin your pleats in the ‘front’ pieces first and iron them flat.
Now, pin your two ‘front’ pieces to your ‘middle’ piece and sew.
Make sure you sew the neck pieces together as well.


Pin & sew your two ‘back’ pieces to what you had just sewn together.
This seems all too familiar….


With right sides of your material together, pin your scarf to your cotton backing material. Sew all of your outside seams together, leaving the bottom open. We will now call this the ‘Top Piece’.


Fold your round tablecloth in half and place it on top of the right side of the material to your Top Piece.
Find the center of your folded tablecloth and pin it to the center of the bottom of your ‘Top Piece’.
Working from the center out, pin the folded tablecloth around the entirety of your top piece. Sew the Top and Bottom pieces together.
I added pleats to my tablecloth ‘Bottom Piece’, just in case I partake of a single scoop of peppermint ice cream in a waffle cone…but you do what you want.


Next comes the zipper. My favorite part. Notice my text is oozing with sarcasm.
I have never liked putting in zippers. I don’t know why…I just don’t.
Anywho…fold the right side of your fabric over a quarter of an inch on your Top Piece and pin your zipper on the inside of the material.
Do NOT fold over your material on your Bottom Piece. Pin the zipper directly to the material, leaving the excess to do as it pleases.
Give your Booty some room to breath by fanning the zipper away from the waist until you reach the end of the zipper on the Bottom Piece. (Mine needed an extra 2” from waist to end of zipper.)
Sew your zipper into place on both sides.


Here is the finished VA-VA-VOOM Vintage Tablecloth Dress.
Mine and the dress’ backside is below.


I can’t wait to wear this little piece out on the town! Now, to convince Biceps we need a night out on the town…..

Read more

Sassy ‘Dress Shirt’

Typically the vintage dresses I come across have been ripped, stained or eaten by evil moths. Instead of parting with the abused garment, I hide the problem areas with a little creativity and turn it into a sassy
one-of-a-kind shirt.

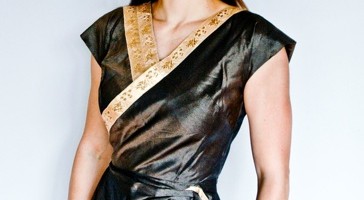
This is what my finished product looked like, but each ‘Sassy Dress Shirt’ will be unique! Read on to learn how to make your very own ‘Sassy Dress Shirt’.


What you will need:
An old dress
Seam Ripper
Iron & Ironing Board
Straight Pins
Sewing Machine
Ribbon to match the dress (if desired to cover holes, etc)


Assess how long you would like your ‘shirt’ to be and cut the excess off, leaving about two inches for hemming. I don’t subscribe to the midriff look from the late 90‘s, so I hem my ‘shirt’ to fall a couple inches below my hip bone.


Turn your ‘shirt’ inside out and measure your hem all the way around, pressing and pinning it as you go. Sew your new hem with a blind hem stitch or whatever you normally fancy when you hem something up.


If you have ribbon or embellishments that match your new ‘shirt’, now is the time to hide those stains or moth holes. No one will be the wiser! In the past, I’ve made little fabric flowers out of the left over material to cover the problem areas.


For this shirt, I removed the ribbon that was once around the bottom hem of my dress to cover over a stain on the front, following the neckline.


I opened the seam where the zipper stopped on the backside and followed that opening with more ribbon. This allowed me a little more booty shakin’ room.
Sew all of your ribbon and your embellishments in place.


Here’s my backside… of the shirt. What were you thinking I meant? Scroll down to see the front again.


Ta-Dah! I love wearing this cute little number out on the town. Let me know if you try making your own Sassy Dress Shirt. I would love to see how yours turns out!

Read more