Archive for category: Recipes

New! Printable Recipe Card Feature!

I had no idea how popular my recipe section would become when I first started blogging. My intention was to have a blog focused on touring with stinky rock bands, remodeling our houses and making weird crafts. I soon realized that recipes were so easy for everyone to relate to (what-not everyone tours with stinky rock bands?), recreate (we all can shop at a grocery store) and understand (if I don’t forget a step!) that they are becoming more and more of a focus for me, too.


I think with a few simple instructions anyone can cook, even if the thought of using a garlic mincer is intimidating. Biceps’ even references my site to find recipes when he’s in charge of date night. How cute is that?!


I love to share my recipes with you so much that it grieved me when I knew you couldn’t just print it off for your later viewing pleasure. I finally found a plug-in that I trusted and installed it. It’s that cute little chef hat right next to the rainbow looking thing.

I know, welcome to the 2000’s of blogging-land. So, I’m a little behind.


From now on, starting with my recipe on Sundried Roma Tomatoes, there will be a printable recipe at the bottom of the post, perfect for your personal cookbook!


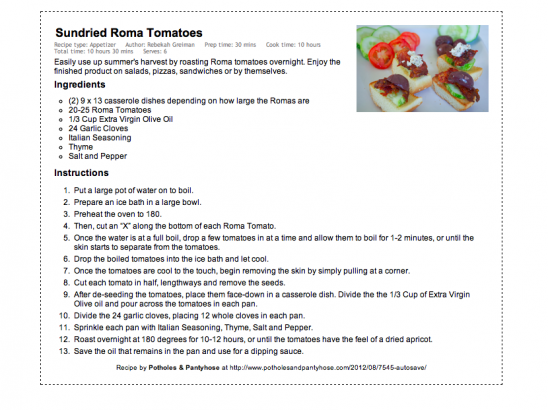
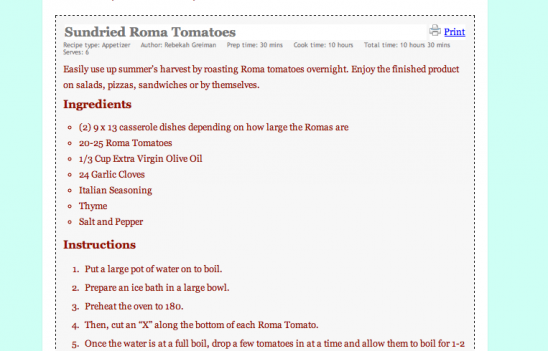
It will look like this at the bottom of each recipe post.


And, it will look like this when you click on the “print” icon. Print away!

I hope you enjoy this new feature.

Read more

Healthy, Homemade Beauty Products

This morning, I will be LIVE on Fox23’s “Great Day, Green Country“, trying to look somewhat composed and unsweaty. I was invited back to share my Homemade Beauty Product Recipes.


Little did they know what weirdness they were once again inviting into their normal world….


Here is the live video. I know, I’m awkward. Just don’t judge the recipes for the weirdness of the presenter.


Apparently, I didn’t stink it up too much during the first go around when I shared my Homemade Household Cleaning Recipes.


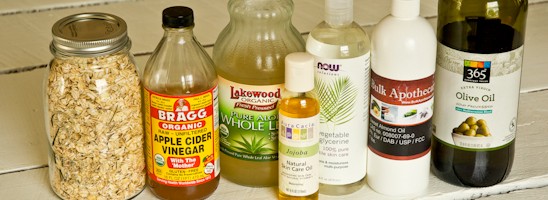
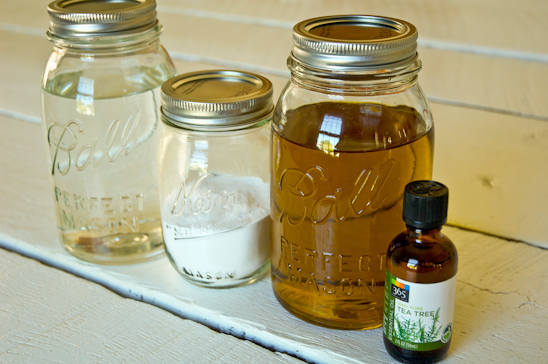
And today, with just 7 simple ingredients, I’ll show you the Healthy, Homemade Beauty Product recipes that I highlighted this morning on Fox23. These recipes use organic ingredients that are centuries old and proven to be healthy for the inside and the outisde of your body. This is nothing new under the sun, just a modern twist on how to do it yourself, easily.

Say good-bye to the over-priced, chemical-laden products from the beauty aisle. It’s time to take back control of what you are putting on the largest organ of your body and make your very own simple Beauty Products.

(If you click on the recipe title-all but the Toner-the link will take you to the step-by-step tutorial for each recipe. I also have a few links at the bottom of this post with more Homemade Household Cleansers and Yummy Food Recipes.)
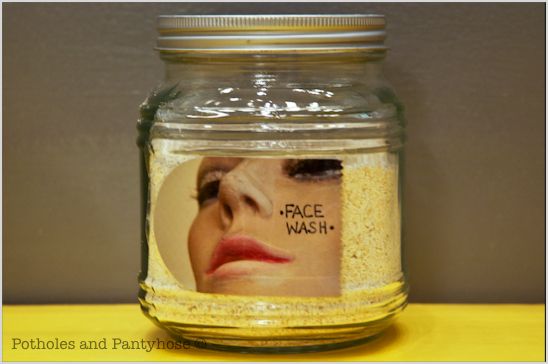
Face Wash
2 Cups or More of plain (Old Fashioned) organic rolled oats

Use a blender and grind up the oats until it is the consistency of a fine powder. Store in airtight container.
With a fistful of oats, add a little water to make it into a mush. Massage over face with circular motions (avoiding eye area) and let sit for 0 to 5 minutes. Wash off with warm water. Use morning and night.

Oatmeal is a natural exfoliant. It cleans, soothes and nourishes the skin. Oatmeal brightens dark spots, lightens freckles and tones down inflammations.
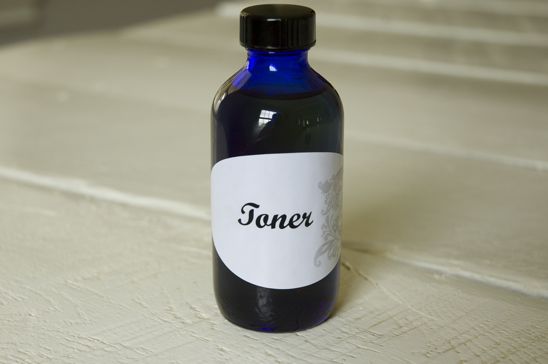


Toner
1 TBS Apple Cider Vinegar

Squeeze a little Apple Cider Vinegar on a cottonball and spread over face, neck and chest. It may be powerful smelling at first, but the scent dissipates and the facial moisturizer will snuff out any remaining scent.

Vinegar clears up acne, heals dry skin and is a great antibacterial. It will remove any leftover make-up, while leaving the skin feeling refreshed and soft.
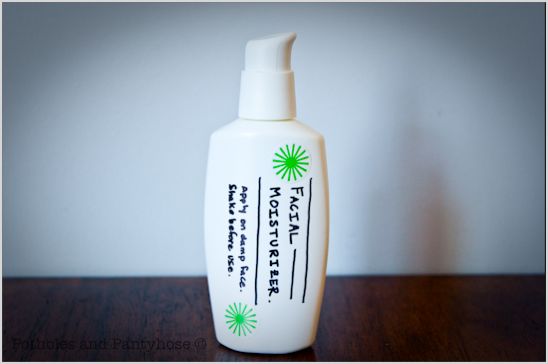


Facial Moisturizer
makes 2.5 oz
4 TBS Pure Aloe Vera (drinkable kind)
1 tsp Vegetable Glycerin
6 Drops Jojoba Oil
1/4 tsp Sweet Almond Oil

Place all ingredients in a container. Shake before each use. After washing your face and following with the toner, squeeze a small amount in your hand and apply with your fingers. It will feel wet at first, but as it dries and absorbs, you will be left with silky soft skin.

Aloe Vera is amazing. Here are some things that it can do topically for your skin (this doesn’t include all of the amazing things it does for the inside of your body):
Halts the growth of cancer tumors.
Eases inflammation and soothes arthritis pain.
Protects the body from oxidative stress.
Nourishes the body with minerals, vitamins, enzymes and glyconutrients.
Accelerates healing from physical burns and radiation burns.
Replaces dozens of first aid products, makes bandages and antibacterial sprays obsolete.
Hydrates the skin, accelerates skin repair.

Vegetable Glycerin
Improves the health of skin
Earth-friendly
Softens the skin
Natural source of moisture
Helps retain moisture
May have a positive affect on skin conditions like skin cancers (non-melanoma) and psoriasis

Jojoba Oil is just as amazing. Here are some of the reasons to use it topically:
Wound treatment
Skin healing
Beneficial as a moisturizer, hydrates the skin, hair and nails while it provides nutrients
Provides a protective coating on the skin to keep bacteria and grime out and moisture in
Reduces and prevents wrinkles and stretch marks
Antibacterial
Anti-inflammatory
Useful treatment for acne, skin wounds and to soothe mild infections
Hypo-allergenic, so it will not cause reactions on the skin and will not clog pores

Sweet Almond Oil
Help retain moisture
Reduces wrinkles
Adds a natural glow
Used on nearly any skin type, dry to oily
PS-Rub a dime sized amount into your scalp for healthier, thicker hair
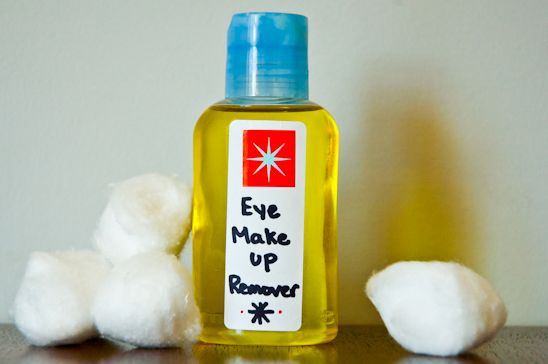


Eye Make-up Remover
makes 3.5 oz
4 TBS Extra Virgin Olive Oil (EVOO)
3 TBS Sweet Almond Oil

Mix in squeezable small container. Dab on cotton ball. Wipe eye makeup off gently.

The Benefits of Extra Virgin Olive Oil for the skin:
Penetrates deep into the skin, providing needed moisture
Protects the skin while keeping it smooth
Powerful Antioxidants, vitamins A and E, can help repair skin damage from sun exposure, cigarette smoke and pollutants.

(See Above Recipe for the Benefits of Sweet Almond Oil)

•   •   •   •   •   •   •   •   •   •   •   •   •   •

YEAH! You now have all you need to keep your skin clean, fresh and feeling younger than before. And, you are spending pennies on the dollar in order to do so.

I hope you have enjoyed these recipes! It may seem overwhelming at first to rid your home of toxins and store-bought everything. And maybe you don’t want to make these products, but would like the benefits of non-toxic products in your home without going broke. I have found some simple solutions to replace the things that I cannot make/don’t want to make myself by purchasing them from a non-toxic green company online. Without directly endorsing them, if you are interested in knowing more,  Feel free to email me with questions.

Here are links to my other Homemade Household Cleansers and Beauty Products:

Easy Laundry Soap
DIY Brass Cleaner
Organic Vegetable/Produce Cleaner
Homemade Household Cleaners

And here are a few Homemade Food Items to easily replace store-bought items:
Simple, Tasty Granola
Easy Crockpot Yogurt
Simple, Homemade Butter
Cooking and Freezing Beans, avoiding BPA
Homemade Hummus
Garden Fresh Salsa

Thanks so much for stopping by and spending time with such a weirdo. Make sure you become a Facebook Fan or a Linky Follower to keep up to date with what this weirdo comes up with next. Have a great day!

If these parties are up, I link to them! (Here’s my complete Linky Party Page):
Monday: Crafts Keep Me Sane, The Better Baker, Skip to My Lou, DIY Showoff, Say Not, Sumo’s Sweet Stuff, Etcetorize, Sew Chatty, Brassy Apple, Flour Me With Love, Creating my Way, Mad in Crafts, Our Delightful Home, Sew Can Do, It’s So Very Cheri, Craft O Maniac, Polly Want a Crafter, Tuesday: Craft Edition, Inspiration Board , New Nostalgia , Lettered Life , Coastal Charm, Tip Junkie , Ladybug Blessings, Hope Studios , Todays Creative Blog, Wednesday: Someday Crafts , Day2DayJoys, Jillify It , Junk in the Trunk, We are that Family , Frugally Sustainable, Sew Much Ado, Fine Craft Guild , The Thrifty Home, My Girlish Whims , Quick, Easy, Cheap & Healthy, Trendy Treehouse, Thursday: Somewhat Simple, No Minimalist Here , A Glimpse Inside, The Mommy Club, The 36th Avenue, Cheap Chic Home, Beyond the Picket Fence, Fireflies and Jellybeans , House of Hepworths , The Shabby Chic Cottage, Friday: My Repurposed LifeIt’s a HodgePodge LifeThe Shabby NestJust Wingin’ ItOne Artsy MommaFrench Country CottageFinding Fabulous, Passionately Artistic, Petals and Picots, Simply Designing, Little Becky Homecky, My Romantic HomeBacon Time, Simply Living, Saturday: Polkadot Pretties, Tatertots and Jello, Create and Inspire, Be Different, Act Normal, Craft Envy, Funky Junk Interiors, Petites Passion, Sunday: Under the Table, Natural Mothers, Mopping the Floor

Read more

Sundried Roma Tomatoes

As you may have seen in my other posts about my garden booty, tomatoes are all the rage around here. I have been canning, freezing, making salsa, oven roasting and generally gorging myself on tomatoes.


And with plenty of tomatoes, comes experimentation that I normally wouldn’t try. I called upon the wisdom of my beautiful mother-in-law, remembering her delicious sundried tomatoes we were introduced to on our last visit.

She shared with me her recipe (which I tweaked a little here and there because I just can’t leave well enough alone) and the results were wonderfully dried Roma tomatoes, ready to grace my pizzas, pasta dishes, crackers and more.


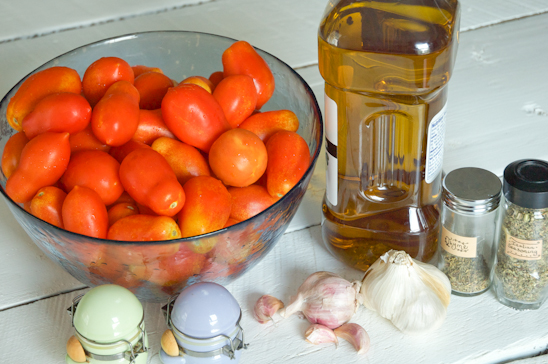
Here’s all that you’ll need to make your very own Sundried Roma Tomatoes:
You’ll need (2) 9 x 13 casserole dishes depending on how large the Romas are
20-25 Roma Tomatoes
1/3 Cup Extra Virgin Olive Oil
24 Garlic Cloves
Italian Seasoning
Thyme
Salt and Pepper


Put a large pot of water on to boil. Prepare an ice bath in a large bowl. Preheat the oven to 180.
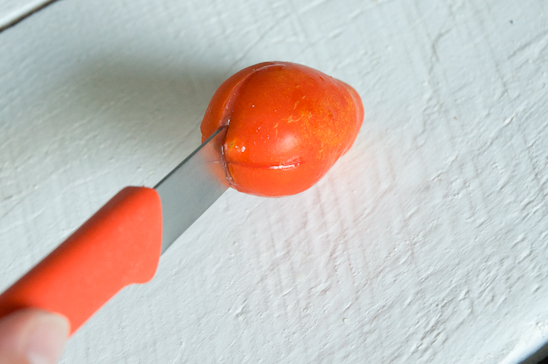
Then, cut an “X” along the bottom of each Roma Tomato.


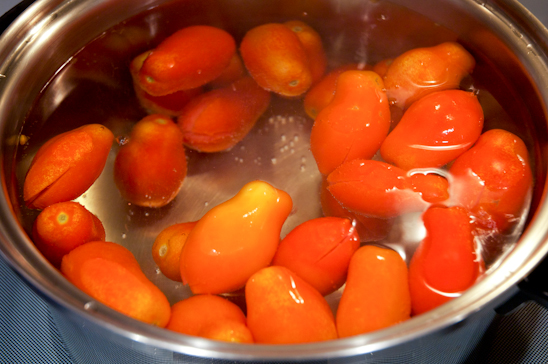
Once the water is at a full boil, drop a few tomatoes in at a time and allow them to boil for 1-2 minutes, or until the skin starts to separate from the tomatoes.


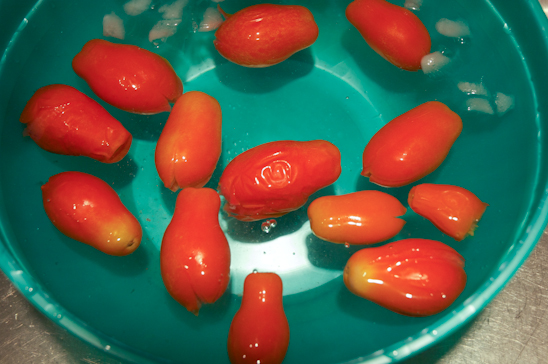
Drop the boiled tomatoes into the ice bath and let cool.


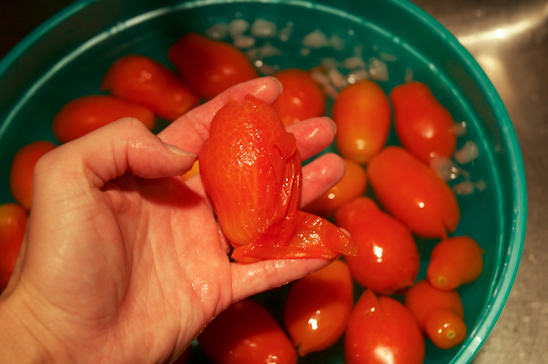
Once the tomatoes are cool to the touch, begin removing the skin by simply pulling at a corner and unwrapping your little tomato present.

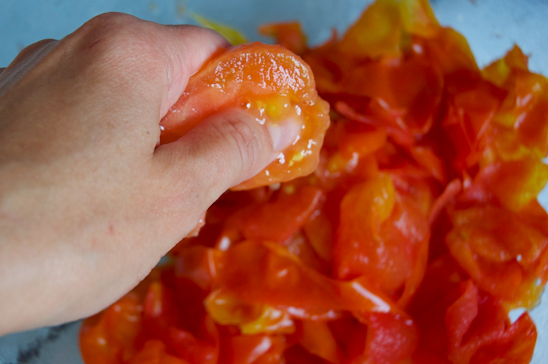
PS-I keep the skins and add it to any tomato juice or seeds leftover from this recipe-which I throw into a ziplock bag and freeze. I use this concoction for stews, soups, etc.


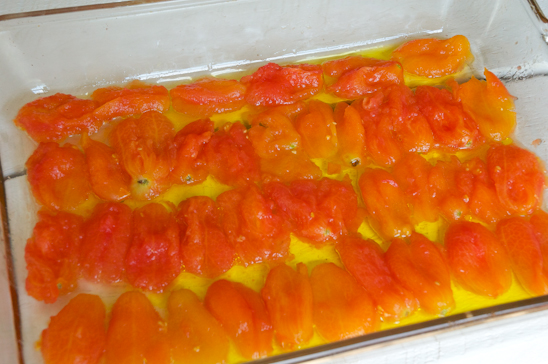
Cut each tomato in half, lengthways and remove the seeds. (I keep the seeds for later use-see above “PS” comment.)


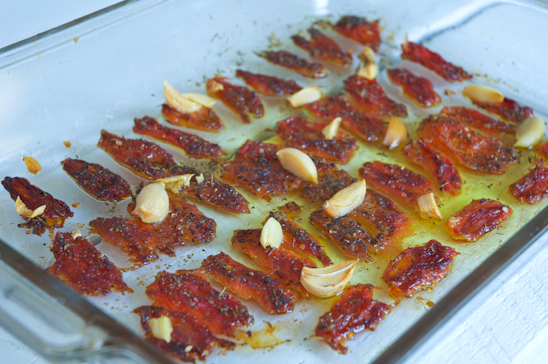
After de-seeding the tomatoes, place them face-down in a casserole dish. Divide the the 1/3 Cup of Extra Virgin Olive oil and pour across the tomatoes in each pan (if applicable).


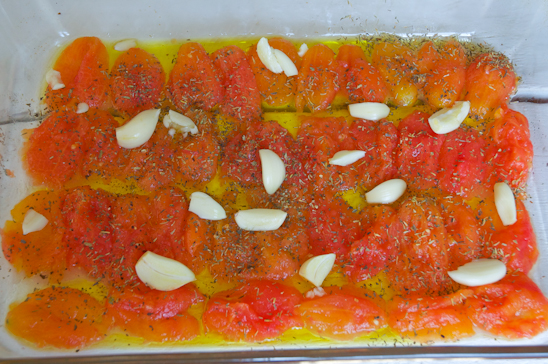
Divide the 24 garlic cloves, placing 12 whole cloves in each pan. Sprinkle each pan with Italian Seasoning, Thyme, Salt and Pepper.


Roast overnight at 180 degrees for 10-12 hours, or until the tomatoes have the feel of a dried apricot.

Save the oil that remains in the pan and use for a dipping sauce.


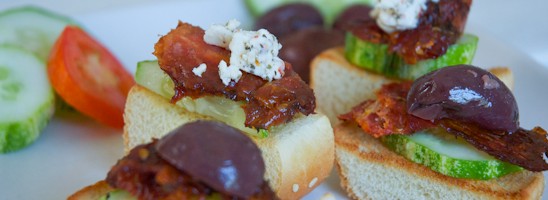
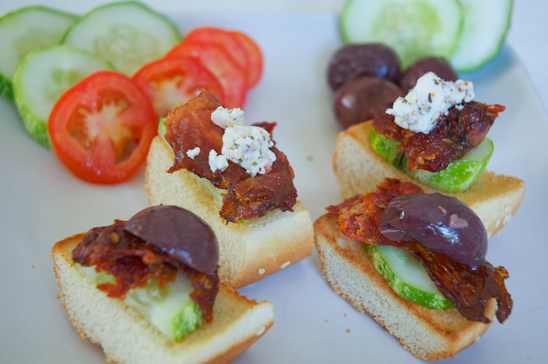
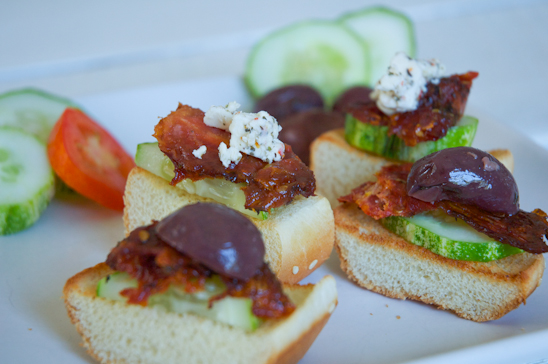
Top toasted slices of a french baguette with the sundried roma tomaotes, feta cheese, cucumbers, black olives-or what ever your little heart desires.

These are tasty no matter how they are consumed!

Sundried Roma Tomatoes
Author: 
Recipe type: Appetizer
Prep time: 
Cook time: 
Total time: 
Serves: 6
 
Easily use up summer's harvest by roasting Roma tomatoes overnight. Enjoy the finished product on salads, pizzas, sandwiches or by themselves.
Ingredients
  • (2) 9 x 13 casserole dishes depending on how large the Romas are
  • 20-25 Roma Tomatoes
  • ⅓ Cup Extra Virgin Olive Oil
  • 24 Garlic Cloves
  • Italian Seasoning
  • Thyme
  • Salt and Pepper
Instructions
  1. Put a large pot of water on to boil.
  2. Prepare an ice bath in a large bowl.
  3. Preheat the oven to 180.
  4. Then, cut an “X” along the bottom of each Roma Tomato.
  5. Once the water is at a full boil, drop a few tomatoes in at a time and allow them to boil for 1-2 minutes, or until the skin starts to separate from the tomatoes.
  6. Drop the boiled tomatoes into the ice bath and let cool.
  7. Once the tomatoes are cool to the touch, begin removing the skin by simply pulling at a corner.
  8. Cut each tomato in half, lengthways and remove the seeds.
  9. After de-seeding the tomatoes, place them face-down in a casserole dish. Divide the the ⅓ Cup of Extra Virgin Olive oil and pour across the tomatoes in each pan.
  10. Divide the 24 garlic cloves, placing 12 whole cloves in each pan.
  11. Sprinkle each pan with Italian Seasoning, Thyme, Salt and Pepper.
  12. Roast overnight at 180 degrees for 10-12 hours, or until the tomatoes have the feel of a dried apricot.
  13. Save the oil that remains in the pan and use for a dipping sauce.

If these parties are up, I link to them! (Here’s my complete Linky Party Page):
Monday: Crafts Keep Me Sane, The Better Baker, Skip to My Lou, DIY Showoff, Say Not, Sumo’s Sweet Stuff, Etcetorize, Sew Chatty, Brassy Apple, Flour Me With Love, Creating my Way, Mad in Crafts, Our Delightful Home, Sew Can Do, It’s So Very Cheri, Craft O Maniac, Polly Want a Crafter, Tuesday: Craft Edition, Inspiration Board , New Nostalgia , Lettered Life , Coastal Charm, Tip Junkie , Ladybug Blessings, Hope Studios , Todays Creative Blog, Wednesday: Someday Crafts , Day2DayJoys, Jillify It , Junk in the Trunk, We are that Family , Frugally Sustainable, Sew Much Ado, Fine Craft Guild , The Thrifty Home, My Girlish Whims , Quick, Easy, Cheap & Healthy, Trendy Treehouse, Thursday: Somewhat Simple, No Minimalist Here , A Glimpse Inside, The Mommy Club, The 36th Avenue, Cheap Chic Home, Beyond the Picket Fence, Fireflies and Jellybeans , House of Hepworths , The Shabby Chic Cottage, Friday: My Repurposed LifeIt’s a HodgePodge LifeThe Shabby NestJust Wingin’ ItOne Artsy MommaFrench Country CottageFinding Fabulous, Passionately Artistic, Petals and Picots, Simply Designing, Little Becky Homecky, My Romantic HomeBacon Time, Simply Living, Saturday: Polkadot Pretties, Tatertots and Jello, Create and Inspire, Be Different, Act Normal, Craft Envy, Funky Junk Interiors, Petites Passion, Sunday: Under the Table, Natural Mothers, Mopping the Floor
Read more

Summer Drink Round-Up

With temperatures reaching 114 on a frequent basis, it’s no wonder that summer drinks are on my mind. I’ve had a lot of fun coming up with Low-Cal or No-Cal summer drinks over the past couple of months.

Here are all the recipes for my Summer Drinks in one simple post. I hope you enjoy!


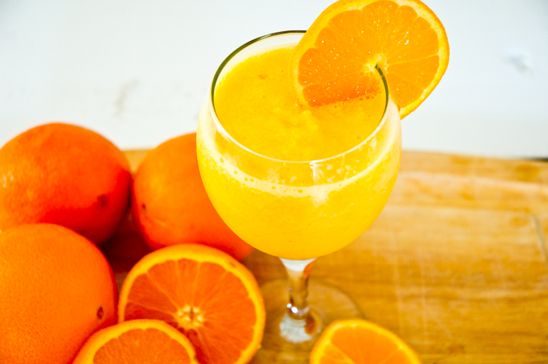
Skinny Orange Julius (for step by step with pictorial instructions, go here)

This Recipe makes a Pitcher of 4-5 Servings:
4-5 Peeled Fresh Oranges
4-5 Cups of Ice
1-2 Cups of Water
1/4 tsp Vanilla Creme Stevia

This Recipe makes one serving:
1 Orange
1 Cup of Ice
1/4 Cup of Water or as Needed
2 Drops of Liquid Vanilla Creme Stevia

In a blender, combine the peeled oranges, adding 1/2 of the needed ice on top. Add the water and pulse until the ice is broken up into chunks. Add to this the other half of ice. Next, add the Stevia. Puree everything until it’s blended, but still a bit chunky. Pour in a chilled glass and enjoy!


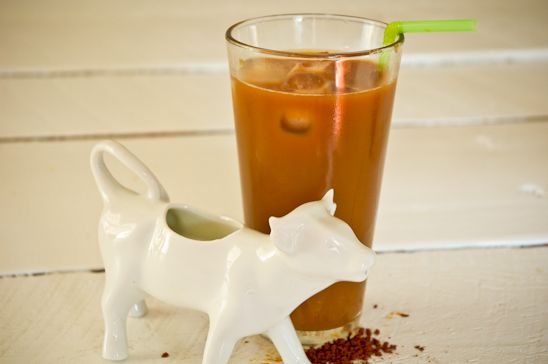
No Calorie Sweetened Iced Coffee (for step by step with pictorial instructions, go here)

2 TBS Decaf/Caffeinated NesCafe-more or less depending on how strong you like your coffee
8 drops Liquid Stevia-more or less depending on how sweet you like it
Milk
Water

Fill a tall glass of water (heh) with the 2 TBS of NesCafe. Stir and add ice. Add the 8 drops of Liquid Stevia and milk, depending on your taste.


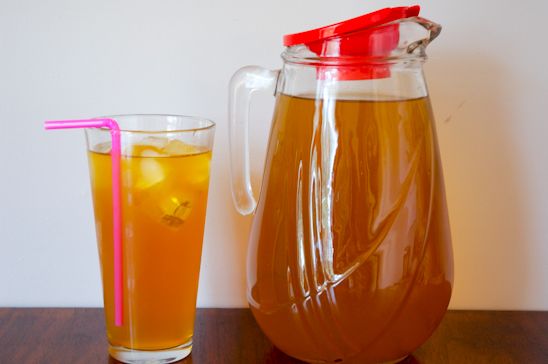
No Calorie Sweet Green Tea (for step by step with pictorial instructions, go here)

Tea Kettle
Glass Tea Jar
10 Green Tea Bags (I use 5 Caffeinated and 5 Decaffeinated Tea Bags)
6 + 4 Cups of Water
1/2 tsp Liquid Stevia

Using a clothespin, use the tab at the end of the string to corral your tea bags. Clip the tea bags to the side of your glass tea jar. Boil 6 cups of water in your tea kettle. After the water in the tea kettle whistles, pour the boiling water into the glass tea jar. Aim for the tea bags as you pour. Steep for 5 minutes.
After 5 minutes, pull the tea bags from the liquid but still inside of the tea jar. Slowly squeeze out any remaining water from the tea bags using a wooden spoon. Add the 1/2 tsp Liquid Stevia. Add 4 Cups of cold water to the tea jar. Stir, chill for several hours and serve.


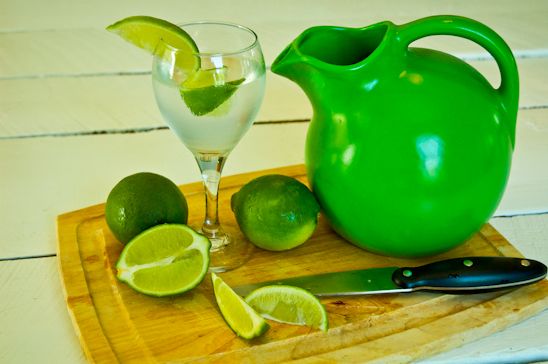
No Calorie Fresh Lime “Gritzer” (for step by step with pictorial instructions, go here)
(makes 1 Liter):
1 Liter of Diet Tonic Water (sweetened with Splenda)*
1 Lime
1/4 tsp Liquid Stevia
*here’s my disclaimer, Tonic Water contains quinine. Some people cannot consume this product. I have yet to find an alternative.

Fill a pitcher with the Diet Tonic Water. Wash one whole lime first, then cut into wedges and squeeze into pitcher. Throw the limes into the tonic water if desired. Add 1/4 tsp of Liquid Stevia (more or less depending upon your sweet needs). Stir a couple of times, pour into your favorite “fancy glass” and garnish with another lime wedge.


That’s all for now, but I’m sure I’ll come up with more. I hope you’ve enjoyed the Summer Drink Round-Up!


If these parties are up, I link to them! (Here’s my complete Linky Party Page):
Monday: Crafts Keep Me Sane, The Better Baker, Skip to My Lou, DIY Showoff, Say Not, Sumo’s Sweet Stuff, Etcetorize, Sew Chatty, Brassy Apple, Flour Me With Love, Creating my Way, Mad in Crafts, Our Delightful Home, Sew Can Do, It’s So Very Cheri, Craft O Maniac, Polly Want a Crafter, Tuesday: Craft Edition, Inspiration Board , New Nostalgia , Lettered Life , Coastal Charm, Tip Junkie , Ladybug Blessings, Hope Studios , Todays Creative Blog, Wednesday: Someday Crafts , Day2DayJoys, Jillify It , Junk in the Trunk, We are that Family , Frugally Sustainable, Sew Much Ado, Fine Craft Guild , The Thrifty Home, My Girlish Whims , Quick, Easy, Cheap & Healthy, Trendy Treehouse, Thursday: Somewhat Simple, No Minimalist Here , A Glimpse Inside, The Mommy Club, The 36th Avenue, Cheap Chic Home, Beyond the Picket Fence, Fireflies and Jellybeans , House of Hepworths , The Shabby Chic Cottage, Friday: My Repurposed LifeIt’s a HodgePodge LifeThe Shabby NestJust Wingin’ ItOne Artsy MommaFrench Country CottageFinding Fabulous, Passionately Artistic, Petals and Picots, Simply Designing, Little Becky Homecky, My Romantic HomeBacon Time, Simply Living, Saturday: Polkadot Pretties, Tatertots and Jello, Create and Inspire, Be Different, Act Normal, Craft Envy, Funky Junk Interiors, Petites Passion, Sunday: Under the Table, Natural Mothers, Mopping the Floor
Read more