Archive for category: The Home Life

Maxwell and his Tongue

This is Maxwell. He is all boy. He goes 100 miles per hour, or none at all.
He may look innocent, but if you are perhaps wearing a swishy skirt while preparing dinner, he may just try to climb aforementioned swishy skirt to get to you, the chicken or whatever else has caught his interest at the moment.

He may do a drive-by “catting”, which requires his paw, your leg and a lot of speed. Or he may just decide to meow incessantly while winding his way in and out of your feet up until the point you accidentally step on his already broken tail. That is our Maxwell.


This is also Maxwell, but at 0 miles per hour. He fell asleep apparently mid-lick. He has no clue my shutter is snapping millimeters away from his fuzzy and slightly orange face.


I must have taken 15 shots of this scene, never awakening “0 m.p.h Max”. This moment in time was such a reprieve from his normal antics that I dared not awaken him.


Bianca, sunning herself quietly, thanked me profusely-as any cat does with a tiny flick of her tail and squinty eyes.
The house was quiet for almost five minutes.

Read more

Sesame Almond Chicken

One of my very favorite dinners I must attribute to my mother’s geniusness. She is the brain behind many of the meals I prepare for Biceps. In all seriousness, my mom pretty much wrote the book on being awesome.

Sesame Almond Chicken is so simple–both in preparation and in the ingredients needed–that anyone, even your sweet husband when you don’t feel like cooking, can make it.
Or your teenage son that’s recently been grounded for being late for his curfew (I don’t have one of these, just remembering what my brother’s used to do).
Or your friend that says, “I don’t know how to cook!” with a voice that emulates Grover from Sesame Street.


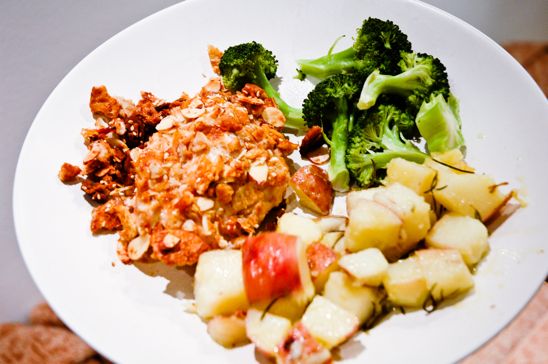
But don’t confuse this meal’s simplicity for tastelessness. The chicken is tender and moist because it’s encrusted with bread crumbs, it’s flavorful due to the slightly cooked almonds and sesame seeds and it’s just oh so stinkin’ tasty.


Here’s what you’ll need to make your very own Sesame Almond Chicken:
(Serves 4-Preheat oven to 350, grease a 9 x 13 casserole dish)
4 Chicken Breast, remove any fat
1 Package of Whole Wheat or Plain Ritz crackers
1 TBsp Sesame Seeds
1 Cup of Sliced Almonds
1/2 Cup, or one stick, of melted Butter


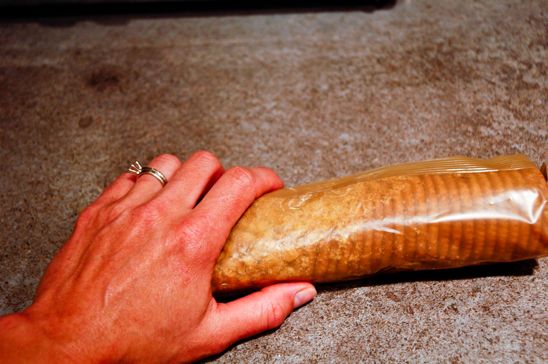
Gently crush your crackers while they are still in the package. Don’t get too crazy, lest you burst the package and crackers go everywhere.


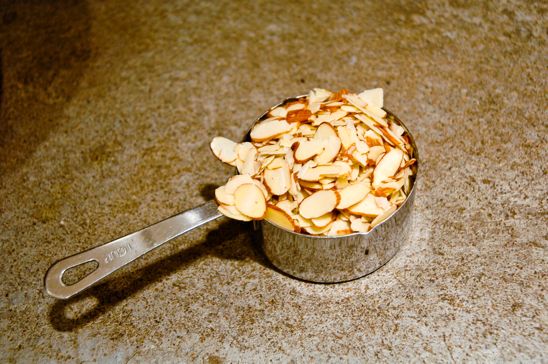
Measure one cup of sliced almonds.


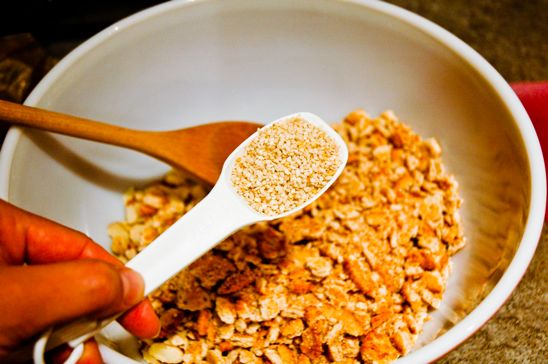
Pour both the almonds and crackers in a large mixing bowl. Add the 1 TBsp of Sesame Seeds.


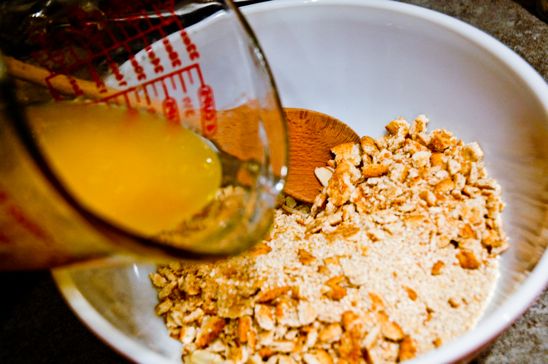
Pour the melted butter in the bowl.


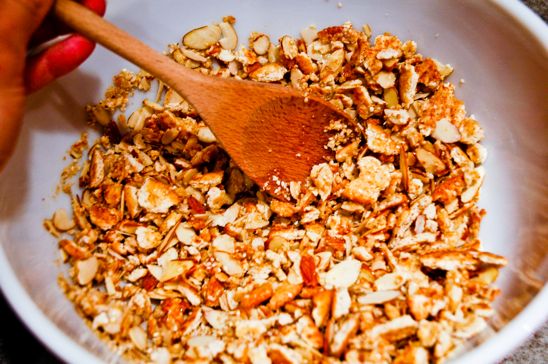
Stir the cracker crumb mixture completely.


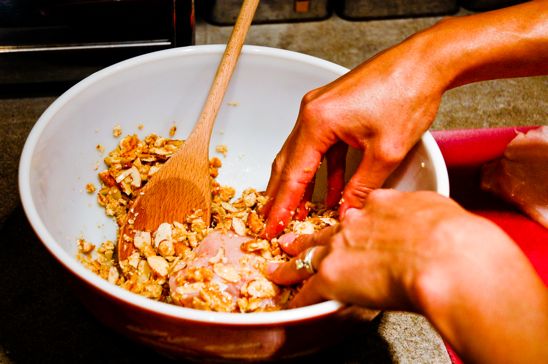
Place one breast of chicken at a time in the mixing bowl and completely cover each breast with the cracker crumb mixture.


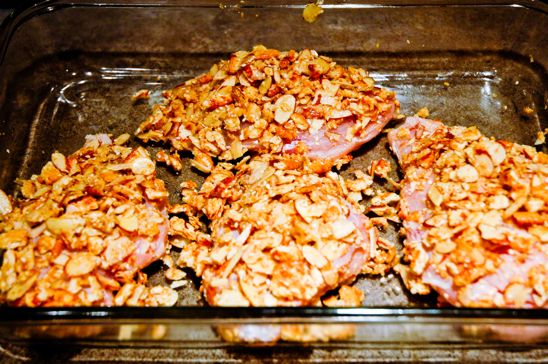
I usually cover one side, place the breast in the casserole dish and then cover the other side with more cracker crumb mixture using my fingers.


Bake at 350 degrees for 20-30 minutes, or until the center is no longer pink. There is no need to cover the chicken or to flip it during cooking. Just leave it alone and go read a book.
Or hug your husband. Or take your dog for a walk….come back and enjoy!

Read more

DIY Spinning Composter

This year was my first year for a full-fledged garden. I consider it full-fledged because it produced enough to not only feed Biceps and I, but it also allowed me to dehydrate, freeze and give-away the excess.

To be honest, I was just happy that anything sprouted from the earth.

I give props to the composted kitchen and yard waste that we added to the soil-this garden seemed to outperform many of my neighbors’ gardens.
And just in case you don’t want to go spend your hard earned dollars buying a fancy composter in excess of $100 bucks or more, I thought I would show you how to make your own using some recycled and some store bought materials for about $30 in a matter of hours.

(Here’s my video for my DIY Spinning Composter.)


Here’s what you’ll need for your very own composter (The store bought materials can all be found at Lowe’s):

Food Safe Barrel of some sort (I used a leftover crazy person’s 40ish gallon Y2K water barrel they had in their basement in preparation for the end of the world)
3″ ABS toilet flange (I used an Oatey brand for $3.60)
3″ PVC pipe (I bought a 10′ stick-that’s the smallest they had for $10)
3″ PVC cap ($.72)
(2) 2 x 6 x 10 pressure treated lumber (~10′ for $6.97) and pressure treated wood screws (about 20 or so)
(2) hinges with appropriate sized bolts and nuts-don’t use the screws in the package that comes with them (Gatehouse brand 3 1/2″ Butt/Mortise hinges for $2.78 each)
(1) window sash latch with appropriate sized bolts and nuts-don’t use the screws in the package that comes with them (Gatehouse brand for $3.59)
(1) galvanized pipe (I re-purposed a closet rod-1″ diameter and about 4′ length, but if you have to buy one, they are about $5-7)
(8) wood screws 1 1/2″ ish (I used leftovers found in my coffee can full of excess screw, but you may spend $.50)


Here are the tools you will need to complete the project:

Square
Skill Saw with wood blade
Drill with 5/16″ drill bit, hole saw slightly bigger than your galvanized pipe/closet rod
Fine grit sandpaper
Chop Saw
Old screen from window
Tins Snips to cut screen
Flat head & Phillips head screwdriver
Hammer

Let’s get started!


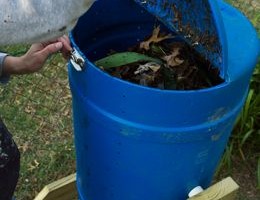
Determine which end is up for you and your barrel. On your “up” end, use your skill saw to cut out a lid in a semi-circle shape (half of the entire circle).


This is what the lid will look like when you are done cutting it out. Sand off any burrs.


Pre-drill the holes for the hinges and the latch. Sand off any burrs. Attach the hardware, using the bolts and nuts (bolts on the outside, nuts inside).
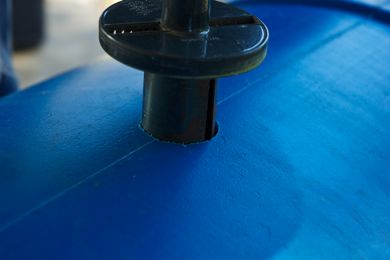


Attach the hole saw to your drill and measure halfway down on each side of your barrel, starting on either side of the lid. The holes should be drilled so that the closet rod will run parallel to the lid. Sand off any burrs.


Drill holes for your closet rod to go through. Insert the closet rod to make sure the barrel can be easily turned. If not, increase the diameter of the hole slightly.
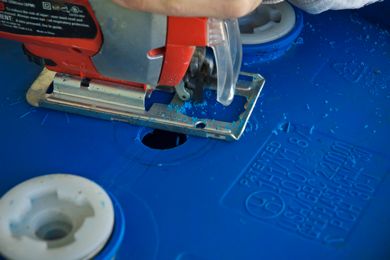


On the bottom of your barrel, trace the 3″ opening for the toilet flange using a sharpee in the center. Cut out the circle with your skill saw and wood blade. Sand off any burrs.


Insert the toilet flange to the outside of the barrel and make sure it fits snugly.


Cut out enough screen to cover the bottom of the opening in the flange. Pre-drill holes in order to screw the flange to the barrel and the screen to the flange.


Remove the closet rod from the barrel and place the PVC pipe vertically in the barrel, fitting it over the toilet flange. Cut the 3″ PVC pipe to fit vertically inside of your barrel, leaving about 6″ headspace between the top of the pipe and the opening of the composter. Place the 3″ cap on top of the pipe.
Mark where the curtain rod will meet with the PVC pipe.


Using your drill with the 5/16″ bit, drill holes several inches apart in the PVC pipe. Using the hole saw, drill two holes in the PVC pipe for the curtain rod to go through.


Using the same 5/16″ drill bit, drill holes vertically in the barrel, about 2″ apart vertically and 6″ apart horizontally.


Cut two identical “legs” for the composter using your chop saw and the pressure treated wood. Begin by measuring from the side of the barrel to center, adding 1 foot to the measurement. For each “leg”, measure 2″ down from one of the cut ends, center the hole saw to cut a circle for the curtain rod to go through.


Cut four identical lengths of wood (mine were about 2′ each in length) to secure the legs to. Attach with the pressure treated wood screws as you see here. I got fancy and cut the corners off of the base pieces. You don’t have to, it doesn’t affect the functionality of the composter.


I added spacers in between the pressure treated wood and the barrel to keep the curtain rod in place. They were just bits of pvc pipe that fit around the curtain rod, cut to about 2″ in length.


Give it a spin and see how much fun making your own compost will be.
Begin collecting all of your kitchen scraps: veggie/fruit peels and scraps, egg shells, coffee filters & grounds, etc (no meat, eggs or dairy) and throw it all in your barrel with dried leaves, grass and yard waste with a ratio of 1 (kitchen waste) to 2 (yard waste). Turn the barrel once a week and keep it as moist as a damp sponge by adding water when needed. (I save old coffee, rinse/rain water, etc. to moisten up the compost).
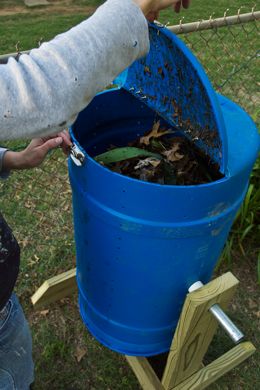


It’s ready to be used in the garden when the compost smells like heavenly dirt and is black and crumbly. Your plants will thank you so much for this yummy concoction…

Read more

Meet the New Kitties

We loved our eight years with Cowboy. He was the weirdest and awesomest (yep, that’s a word) cat ever.

He was my little buddy and followed me around the house doing strange things. He would sit on my lap for hours while I would write my articles or blog. And, he slept on top of me each night.

He would sneeze quite often, make a sound like an Ewok when he wanted something, and fought until the very end for his furry little life. We didn’t realize what a gaping hole was left when he passed away. After several days of crying and being pretty mopey, Biceps said a strange thing.
“What about getting a new kitty? And maybe not just one, but two?”
I had a feeling he was lonely without the furry dude, too.
But, I was pretty resistant at first. I mean, how could a new cat-or even two new cats-take the place of Cowboy? But, Biceps reminded me that we aren’t replacing Cowboy, no cat could ever do that. We are giving two new kitties a new home–a much needed home. And they in turn will bring us happiness and entertainment.


And so, after days of scouring rescue centers, talking with several “foster parents” and driving around, we found our forever kitties.
This is Maxwell.
Originally he was named “Flame” due to his orange markings on his nose, ears and tail. But that name we decided was weird. For several days, we confused the he k out of the little guy. I called him “Scout” and Biceps called him “Piglet”. Neither of us could agree, until the name “Maxwell” surfaced. It stuck and the name fit his personality all too well.


He does everything to the max. Whether he is eating, sleeping, being extremely cute or playing, he does it full force. There is no half-hearted efforts here from ol Maxwell.
And, he is all that is boy-stinky, haphazard and always attacking something.


And this is Bianca-the complete opposite of Maxwell. She smells like roses. Literally. We have a feeling she is stuffed with potpourri.


Bianca has taken it upon herself to clean Maxwell. It may seem sweet and motherly, but deep down, I think it’s mainly because she can’t stand the smell.


They became best buds right off the bat, doing everything together. They’ll even eat at the same time and switch to their water bowl at the same time. It’s bizarre. But pretty par for the course in our house. Nothing around here is ever normal….


Welcome home, you two crazy cats. We are so thankful that you are here. Even if you have jumped into the toilet on several occasions, knock things off the fireplace mantle and race through the house at 500 m.p.h..
They have definitely brought life back into the house. Lots of life….

Read more