Archive for category: The Home Life

Seriously Delectable Split Pea Soup

I know what you are thinking. I never wanted to eat Split Pea Soup either.
What’s next-Broccoli Soup? Come on.
But, Biceps requested Split Pea Soup. He’s crazy like that and I like to silence his crazy.

She may not photograph well, but this here soup is downright amazingly good. It’s also very simple to make, full of protein and yummy veggies.
Biceps said it’s one of the best soups that I’ve ever made. And now, this Split Pea Soup has now become a staple in our weekly routine. Biceps likes to remind me how not crazy he is for making this suggestion to me.


Here’s what you’ll need to make your very own Split Pea Soup (serves at least 8 as a main dish):
A large stockpot
6 Cups Water
4 Cups Split Peas
3 1/2 Cup Chicken Broth
2 Lbs meaty Pork Hocks or Ham Bone
1/2 tsp dried Marjoram
1/4 tsp Pepper
2 Bay Leaves
1 Cup Chopped Carrots
1 1/4 Cup Chopped Onions


Rinse and drain the 4 Cups of Split Peas. Pull out any yucky ones.


Combine the water, split peas, broth, pork hocks/ham bone, marjoram, pepper, bay leaves and 1/4 Cup of the chopped onion.
Bring to a boil and reduce your heat. Simmer for 1+hour with the lid on, stirring occasionally, until the meat easily comes off the bone when pried with a fork.


Remove the bones and let cool. Cut the meat from the bones and coarsely chop. Discard the bones.


(Sorry, forgot to take a picture of this step. Here’s an up close and personal finished product shot instead…)
Add the meat to the stockpot and stir in the chopped carrots and the remaining 1 Cup of onions. Return all the ingredients to boiling and reduce heat. Simmer covered for 20-30 minutes more or until the veggies are tender. Stir occasionally to prevent scorching.


Serve with tasty toast or toast that’s tasty on a cool fall night. You are going to love this, guaranteed! If not, I will come over to your house and personally eat the remaining soup. Seriously, I’ll do it. I have a lot of frequent flyer miles that need to be used up. Enjoy!

Read more

Vintage Christmas Gifts & My Etsy Store

Dear Readers:
I hate to self-promote. It seems so trite and ridiculous.
So, if you want to go over to my Etsy site and buy something, by all means, do it. But I don’t want to guilt you into it and beg of you to do it.
That said, I just added a bunch of new stuff today and am excited to share it with you. I thought you might be on the prowl for a great Christmas gift, or an idea of the vintagey finds out there in the world.
If so, here are a couple of sneak peaks at what you might find.

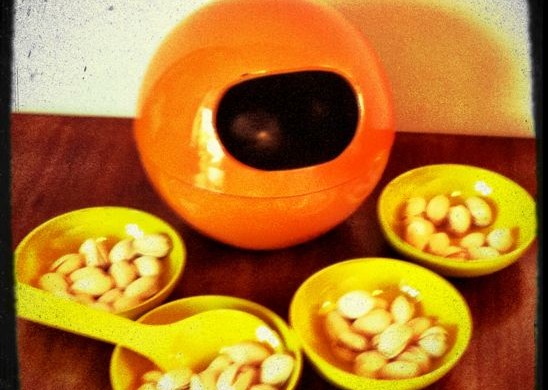
Super cute vintage burnt orange nut bowl ready for your next party-$25.00.

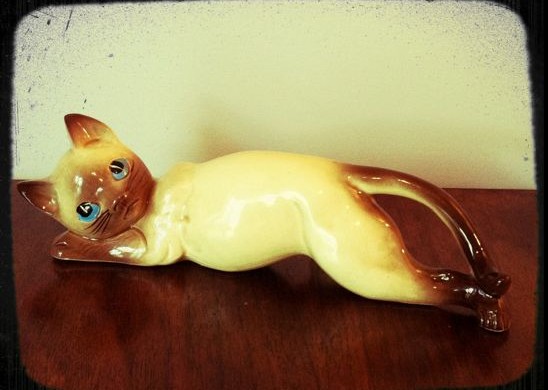
My shop wouldn’t be complete without a vintage cat or two-$15.

Vintage cow bottle opener with tongue and major sass-$22.50.

Cute vintage squirrel that won’t bite through your electrical cords like a real squirrel would-$25.

That’s just a couple of items that I have for sale in my Etsy store. It’s quite often a rotating amount of inventory, so if you don’t like what you see now-maybe I’ll hit the mark with you next time.
-Love, Rebekah

Read more

DIY Spinning Composter-Video Only

I wrote a post a few weeks ago outlining how to make a DIY Spinning Composter. I had such a huge response from this particular project, that Biceps and I decided it needed a video to go along with it.

And here’s a little excerpt from that tutorial on my DIY Spinning Composter:

This year was my first year for a full-fledged garden. I consider it full-fledged because it produced enough to not only feed Biceps and I, but it also allowed me to dehydrate, freeze and give-away the excess.To be honest, I was just happy that anything sprouted from the earth.

I give props to the composted kitchen and yard waste that we added to the soil-this garden seemed to outperform many of my neighbors’ gardens.

And just in case you don’t want to go spend your hard earned dollars buying a fancy composter in excess of $100 bucks or more, I thought I would show you how to make your own using some recycled and some store bought materials for about $30 in a matter of hours.

If you’d like to see step by step instructions, along with photographs, here’s the link to my DIY Spinning Composter.


Read more

Easy Dehydrated Apples

We recently acquired a free bag of red delicious apples left behind from our last tour. We are fans of gala apples and I typically use granny smith in my pies…so the red delicious really weren’t that exciting of a find. Until, my brain went into gear.

I pulled out my trusty $5 dehydrator purchased from a garage sale (Nesco American Harvest Food Dehydrator and Jerky Maker), my lemon juice, my knife and went to work.


First things first, I cored the apples with my handy apple corer. Simple ’nuff.


I sliced the apples up to be about 1/4″ thick.


I threw the slices in a ziplock bag filled with lemon juice and tossed them around, making sure they were thoroughly coated.


Next, I rinsed the lemon juice off of the slices.


I arranged the slices on the the dehydrator trays evenly and set the temperature to 135 degrees (which is the recommended temperature for fruits and vegetables).
I left the dehydrator on for about 4 hours, checking it each hour.


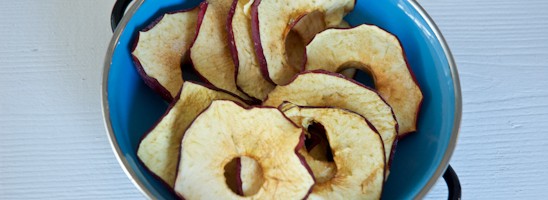
Once the apples were done, we ate them. Pretty much all in the same day.

Read more