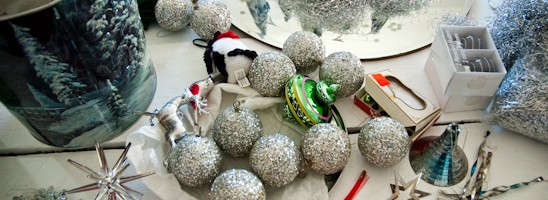
Archive for category: Arts & Crap

Pretty Paper Christmas Trees

I explained in “Christmas No-No Decor” why I had to switch it up this year due to my naughty kittens. We are in the throes of training them…they are just a little hard-headed.
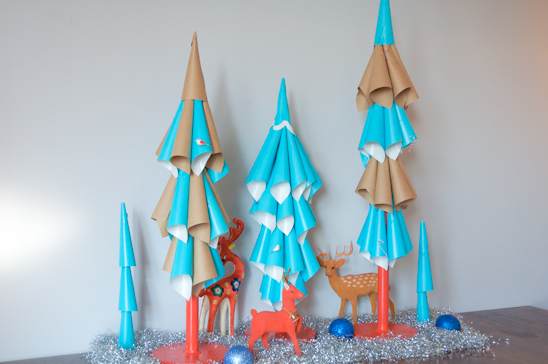
I was excited to try something new and this vision of blue and red came to mind. I went with it.


Apparently, the motivation from naughty cat-dom was just the challenge I needed. Without spending a dime and using things that I had on hand, I created a whole new fancy look for my mantel this year.
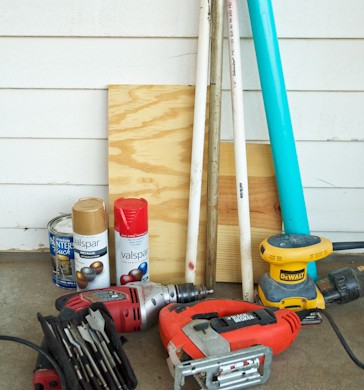
 

Here’s what you’ll need to make your very own Pretty Paper Christmas Trees:

3/4″ Dowel Rods or PVC pipe
3/4″ Scrap Plywood
Coffee can lid
Jigsaw
Palm Sander & Fine/Medium Sand Paper
Drill and paddle drill bits
Oops Paint or Spray Paint
Hot glue gun & glue sticks (not pictured because they were warming up for their duties)
Wrapping Paper (I used both robin egg blue and brown parchment)
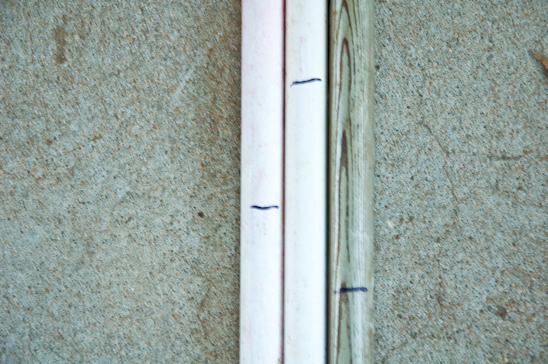
 

I had two pieces of leftover 3/4″ PVC and a 3/4″ Broom stick that someone had gone ninja on. I used all three pieces to make my three trees.
Mark the desired height of trees onto the PVC or dowel rod with a sharpee. I cut my lengths to 18″, 24″ and 32″.
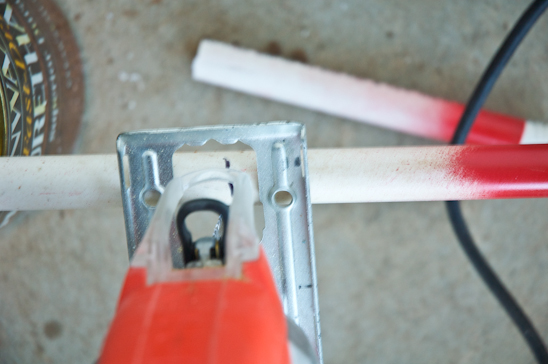
 

Using the jig saw and a wood blade, cut the PVC or dowel rods at the marked lines.
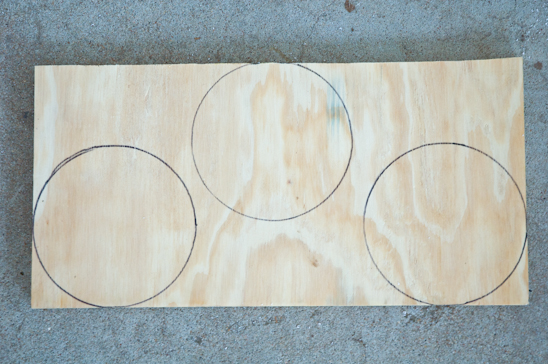
 

Outline the coffee can lid onto the scrap plywood. This will be the base of the trees.
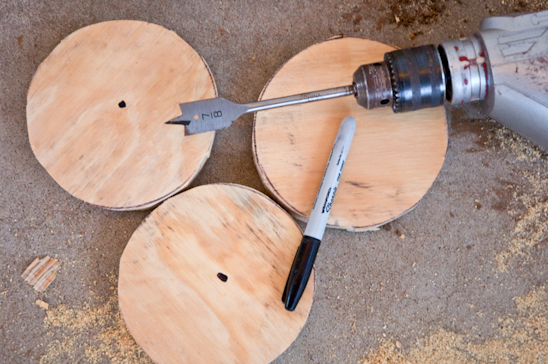
 

This joke never gets old, “Cut it out.” (Courtesy Uncle Joey.)
Meaning, cut the plywood circles out with the jig saw.
Using a 7/8″ paddle drill bit attached to the drill, drill into the center of the plywood, without going all the way through.
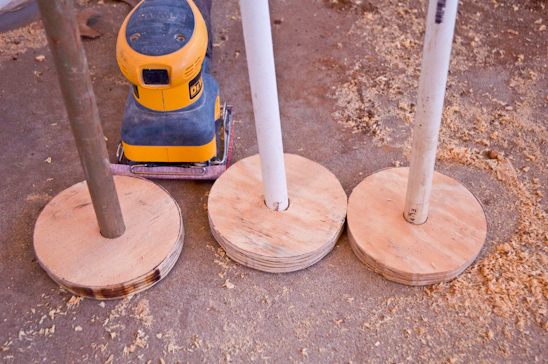


Sand the pieces of plywood using the palm sander. Sand the PVC and dowel rods by hand with a loose piece of sand paper.
Make sure the PVC or dowel rods fit into the holes in the plywood.
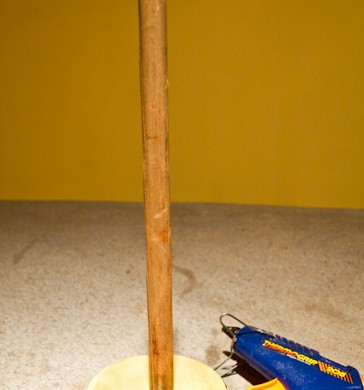
 

Hot glue the PVC or dowel rods to the plywood. Make sure you burn at least two of your fingers in this process.
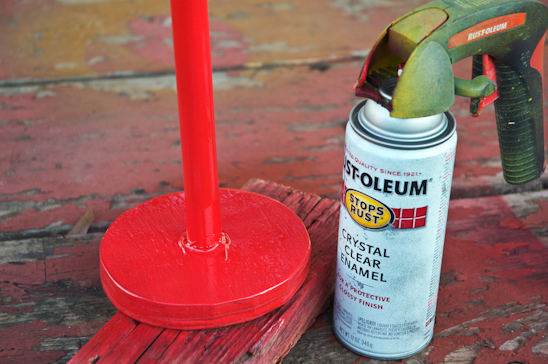
 

Spray the entire thing with two coats of your favorite paint. Let dry.


While the tree stands are drying, cut out 3″ square pieces from the wrapping paper.


Roll each square into a cone shape that resembles this one. Hot glue the very end to the cone.


Pour a glass of wine and then do that same thing about 20 times more for each tree-depending upon the height.
Some of my trees required about 20 cones, the tallest about 30.
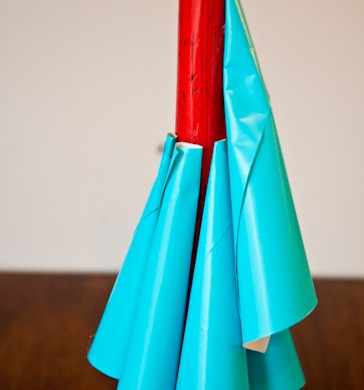
 

Starting about 6″ away from the base of the tree, begin hot glueing the desired colored cones to the PVC or dowel rod. Move up about 3-4″ and add another round of cones. Continue doing this until you reach the top of the tree.
I made one tree that was all blue, one with rows of alternating blue and brown parchment paper, and one that alternated within the same row blue, brown, blue, brown, etc.


I insist you make a mess while doing this, just so I don’t feel bad.
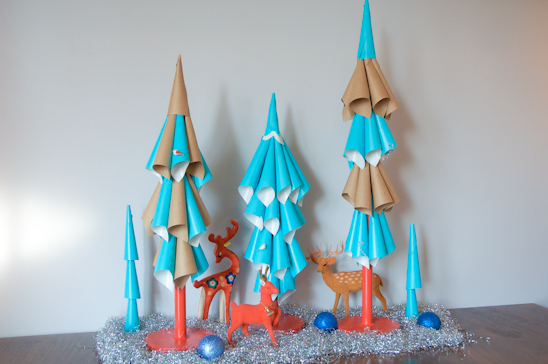
 

Add one last cone to the top of the tree, covering up any of the remaining PVC or dowel rod. Add a few cute birds, candy canes or alternating colors.


Fancy it up with some cute deer, sparkly tinsel and leftover ornaments and call your mantel decorated!
Merry Christmas!
Read more

DIY Family Board Game

Our families both appreciate hand-made gifts for Christmas-especially if the gifts are not of the socks or underwear variety.
So, when it came close to Christmas, Biceps and I decided to make a DIY Family Board Game for each side of our families.

The family loved it-who doesn’t like to hear questions asked about themselves?-and it has become a tradition to play our game together, adding new cards each year. I’ll show you around the game and then give you a step by step tutorial on how to do it yourself!


We personalized the entire game by creating question cards that pertain specifically to our family using old stories, funny memories and anything that might embarrass each one of us.


We harvested old family photos and glued them to the board, using street names from our hometown to guide the way around the board.


We also personalized game pieces that are meaningful to our family-my dad swears every year that the Christmas tree grows on the way home from the forest and he also can put away two ginormous bowls of popcorn in one sitting.


We then decorated the box with stickers and photos, recalling yesteryears of campfires, sleeping bag rides and such other childhood awesomeness.


And of course, a very specific set of rules was implemented by the one and only rule giver-Biceps.
I don’t need no stinkin’ rules.
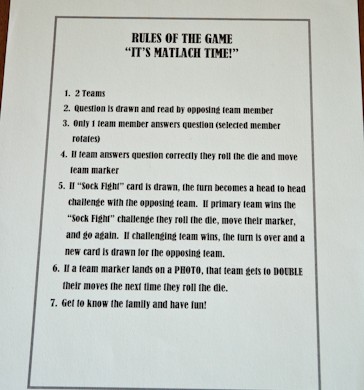
The rules are pretty simple-divide into two teams, one team draws a question card, but only one member of that team gets to answer the question. If they answer correctly, they roll the dice and move that many spaces. Then the next team goes.
BUT-if you land on a “Launchpad” (a photo along the path), you get to double your roll the next go around.
Pretty simple. Except Biceps threw in a bunch of more rules…he is such a rule monger…


It was a rather simple process to make the game and a bonus was the miniscule financial investment. Like $4.00 or so. The whole idea was a real win-win.
Now since you have witnessed all of this DIY Family Board Game-let me tell you how I made it!


Here’s what you’ll need to make your very own board game:
An old, neglected board game (I don’t understand Parcheesi, so it was sacrificed)
15-20 sheets of Card Stock (for the question cards, I used gray)
4-6 Sheets of Card Stock (to cover the board, I used a light tan)
Rubber Cement
Markers
Old Family Photos
Stickers (optional)

To play the game:
Game Pieces (I used a mini tree and popcorn box I already had on hand and hot glued it to a penny)
Dice
Timer (I bought mine at a educational supply store for $3)
Playdough (not pictured-it dried out because of inadequate lid tightening and I need to buy some new ‘dough. Deal with it.)


Rubber Cement the card stock to the game board. Pay heed to the folds in the board and cut your card stock accordingly.


Once the board is covered and the rubber cement is dry, cut out family photos to decorate the board with. These photos became our “launchpad”-meaning, if you landed on them you got some sort of bonus roll/move.


Glue your photos down, making a definitive “START” and “STOP”.


In between the “START” & “STOP”, create a meandering and colorful path around the board, spicing up the path with the occasional photo (Launchpad).


Now, paint, cover with a fabric or whatever decor you desire to the outside of the game’s box. Add additional stickers, sayings, or more photos that mean something to you and yours.


Here is an example of our rule sheet printed out on card stock. They are your typical multiple player board game rules with specifics thrown in for our family.
You may copy these rules for yourself, make up your own, or just make them up as you go along-that could get exciting.


Up until now, things have been smooth sailing for you. Now comes the slightly more difficult task of creating questions. We tried to make sure our questions had a specific answer, were known by most family members, and slightly obtuse.
For example, instead of: “What is Grandpa’s first name?”
Asking: “What was Grandpa called as a boy following a disturbing fishing incident?”

We also added another twist-kind’ve a “wild card” known as “Sock-Fight!” on my family’s side and “Breaker-Breaker!” on Bicep’s side. These “wild card’s” cause a head to head challenge with the other team. If you beat them at a skill; drawing, sculpting or charades, you get to go again. If you don’t beat them, you loose your turn.

We spent a long time collaborating on the questions, re-wording, re-writing, making a template on my computer and then printing them off onto the card stock. (Someone is a perfectionist-but I won’t name any names). I then skipped over to a copy center and used their cutting machines to make each card precisely the same size- 2 1/4 x 2 1/4.


And that, my dears, was our DIY Family Board Game. The family loves it because it’s about them. I love it because it’s become a family heirloom that is added to each year with a marriage, a birth, or just another embarrassing moment.
As far as homemade gifts, this one was a dead-ringer.

Read more

The Christmas Crazies-Help!

Dear Readers:

I am sure you don’t ever feel like this:
that you own a brain of mush due to too many list-making events,
that you want to bargain/convince yourself that a nap over a work-out is a better investment and
that you wonder how everyone else is so put together while you feel like a flopping fish.

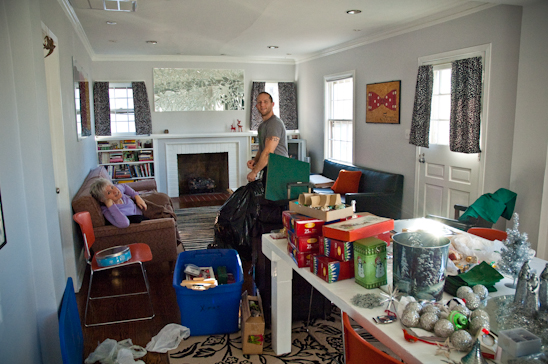
I am also sure your living room never looks like this when you are trying to decorate for the upcoming festivities-while on a short time line and a small budget.
And you hope your mother-in-law that is staying with you for a month doesn’t feel neglected as you try to reconfigure your Christmas trimmings-introducing all non-breakables due to the new naughty kittens that have become a part of your life.

But, I want to be honest, dear readers. That is exactly how I feel-mushy brain, wanting a nap and floppy fish-like. When I am tempted to complain, it’s great to remember just who the heck is in control.
And it ain’t me.
There is so much changing in Biceps’ and my life right now that I’m not sure which end is up. (And I usually label those sorts of things.)
Throw in a dash of new babies being born, a broken car windshield, a church departure, both sides of the families coming in for the holidays, Bicep’s two new careers and a “home-made project” that is overwhelming…and you’ve got my yesterday.


So, since your house is probably all decorated, your life feels in control and your brain is not mush-please pray for me and my weakness. I need your help. I am leaning on you-and of course, God. He’s pretty good to me when I want to whine about stuff like this.
Wah.

Read more

DIY Vintage Aluminum Foil Wreath

It is officially December. Let the Christmas games begin!
Truth be told, I have been listening to Christmas music since November 8th. That morning it was chilly, Biceps suggested we turn on “the Christmas cheer” and we haven’t looked back.
I love creating new wreaths each year for Christmas. Last year, I made two wreaths for Christmas-“Silver Twig Wreath” and a “Whimsical Silver Wreath” that I dismantled this year and re-used for parts.


Reduce, Re-use and Recycle, right? Here is this year’s DIY Vintage Aluminum Foil Wreath that took just a few minutes and a few pennies to create. It’s so purty.


Here’s what you’ll need to make your very own DIY Vintage Aluminum Wreath:
A large dinner plate, charger or lid to a popcorn tin
Coffee can lid or something similar
Scissors
Cardboard
Aluminum Foil
Leftover ornaments-plastic, glass, fabric-whatever floats your boat
2′ + of Ribbon
Hot glue gun and glue sticks


Using your dinner plate/charger/lid, trace a large circle onto the cardboard.


As Uncle Joey would say, “Cut it out.”
If you don’t know what that reference was, I apologize. It’s a little Gen X humor, I suppose. Or is it Gen Y? If I had my choice, I’d rather be a Gen Z because it rhymes with Ginseng and just sounds so much cooler. But, I digress.


Trace a smaller circle smack dab in the center of your large circle using a coffee can lid. Cut out the smaller circle. The cardboard will now resemble a large donut. Yum.


Wrap the front and back or the cardboard “donut” with aluminum foil.


Tear off 2-3′ sections of aluminum foil, fold in half lengthwise. Place an end of the foil on the aluminum donut and hot glue that sucker down.


Make 3″ loops of the folded foil, hot glueing each loop down to the aluminum donut an inch or so away from the last loop. Continue doing so until you are out of foil. Start over with another 2-3′ piece of folded foil until the entire wreath is covered in looped foil.


Cut a slit in the top of each loop with your scissors (this simultaneously sharpens your scissors and makes a killer wreath, by the way).
“Poof out” each loop randomly. “Poof out” is the technical term for “fluffing”.


Loop the ribbon in half, hot glueing the ends to the backside of the wreath.


Hot glue the chosen ornaments on the front side of the wreath, interspersing them willy nilly between the “poofs”.


One DIY Vintage Aluminum Foil Wreath is now ready for your front door. Hang it up and call it a day. Grab a glass of wine and realize just how awesome you are with your hot glueing skillz.

Read more