Archive for category: Lady Type Crafts

Va-Va-Voom Vintage Tablecloth Dress

Grandma Greiman sent me away from her farm with a trailer full of treasures.
This old tablecloth was barely holding on to its original embroidered flowers and I couldn’t bear to throw it out or tear it up into scraps.
So, why not throw in a scarf for good measure and make a dress?

Scarves have become one of my favorite fabric pieces to re-invent.
They are the perfect material for molding into free-flowing sassy pieces. And boy am I into the sass. You have no idea.


I created my own pattern for this dress by trial and error. (My pattern was made for me, and I am a size two. If you would like to increase the size, a general rule is to add 1/4” all the way around per size increase.)

To Make this Dress, you’ll need:
Four Pattern Pieces (Front Piece #1, Front Piece #2, Back Piece, Middle Piece)
One Large Silk Scarf
Cotton backing fabric the same size as the scarf
Round Tablecloth (mine was 66” in diameter)
20” Zipper
Straight Pins
Scissors
Seam Ripper (If your expertise is anything like mine)
Thread to Match
Sewing Machine

Fold your scarf in half and lay your pattern on top of it. Cut out two ‘back pieces’, two ‘front pieces’ and one middle piece.

Repeat this procedure with the cotton backing fabric.


With the right side of your fabric down, pin the pleats in your two front pieces and iron them flat.
Then pin the two front pieces to your middle piece and sew.
Make sure you sew the neck pieces together as well.


Pin & sew your two ‘back’ pieces to what you had just sewn together.


We are going to repeat this process with your scarf. But since I am a visual learner, I will go ahead and do it all over again for you. With the right side of your scarf fabric down, pin your pleats in the ‘front’ pieces first and iron them flat.
Now, pin your two ‘front’ pieces to your ‘middle’ piece and sew.
Make sure you sew the neck pieces together as well.


Pin & sew your two ‘back’ pieces to what you had just sewn together.
This seems all too familiar….


With right sides of your material together, pin your scarf to your cotton backing material. Sew all of your outside seams together, leaving the bottom open. We will now call this the ‘Top Piece’.


Fold your round tablecloth in half and place it on top of the right side of the material to your Top Piece.
Find the center of your folded tablecloth and pin it to the center of the bottom of your ‘Top Piece’.
Working from the center out, pin the folded tablecloth around the entirety of your top piece. Sew the Top and Bottom pieces together.
I added pleats to my tablecloth ‘Bottom Piece’, just in case I partake of a single scoop of peppermint ice cream in a waffle cone…but you do what you want.


Next comes the zipper. My favorite part. Notice my text is oozing with sarcasm.
I have never liked putting in zippers. I don’t know why…I just don’t.
Anywho…fold the right side of your fabric over a quarter of an inch on your Top Piece and pin your zipper on the inside of the material.
Do NOT fold over your material on your Bottom Piece. Pin the zipper directly to the material, leaving the excess to do as it pleases.
Give your Booty some room to breath by fanning the zipper away from the waist until you reach the end of the zipper on the Bottom Piece. (Mine needed an extra 2” from waist to end of zipper.)
Sew your zipper into place on both sides.


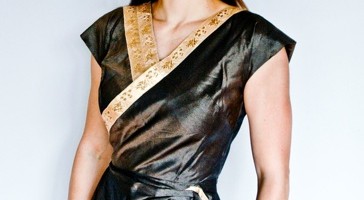
Here is the finished VA-VA-VOOM Vintage Tablecloth Dress.
Mine and the dress’ backside is below.


I can’t wait to wear this little piece out on the town! Now, to convince Biceps we need a night out on the town…..

Read more

Vintage Apron Skirt for the Sassy Girl

When life (Grandma) gave me aprons-lots of aprons…
I decided to make a skirt!
And I also believe that my stack of aprons are pro-creating with my original four. I keep finding more. Creepy.
I decided something must be done.
And this skirt popped in my crazy brain while I was sawing today.
This is super easy to make! And because it is a one of a kind, you will never be bummed at another church picnic because you are wearing the same exact thing Sister Susie is wearing.
Oh, isn’t that just the worst?


Here’s what you’ll need:
Iron & & Ironing Board
Scissors
Tape Measure
Seam Ripper
Straight Pins (although mine are a bit curvy)
Thread to match
Three aprons of similar length
Button Covers (if desired), or buttons-cute ones, please!


I chose these three adorable aprons because of the different patterns-gingham, stripes and floral print.
And they were pretty much the same length, too.
I decided that stripey would be my front of the skirt (the apron on the right), floral would go underneath the front as an accent (the apron on the left) and gingham (center apron) would be the back of the skirt.


Using a seam ripper, remove any pockets on the aprons that will be on the back of your skirt or is the accent pattern on your skirt.
Try not to poke your finger. Ouch.


Next, cut the apron strings (tee hee) from the aprons that will be the back of the skirt and the accent pattern. Keep these little suckers for later.


Make sure your apron is good and wrinkly.
Next, measure the center of the apron that will be the front of your skirt. Cut from the bottom of your apron towards the top, stopping at where the waist band is.


After you have made your cut, flip your front over and iron a seam allowance of about 1/4”.


Pin the apron strings that you had cut off of your accent pattern apron to the front of your skirt. Fold a 1/4” under for your seam and iron the strings into place.
Sew your strings to the front of your skirt.


Place the front of your skirt right side down. Center and pin to it, with the right side down, the accent pattern apron. Sew into place.


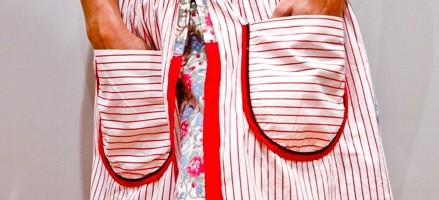
This is how the front of your skirt should look by now. See the peekaboo accent pattern? Isn’t it precious?
Moving on.


On the right side of the skirt, pin the front of your skirt to the back of your skirt, using a 2” seam allowance. Place a pin 4” below the waistband.
Sew into place, stopping at the 4” pin. Slip on your almost done skirt and pin the left side into place, top to bottom.


Sew from the bottom to the top on the left side of your skirt.


I made my own buttons using the material leftover from the apron strings. But you can use any ol button your heart desires. I made one real button hole on the right side and attached a matching button on the left side of the skirt, just to bring symmetry to the situation.
I also added a hook and eye on my right side, for more concealing power. But you can use a second button, or forgo the whole button thing and throw in a zipper.
Get crazy! I dare ya!


And here’s the finished front of the skirt, once more. Isn’t it cute, sassy and vintage all rolled into one? I think so, and I think I will wear it tomorrow night.
And below is my backside.


My very wrinkly backside. Please ignore the fact that I did not iron this apron. I wanted cheddar whales, hubby and a little snuggle time.

Let me know if you make an Apron Skirt. I would love to see it!

Read more

Sassy ‘Dress Shirt’

Typically the vintage dresses I come across have been ripped, stained or eaten by evil moths. Instead of parting with the abused garment, I hide the problem areas with a little creativity and turn it into a sassy
one-of-a-kind shirt.

This is what my finished product looked like, but each ‘Sassy Dress Shirt’ will be unique! Read on to learn how to make your very own ‘Sassy Dress Shirt’.


What you will need:
An old dress
Seam Ripper
Iron & Ironing Board
Straight Pins
Sewing Machine
Ribbon to match the dress (if desired to cover holes, etc)


Assess how long you would like your ‘shirt’ to be and cut the excess off, leaving about two inches for hemming. I don’t subscribe to the midriff look from the late 90‘s, so I hem my ‘shirt’ to fall a couple inches below my hip bone.


Turn your ‘shirt’ inside out and measure your hem all the way around, pressing and pinning it as you go. Sew your new hem with a blind hem stitch or whatever you normally fancy when you hem something up.


If you have ribbon or embellishments that match your new ‘shirt’, now is the time to hide those stains or moth holes. No one will be the wiser! In the past, I’ve made little fabric flowers out of the left over material to cover the problem areas.


For this shirt, I removed the ribbon that was once around the bottom hem of my dress to cover over a stain on the front, following the neckline.


I opened the seam where the zipper stopped on the backside and followed that opening with more ribbon. This allowed me a little more booty shakin’ room.
Sew all of your ribbon and your embellishments in place.


Here’s my backside… of the shirt. What were you thinking I meant? Scroll down to see the front again.


Ta-Dah! I love wearing this cute little number out on the town. Let me know if you try making your own Sassy Dress Shirt. I would love to see how yours turns out!

Read more

How to Make a Sock Giraffe

I tend to bust through my socks quickly. I hate to admit this, but I must have very pointy toes.


And I am a firm believer when life hands you holey socks, you make stuffed giraffes out of them. This is not a fine science, and it’s best if you have two pairs of socks that are alike in size. But, if you don’t-improvise.


To make this sock giraffe, you will need four small socks that are cute in nature, scissors, a tape measure and a sewing machine.
If you have two opposing sock patterns, this makes for one cute giraffe.


You will also need a funnel and jasmine rice. You could also use dried beans or corn kernels…but I like the way the jasmine smells.


Cut the elastic band off of the opening of one of the pairs of the sock.
Then cut both socks from the top to the bottom on the back side (the side where the heel would touch).


Choose one of the two socks to be the giraffe’s head and neck. The other will be the stomach and booty.
The sock you chose for the head/neck, from the toe of the sock, cut two inches up. This will be the mouth.
I chose to take one inch of material out between the toe and the heel from the head/neck sock in order for the giraffe’s head to be proportionate to the body.


Turn all of the material inside out and lay flat.
Pin the ‘mouth’ to the ‘head’ by unfolding it first. Then, sew the ‘mouth’ to the ‘head’ first with a simple straight stitch.
Pin the ‘head’ to the body by unfolding it first. Then, sew the ‘head’ to the body’.


Time to use up your other pair of socks! Cut from just where the heel seam ends towards the toe of the sock, two inches in width. These will be the back legs. The heel of the sock will create a natural hip for the giraffe.


Now, cut the tip of the tow off of the sock to create a straight end for the leg which will be the giraffe’s foot. Turn the leg piece inside out and sew it together, leaving the straight end (giraffe’s foot) open to stuff with rice later. Save the toe piece to attach to the belly later on.


Cut the remaining section off of the sock we’ve been using. This will be the giraffe’s belly.
The square section of the sock will create the giraffe’s two front legs. Cut this square section in half.


Here is a shot of what the giraffe might look like before we are done sewing it.
I changed up the ears and tail, so don’t get too attached.


Remember our belly piece and the toe piece we saved? Sew them together to look like the picture below.


Here is the belly sewn together. Isn’t it cute?


With the belly piece and the body piece inside out, pin it to the body by starting at where the giraffe’s booty would be until you get to the neck.


Sew the belly to the body and straight up into the neck.
When you turn the body/belly right side out, it should look like this, but with the head attached and sewn together as well.
(You will notice that I had forgotten to sew the head to the neck first. Big mistake, please ignore this little oversight.)


Once you have sewn the entire seam up through the neck and into the head, leave an opening at the mouth in order to put rice through.


I used some leftover material from the second pair of socks to make two triangular ears about an 1” tall by 1 1/2” wide and the tail about 3” long and 1/2” wide. Leave an opening for the rice by sewing together only three sides of each appendage. Fill them each with rice using the funnel if necessary (you don’t need to fill the tail with rice. Pin them close and hand sew the ends.


I cut little fringes on the tail for bonus cuteness.


Now, it’s time to fill the body with rice. Using the mouth hole that we left open, fill this cute little body with rice until he’s floppy. Sew a seam where the neck meets the body by separating the rice and running a straight stitch back and forth several times. You do this to keep the neck full of rice. Otherwise, the rice will continue to just fill the body up. Pin the mouth closed and hand sew it together.
Pin on the body where the legs and tail will be. Pin on the head where you would like the ears to be.


Pin the appendages to the body and hand sew them on.


Hand sew the eyes on with a different color of thread by simply going over the same spot several times until it looks like this.


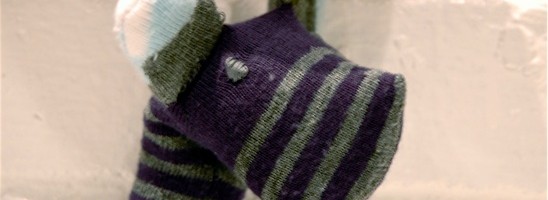
This is our cute little giraffe after he has everything sewn on. How cute and floppy is he? Or she?
I guess it’s up to the creator what the giraffe is….


My giraffe preferred the name, ‘Mr. Cool’, so I guess he’s a boy. Now, all you have to do is find someone who is in desperate need of a floppy giraffe and give this to them.
I gave mine to my nephew. Who in your life would want a floppy giraffe?

Read more