Archive for category: House Decor

All by myself, don’t wanna be….

Since Thanksgiving, our house has been full of company in one way or another. It started off small, with my mother-in-law coming back with us from our trip up north. I got quite used to seeing her each and every day as we ate lunch together or watched movies while Bicep’s was hard at work.
And then, right before Christmas-my mother-in-law was joined by the remainder of the family.

It was glorious, wonderful, family bliss (after I got over the stress of planning everything-let’s be real).


Dinners were loud, desserts were consumed without regard and the dishwasher ran around the clock.


Bicep’s family transitioned to the their respective homes shortly after Christmas-and my family transitioned into our home days later.
We visited a winery, ate more desserts, played the DIY Family Board Game that Bicep’s and I created, and drank lots of coffee.


We sat around for hours with the fireplace roaring, chatting into the wee hours of the night. Maxwell became so used to Dakota-my parent’s pooch-that snuggling became commonplace between the two.
The house was full of life, noise, and people.
 

And as my parent’s pulled out of the driveway, we waved back and forth until we couldn’t see one another any longer, with tears falling down our cheeks.
While I take down the Christmas ornaments, the tree, the lights, and the decor, I am surrounded-for the first time in a long time-by silence. I box it all up, cart it up to the attic-the whole while-silent.
Thick, lonely silence.
Some of you may dream of such silence. But silence day after day isn’t so fun anymore.

I sweep, mop, scrub toilets, change out the laundry-more silence.
Sure-I can put on music, and I did. But, there’s not a body here to chat with.
And, it’s weird.

I’m not sure what to do other than make light of the situation and sing, “All by myself, don’t wanna be, all by myself…” just like Bridget Jones did.
Which is even weirder when you are belting that tune out into your broom handle and the mailman catches you as he drops off your daily dose of junk mail.
Sorry about that, Mr. Mailman. Just write it off as a weird, lonely housewife.
I’m sure you’ve seen it all before…


Read more

Wooden Christmas Garland

Decorating for Christmas is something I look forward to all year-storing things away that I collect throughout the changing seasons-until I feel that first nippy bite in the air.
One of my neighbor’s had their visiting father-who I have come to adore-knock on my door this past spring. It was no surprise that he came to me with a stack of cedar chunks from a felled tree.
And to quote the father (with a severe southern drawl), “When I saw these, I just knew if anyone could do something with them, it’d be you.”
Apparently, my reputation precedes me….

And I hope I haven’t let him down or failed his expectations of just what I could “do with them”. For next to nothing, I have a unique garland made from reclaimed cedar wood that Anthropologie is probably jealous of…or at least, I’d like to think so.
I’ll be sharing the tutorial on how to make the cute little blue, brown & red trees next week.


Here’s what you’ll need to make your very own Wooden Christmas Garland:
Chunks ‘o Wood (mine were about 9″ in diameter)
Rope (I used 1/2 twisted nylon rope-blue hawk is a pretty good brand from Lowe’s)
Palm Sander and 80+ grit Sandpaper
Your favorite color paint/spray paint
Hammer & nails (not pictured)
Stencils
Blue Tape

Let’s get started!


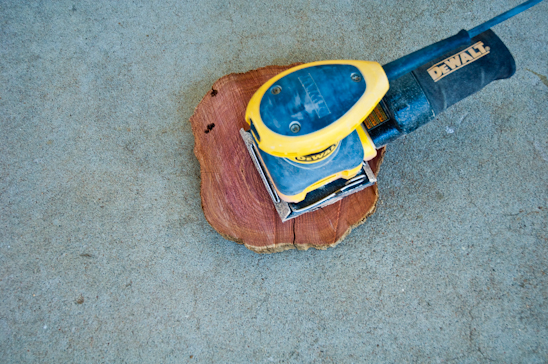
Lightly sand the wood, going with the grain if possible. I sanded mine just enough to not have burrs or splinters. I wanted my garland to be rustic.


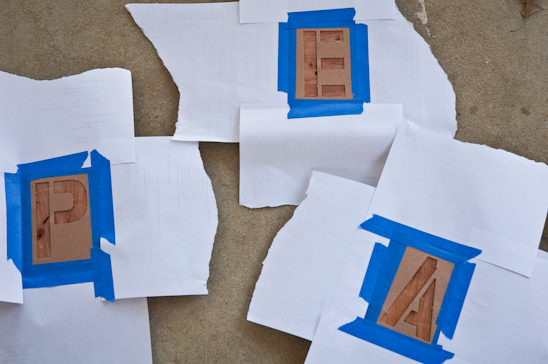
Choose your saying. I went with “Peace”, but considered “Boink”, “Poop”, and “Elephant”. I really didn’t have enough wood to do the latter and was outvoted on the first two by my visiting mother-in-law.

Tape down the stencils with blue tape, adding scrap paper if needed to protect the rest of the wood.


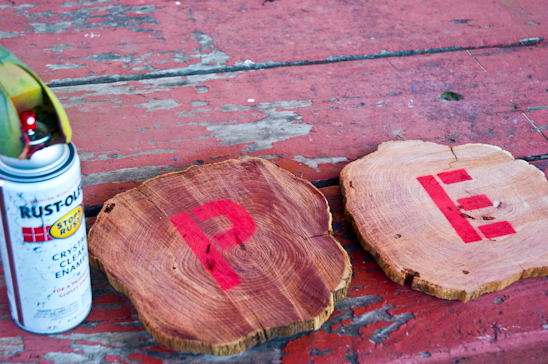
Spray away! I went with two coats, just to be safe.


Remove the stencils. Stand back. Ooh and ahh until the neighbor gets curious. Then tell them to quit snooping, this is a top secret project.


I gave the wood a light coating with a Crystal Clear Enamel, but you don’t have to. You could also add a layer of polyurethane instead. Either acts as a protectant and gives the wood a little sheen.
The “P” has been sprayed with it in this picture, but not the “E”.


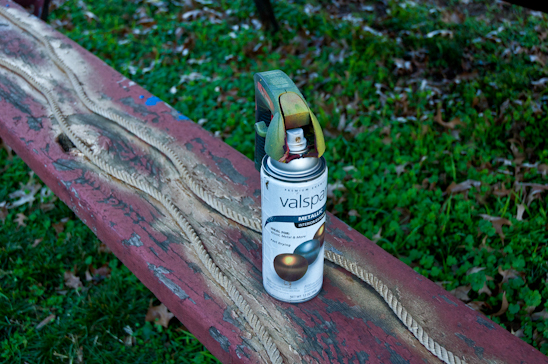
Spray paint your rope, if you so desire. I went with shiny, shiny gold. I like gold things-they’re kingly.


Once everything is dry, use your hammer and small nails to tack in the rope to the back of the wood. I used two nails per chunk of wood.


Hang your Wooden Christmas Garland where your little heart desires and enjoy.
Then call your neighbor to tell them you just finished your top secret project and you also have some warm cookies to share.
I bet they’ll be over in two shakes of a kitty’s tail.

Read more

Pretty Paper Christmas Trees

I explained in “Christmas No-No Decor” why I had to switch it up this year due to my naughty kittens. We are in the throes of training them…they are just a little hard-headed.

I was excited to try something new and this vision of blue and red came to mind. I went with it.


Apparently, the motivation from naughty cat-dom was just the challenge I needed. Without spending a dime and using things that I had on hand, I created a whole new fancy look for my mantel this year.


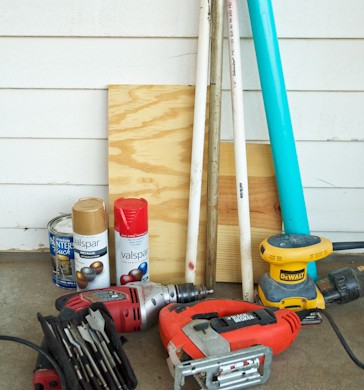
Here’s what you’ll need to make your very own Pretty Paper Christmas Trees:

3/4″ Dowel Rods or PVC pipe
3/4″ Scrap Plywood
Coffee can lid
Jigsaw
Palm Sander & Fine/Medium Sand Paper
Drill and paddle drill bits
Oops Paint or Spray Paint
Hot glue gun & glue sticks (not pictured because they were warming up for their duties)
Wrapping Paper (I used both robin egg blue and brown parchment)


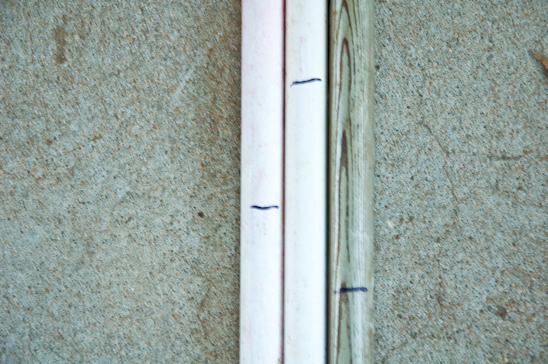
I had two pieces of leftover 3/4″ PVC and a 3/4″ Broom stick that someone had gone ninja on. I used all three pieces to make my three trees.
Mark the desired height of trees onto the PVC or dowel rod with a sharpee. I cut my lengths to 18″, 24″ and 32″.


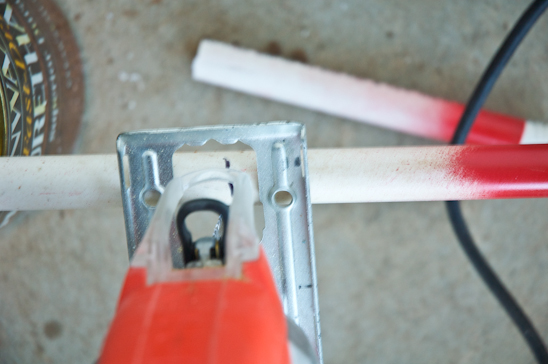
Using the jig saw and a wood blade, cut the PVC or dowel rods at the marked lines.


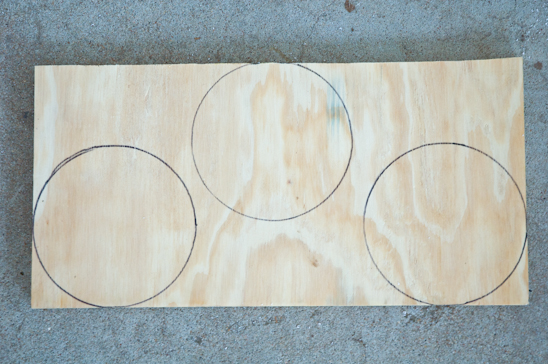
Outline the coffee can lid onto the scrap plywood. This will be the base of the trees.


This joke never gets old, “Cut it out.” (Courtesy Uncle Joey.)
Meaning, cut the plywood circles out with the jig saw.
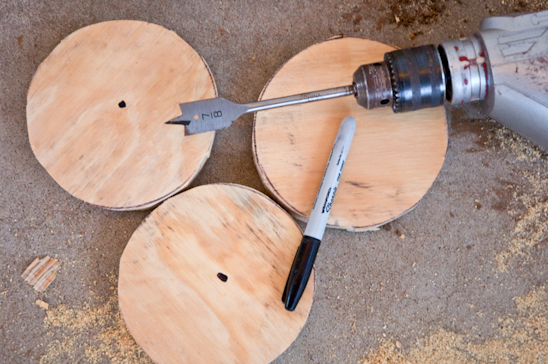
Using a 7/8″ paddle drill bit attached to the drill, drill into the center of the plywood, without going all the way through.


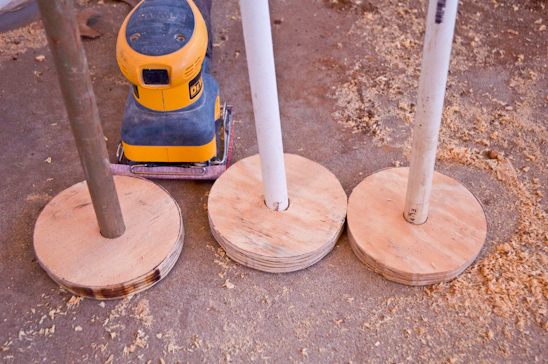
Sand the pieces of plywood using the palm sander. Sand the PVC and dowel rods by hand with a loose piece of sand paper.
Make sure the PVC or dowel rods fit into the holes in the plywood.


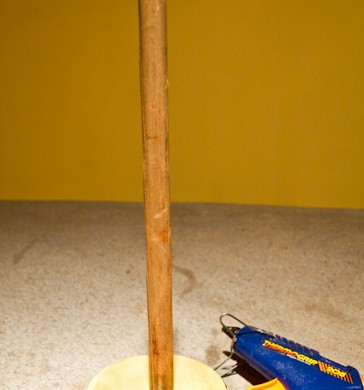
Hot glue the PVC or dowel rods to the plywood. Make sure you burn at least two of your fingers in this process.


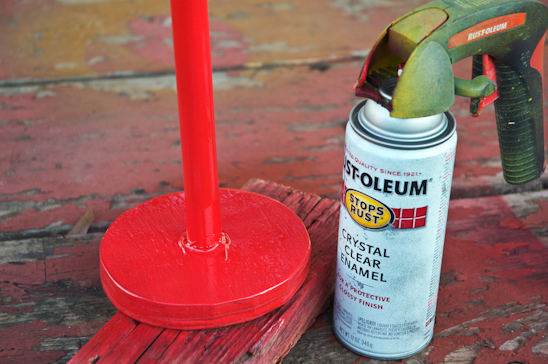
Spray the entire thing with two coats of your favorite paint. Let dry.


While the tree stands are drying, cut out 3″ square pieces from the wrapping paper.


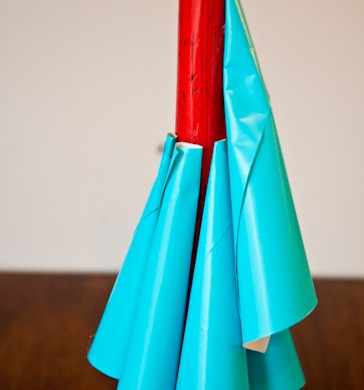
Roll each square into a cone shape that resembles this one. Hot glue the very end to the cone.


Pour a glass of wine and then do that same thing about 20 times more for each tree-depending upon the height.
Some of my trees required about 20 cones, the tallest about 30.


Starting about 6″ away from the base of the tree, begin hot glueing the desired colored cones to the PVC or dowel rod. Move up about 3-4″ and add another round of cones. Continue doing this until you reach the top of the tree.
I made one tree that was all blue, one with rows of alternating blue and brown parchment paper, and one that alternated within the same row blue, brown, blue, brown, etc.


I insist you make a mess while doing this, just so I don’t feel bad.


Add one last cone to the top of the tree, covering up any of the remaining PVC or dowel rod. Add a few cute birds, candy canes or alternating colors.


Fancy it up with some cute deer, sparkly tinsel and leftover ornaments and call your mantel decorated!
Merry Christmas!

Read more

DIY Vintage Aluminum Foil Wreath

It is officially December. Let the Christmas games begin!
Truth be told, I have been listening to Christmas music since November 8th. That morning it was chilly, Biceps suggested we turn on “the Christmas cheer” and we haven’t looked back.
I love creating new wreaths each year for Christmas. Last year, I made two wreaths for Christmas-“Silver Twig Wreath” and a “Whimsical Silver Wreath” that I dismantled this year and re-used for parts.


Reduce, Re-use and Recycle, right? Here is this year’s DIY Vintage Aluminum Foil Wreath that took just a few minutes and a few pennies to create. It’s so purty.


Here’s what you’ll need to make your very own DIY Vintage Aluminum Wreath:
A large dinner plate, charger or lid to a popcorn tin
Coffee can lid or something similar
Scissors
Cardboard
Aluminum Foil
Leftover ornaments-plastic, glass, fabric-whatever floats your boat
2′ + of Ribbon
Hot glue gun and glue sticks


Using your dinner plate/charger/lid, trace a large circle onto the cardboard.


As Uncle Joey would say, “Cut it out.”
If you don’t know what that reference was, I apologize. It’s a little Gen X humor, I suppose. Or is it Gen Y? If I had my choice, I’d rather be a Gen Z because it rhymes with Ginseng and just sounds so much cooler. But, I digress.


Trace a smaller circle smack dab in the center of your large circle using a coffee can lid. Cut out the smaller circle. The cardboard will now resemble a large donut. Yum.


Wrap the front and back or the cardboard “donut” with aluminum foil.


Tear off 2-3′ sections of aluminum foil, fold in half lengthwise. Place an end of the foil on the aluminum donut and hot glue that sucker down.


Make 3″ loops of the folded foil, hot glueing each loop down to the aluminum donut an inch or so away from the last loop. Continue doing so until you are out of foil. Start over with another 2-3′ piece of folded foil until the entire wreath is covered in looped foil.


Cut a slit in the top of each loop with your scissors (this simultaneously sharpens your scissors and makes a killer wreath, by the way).
“Poof out” each loop randomly. “Poof out” is the technical term for “fluffing”.


Loop the ribbon in half, hot glueing the ends to the backside of the wreath.


Hot glue the chosen ornaments on the front side of the wreath, interspersing them willy nilly between the “poofs”.


One DIY Vintage Aluminum Foil Wreath is now ready for your front door. Hang it up and call it a day. Grab a glass of wine and realize just how awesome you are with your hot glueing skillz.

Read more