Archive for category: House Decor

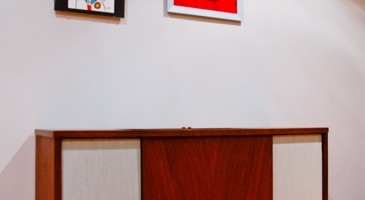
Vintage Stereo Cabinet Redux

Biceps and I enjoy working out.
What I don’t enjoy are the ugly weights and yoga mats lying around my house. We don’t have a workout room where I can tuck all this away and shut the door.

I needed a solution for this debacle. I found said solution at Habitat for Humanity for $10 bucks. But, it needed a lot of work.($10 has seemed to be the magic number for me lately-that’s what my sewing cabinet cost, too!)


Picture in your cute little mind these being a pumpkin orange and the wood covered in gunk, spider eggs and stickers. I didn’t take a before picture, darn it, because I was too gung ho to get the project started and forgot to pull out the camera.
Forgive me, dear one. Forgive me.


The sides of the cabinet housed the speakers. We gutted the entire thing, removing the side walls that separated the speakers from where the record player sat, the speakers, the electrical components…the whole she-bang. This is also when I found the spider eggs. I almost had a panic attack


After gutting it, we installed 3/4” plywood to beef up the bottom and close up the backside.


Check that backside out. You like it, don’t you? I thought so.


We cut out plywood to fit where the stereo speaker covers used to be (goodbye pumpkin color) and covered them with some very cool vintage blue fabric. We also installed a clasp to connect this plywood piece into the main body of the stereo cabinet.


Here’s the receiver for the piece of plywood that is now covered in blue fabric. This allows you to remove the blue panels and have access to the sides of the stereo cabinet.


I found these legs at Lowe’s for $3 a piece and stained them to match the cabinet. I added a little sticky felt to the bottom so they wouldn’t scratch my sweet floors.


Lastly, I cleaned the entire thing using my special cleaning/furniture polish (3C olive oil to 1C white vinegar-mix in jar, use soft cloth to apply to furniture). It has brought life to the dullest piece of wood, is super cheap and ‘green’.


And now, all of this….


Fits secretly in here. My solution cost me a total of $22. I think that’s pretty freakin’ cool, don’t you?
Read more

Scrappy Plywood Art

I am not a professional painter, by any means. However, what I do have is plenty of time on my hands, leftover remodeling bits and a little creative inspiration. A small budget and the need to have some crap on my walls is my creative inspiration.
Today, we are going to make a piece of art from cheap plywood. And, it’s gonna be awesome.
What you will need:
Oops paint (this is paint that has been mis-tinted and is usually $5 a gallon at most hardware stores), or leftover paint you no longer have feelings for.
A paintbrush, sanding block or sand paper, a tape measure, a skill saw with a wood blade, polyurethane (I use the fast drying kind) and a scrappy piece of plywood.


I spare EVERY expense when it comes to art that I might burn later on if I hate the outcome. Get the cheap ‘chipboard’. It has a blue edge. A 4×8 sheet of this stuff costs around $10, or go by a salvage store and buy some scrap.


You will need an electric drill and 2” drywall screws (that is, if you want to hang your art directly onto the wall like I do.) Otherwise, you can mount picture hanging devices on the back and hang it the old fashioned way.


Custom measure how big you want your artwork to be. Draw a line with a level and cut that sucker.
I wanted a large piece over our bed, so I went with a 4’x3’ piece of scrap plywood.


Sand the edges and any burrs that are sticking up on the face of your plywood lightly.


Next, draw a silhouette-type design on it. I decided to go for a deer head with antlers.
I know, don’t freak out. If you think you can’t draw, google ‘silhouette’ and find a design you like. Print it off and outline your design like you are in kindergarten. Don’t worry, it doesn’t have to be perfect.
Check out my line work below and it will make you feel better.


Use your oops paint to fill in the silhouette. Again, it does not have to be perfect. This is a rough piece of plywood and the paint will not go on in a straight line all of the time. That’s what makes this cool…and easy.


Paint the edges of the plywood and wrap it around to the front of your painting about a half of an inch. This will make a nice border to showcase your awesome talent.


After your paint has dried, break out the polyurethane. I usually buy one of those disposable foamy brushes, but I didn’t have any on hand. If are applying polyurethane with a paintbrush, make sure that it is an ‘oil’ paintbrush. You will also need mineral spirits to clean it out. Yuck.
Thus the reason why I usually buy a foamy brush. Let the poly dry. You can apply a second coat of poly if your wood is really thirsty or you want it doubly shiny.


Now is the glorious moment.
I hung this piece by drilling straight through with 2” drywall screws on the black sections of the silhouette. I then touched up the screw heads with more black paint.
You can also use picture hanging devices that attach to the back side of the plywood and hang it as most normal people do.

But you know I have never enjoyed being normal…

Read more

A $10 Sewing Cabinet Makeover

I hunt for bargains.
I got this little number at a Habitat for Humanity and fell in love immediately. This little guy needed a second chance at life and I’m just the girl to make it happen.

I love to sew and have always wanted a really functional sewing cabinet. This not only had drawers for scissors, tape, etc…but the two sides flipped out to give you some more working room. Bonus.
Here’s what you need below.


You will need sandpaper. I recommend the 120 grit (on the left) if you don’t have to cut through years of stain or paint.The 80 grit (on the right) is tougher and can cut through thicker stains or stubborn paint.


You will need a palm sander and extension cord.


Grab yourself a pair of gloves-save that manicure; polyurethane-I chose the fast drying clear gloss, three foamy brushes, a drop-cloth and a rag. You will also want to choose which color of stain you want, or you can go au natural. I chose a stain we had in our shed, which you will see later on.


You’ll need two microfiber cloths and steel wool, as well. I think that’s about it. Now on to the lesson!


Take one of your sandpaper sheets and fold it in half.


Then fold the half in half, creasing the folds.


Tear the sandpaper down the creases making four squares.


Take one of these squares and attach it to your palm sander. Watch those fingers-I have been pinched one too many times….


Sand in the direction of the woodgrain. You may have to go over the piece a couple of times. Use a square of sand paper to hand sand anything your palm sander cannot get to.


Once you have sanded the entire thing, vacuum every nook and cranny.


Then use a microfiber cloth to get any left behind bits o’ dust. Run it over the entire thing thoroughly. I recommend doing this two or three times.
Please ignore my weird looking hand. I blame it on my camera’s perspective.


Find an inconspicuous place on your piece of furniture-like the bottom of it or the backside and test out your stain samples. I chose the one at the far right. It’s called ebony. There is no ivory stain, I checked.
At this point, I would recommend bringing your item indoors and laying down a drop-cloth.


Using your foamy brush, apply a thin layer of stain in the direction of the woodgrain very slowly. Make sure you are checking for drips or pools of stain the whole time you are staining.


Use a rag to wipe off the excess stain. ‘Nuff said.


Then let the sucka dry following the manufacturer’s recommendation.


Time for the polyurethane, which I like to call the ‘OOH! moment’, cuz it’s pretty. Carefully open the poly can and stir in a clockwise direction. Do not pull up from the bottom like you normally do with paint. Stir the poly frequently during application. Dip a NEW foamy brush into your stirred, not shaken, poly and apply it while following the woodgrain once again. Let dry-mine took 4 hours to dry indoors, but follow the manufacturer’s recommendation.


Using a steel wool pad, slightly scuff the dried poly by following (yes, you guessed it!)-the woodgrain.


Take a clean microfiber cloth and wipe that thing down, in any direction you like this time.


Back to the poly for your second coat. Apply a thin layer following the woodgrain again. Let dry the recommended time. And then….


POW!
And ZAM!
And BOO-YEAH!


And then, mark this momentous occasion with a glass of red wine.
Or white. Your choice.

Read more

I happen to love flowers…and Mirror Art

And although this Arts and Crap isn’t about flowers, I must talk about them first. Because they are just so darn purty. Then, we’ll get onto mirrors.


If you look deep into the photo, you will see a sneak peak of what we are going to talk about today. But don’t get stuck in the past for too long. Move on, people. Move on.


Although my fingers don’t care for the rough, thorny branches. My husband helped me band-aid one more finger before leaving the house on ‘an errand’.


A few minutes later, he came home with these.
Soft peach gladiolus. (Here’s another sneak peak at what we are going to make!)


And although I like the hard work of cutting branches from a deliberately mean bush and slicing open my hands, I am fond of the store bought kind too.


Even if they don’t put up much of a fight.
“Sissies!”-Mr. Thorny Flower.

Moving on…


Now that we have that discussion out of the way, see the background behind these flowers? That is what I wanted to talk to you about.


This is the finished product we will be doing together today. The entire piece is about 4 feet wide by 2 1/2 feet tall.


You will need broken or old mirror (pretend that I included the mirror in this picture), a hammer, heavy duty butcher paper or a heavy duty paper bag, gloves, a scrap piece of plywood, liquid nails and a caulk gun.We chose to paint our plywood glossy white. But you can do whatever you want. I know you will anyways…


Place the mirror in the paper bag or wrap it in the heavy duty butcher paper. Gently tap the mirror with the hammer a few times.


Open your bag to see what you’ve won. OOOH! You’ve won a broken mirror. How delightful!


Carefully retrieve the pieces of mirror and arrange them on your plywood in whatever pattern you desire.


You’ll want several sizes of the mirror chunks-so don’t get overly particular about uniformity.


After you have arranged the mirror pieces to your liking, start liquid nailing those suckers down. Make sure you have a system so that you don’t forget a piece. I recommend putting a small square of blue painter’s tape on each piece and removing it when the piece has been glued down. I did not do this, as you can see. Big mistake.


Let dry for 24 hours. Before hanging it, test that you did glue all of the pieces down by gently raising the board up and tilting it.
If a piece falls out, don’t worry. Just re-attach with more liquid nails.


We used drywall screws and screwed our piece of plywood straight to the wall. Then I touched up the screw heads with more glossy white paint. You can also attach the mirror to the wall by using two eye hooks and picture hanging wire.


Then stand back and enjoy your work of art. You are bound to get some ooh’s and aah’s from this little project.

Read more