Archive for category: Boy Type Crafts

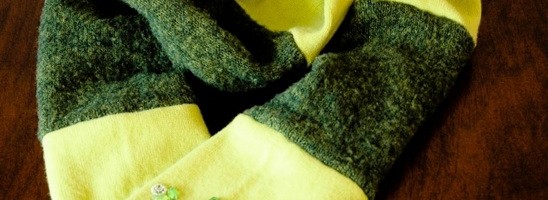
Recycled Sweater Scarf

I own several cute sweaters that have have seen better days.
Pilly, accidentally shrunken and worn out in places, these sweaters were on the verge of being tossed out.
But the fabrics were soft and cozy and they asked me for a second chance.

Armed with my old, pilly sweaters and with the need for wintery accoutrements; I forged into the unknown world of scarves and mittens…with a seam ripper at my side.
(So, as not to overwhelm, this tutorial will focus on the scarf. I’ll add the tutorial for the mittens later.)


Here’s what you’ll need to make your own sweater scarf:
Two old sweaters
Scissors
Seam Ripper (if you sew like me)
Straight pins
Tape measure
Thread and Bobbin to match
Sewing Machine


Cut the sleeves from the body of both of the sweaters. One of my sleeves had pretties on it, which I placed strategically at the end of the scarf.


Measure the overall length of your sleeves and divide by three, cutting the sleeve in thirds. Each of my three pieces measured to be 6 1/2” long. A typical scarf if about 50-55” in length. Mine ended up being about 58”.


Lay the cut pieces out in an alternating pattern. I used the sleeves of my lime green sweater to be the end pieces of the scarf.


Cut along the old seam of each of your pieces, laying them open flat.


Pin each flat piece to the next, right sides together, with a 1/4” seam allowance.


Double check that the right sides are all on one side of the scarf by laying it out flat.
My scarf started resembling a caterpillar at this point.


Sew together each of the pinned pieces on the wrong side of the material.


The seams should all be on the wrong side of the material. If not, pull out your handy dandy seam ripper out and get to work…


Fold the scarf in half, lengthwise. Pin together, leaving a 1/4” seam allowance.


Once the length of the scarf has been sewn a fresh new seam, turn it inside out.


I left the ends of the scarf open, but you can sure as heck sew yours closed. I wanted the option of smuggling candy inside of them if need be.


Try the cuteness factor of your scarf out by wearing it around the house. Add sassy stances and flip the end of the scarf around your neck until your husband notices.
When he asks you why you are wearing a scarf when it is still 94 degrees outside, tell him that you saved him $35 by making your own scarf from old sweaters.
I guarantee you that he will love your new scarf.
(Make sure you stop back by soon. I’ll be putting up the tutorial for the matching mittens for your sewing pleasure!)
Read more

How to Make a Sock Giraffe

I tend to bust through my socks quickly. I hate to admit this, but I must have very pointy toes.


And I am a firm believer when life hands you holey socks, you make stuffed giraffes out of them. This is not a fine science, and it’s best if you have two pairs of socks that are alike in size. But, if you don’t-improvise.


To make this sock giraffe, you will need four small socks that are cute in nature, scissors, a tape measure and a sewing machine.
If you have two opposing sock patterns, this makes for one cute giraffe.


You will also need a funnel and jasmine rice. You could also use dried beans or corn kernels…but I like the way the jasmine smells.


Cut the elastic band off of the opening of one of the pairs of the sock.
Then cut both socks from the top to the bottom on the back side (the side where the heel would touch).


Choose one of the two socks to be the giraffe’s head and neck. The other will be the stomach and booty.
The sock you chose for the head/neck, from the toe of the sock, cut two inches up. This will be the mouth.
I chose to take one inch of material out between the toe and the heel from the head/neck sock in order for the giraffe’s head to be proportionate to the body.


Turn all of the material inside out and lay flat.
Pin the ‘mouth’ to the ‘head’ by unfolding it first. Then, sew the ‘mouth’ to the ‘head’ first with a simple straight stitch.
Pin the ‘head’ to the body by unfolding it first. Then, sew the ‘head’ to the body’.


Time to use up your other pair of socks! Cut from just where the heel seam ends towards the toe of the sock, two inches in width. These will be the back legs. The heel of the sock will create a natural hip for the giraffe.


Now, cut the tip of the tow off of the sock to create a straight end for the leg which will be the giraffe’s foot. Turn the leg piece inside out and sew it together, leaving the straight end (giraffe’s foot) open to stuff with rice later. Save the toe piece to attach to the belly later on.


Cut the remaining section off of the sock we’ve been using. This will be the giraffe’s belly.
The square section of the sock will create the giraffe’s two front legs. Cut this square section in half.


Here is a shot of what the giraffe might look like before we are done sewing it.
I changed up the ears and tail, so don’t get too attached.


Remember our belly piece and the toe piece we saved? Sew them together to look like the picture below.


Here is the belly sewn together. Isn’t it cute?


With the belly piece and the body piece inside out, pin it to the body by starting at where the giraffe’s booty would be until you get to the neck.


Sew the belly to the body and straight up into the neck.
When you turn the body/belly right side out, it should look like this, but with the head attached and sewn together as well.
(You will notice that I had forgotten to sew the head to the neck first. Big mistake, please ignore this little oversight.)


Once you have sewn the entire seam up through the neck and into the head, leave an opening at the mouth in order to put rice through.


I used some leftover material from the second pair of socks to make two triangular ears about an 1” tall by 1 1/2” wide and the tail about 3” long and 1/2” wide. Leave an opening for the rice by sewing together only three sides of each appendage. Fill them each with rice using the funnel if necessary (you don’t need to fill the tail with rice. Pin them close and hand sew the ends.


I cut little fringes on the tail for bonus cuteness.


Now, it’s time to fill the body with rice. Using the mouth hole that we left open, fill this cute little body with rice until he’s floppy. Sew a seam where the neck meets the body by separating the rice and running a straight stitch back and forth several times. You do this to keep the neck full of rice. Otherwise, the rice will continue to just fill the body up. Pin the mouth closed and hand sew it together.
Pin on the body where the legs and tail will be. Pin on the head where you would like the ears to be.


Pin the appendages to the body and hand sew them on.


Hand sew the eyes on with a different color of thread by simply going over the same spot several times until it looks like this.


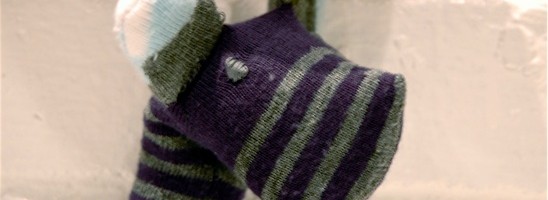
This is our cute little giraffe after he has everything sewn on. How cute and floppy is he? Or she?
I guess it’s up to the creator what the giraffe is….


My giraffe preferred the name, ‘Mr. Cool’, so I guess he’s a boy. Now, all you have to do is find someone who is in desperate need of a floppy giraffe and give this to them.
I gave mine to my nephew. Who in your life would want a floppy giraffe?

Read more