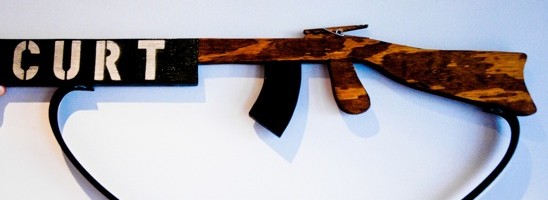
Archive for category: Boy Type Crafts

Wooden Christmas Garland

Decorating for Christmas is something I look forward to all year-storing things away that I collect throughout the changing seasons-until I feel that first nippy bite in the air.
One of my neighbor’s had their visiting father-who I have come to adore-knock on my door this past spring. It was no surprise that he came to me with a stack of cedar chunks from a felled tree.
And to quote the father (with a severe southern drawl), “When I saw these, I just knew if anyone could do something with them, it’d be you.”
Apparently, my reputation precedes me….

And I hope I haven’t let him down or failed his expectations of just what I could “do with them”. For next to nothing, I have a unique garland made from reclaimed cedar wood that Anthropologie is probably jealous of…or at least, I’d like to think so.
I’ll be sharing the tutorial on how to make the cute little blue, brown & red trees next week.


Here’s what you’ll need to make your very own Wooden Christmas Garland:
Chunks ‘o Wood (mine were about 9″ in diameter)
Rope (I used 1/2 twisted nylon rope-blue hawk is a pretty good brand from Lowe’s)
Palm Sander and 80+ grit Sandpaper
Your favorite color paint/spray paint
Hammer & nails (not pictured)
Stencils
Blue Tape

Let’s get started!
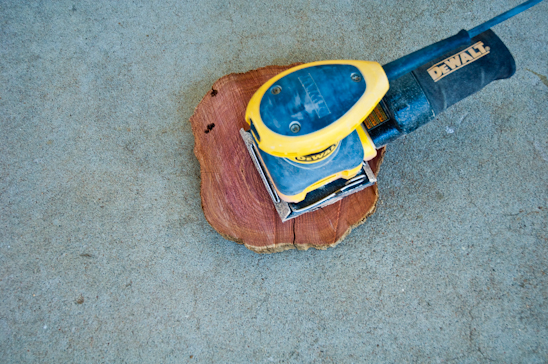
 

Lightly sand the wood, going with the grain if possible. I sanded mine just enough to not have burrs or splinters. I wanted my garland to be rustic.
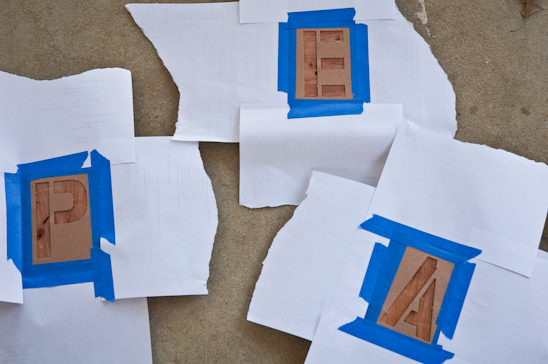
 

Choose your saying. I went with “Peace”, but considered “Boink”, “Poop”, and “Elephant”. I really didn’t have enough wood to do the latter and was outvoted on the first two by my visiting mother-in-law.

Tape down the stencils with blue tape, adding scrap paper if needed to protect the rest of the wood.


Spray away! I went with two coats, just to be safe.
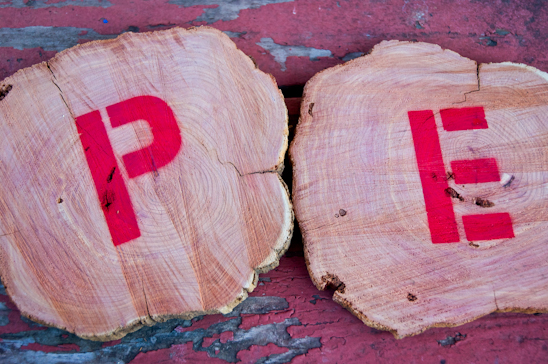
 

Remove the stencils. Stand back. Ooh and ahh until the neighbor gets curious. Then tell them to quit snooping, this is a top secret project.
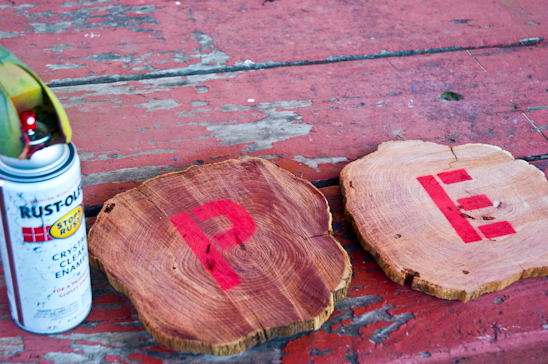
 

I gave the wood a light coating with a Crystal Clear Enamel, but you don’t have to. You could also add a layer of polyurethane instead. Either acts as a protectant and gives the wood a little sheen.
The “P” has been sprayed with it in this picture, but not the “E”.
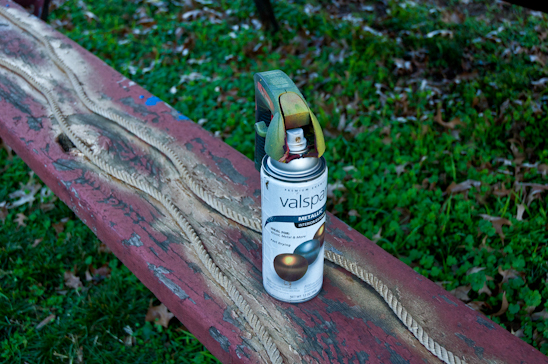
 

Spray paint your rope, if you so desire. I went with shiny, shiny gold. I like gold things-they’re kingly.


Once everything is dry, use your hammer and small nails to tack in the rope to the back of the wood. I used two nails per chunk of wood.


Hang your Wooden Christmas Garland where your little heart desires and enjoy.
Then call your neighbor to tell them you just finished your top secret project and you also have some warm cookies to share.
I bet they’ll be over in two shakes of a kitty’s tail.

Read more

DIY Family Board Game

Our families both appreciate hand-made gifts for Christmas-especially if the gifts are not of the socks or underwear variety.
So, when it came close to Christmas, Biceps and I decided to make a DIY Family Board Game for each side of our families.

The family loved it-who doesn’t like to hear questions asked about themselves?-and it has become a tradition to play our game together, adding new cards each year. I’ll show you around the game and then give you a step by step tutorial on how to do it yourself!


We personalized the entire game by creating question cards that pertain specifically to our family using old stories, funny memories and anything that might embarrass each one of us.


We harvested old family photos and glued them to the board, using street names from our hometown to guide the way around the board.


We also personalized game pieces that are meaningful to our family-my dad swears every year that the Christmas tree grows on the way home from the forest and he also can put away two ginormous bowls of popcorn in one sitting.


We then decorated the box with stickers and photos, recalling yesteryears of campfires, sleeping bag rides and such other childhood awesomeness.


And of course, a very specific set of rules was implemented by the one and only rule giver-Biceps.
I don’t need no stinkin’ rules.
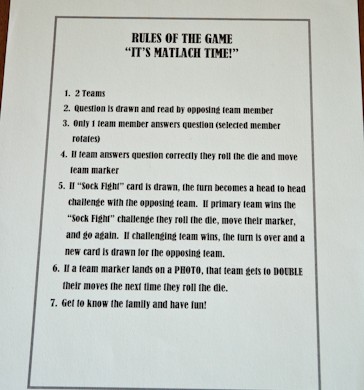
The rules are pretty simple-divide into two teams, one team draws a question card, but only one member of that team gets to answer the question. If they answer correctly, they roll the dice and move that many spaces. Then the next team goes.
BUT-if you land on a “Launchpad” (a photo along the path), you get to double your roll the next go around.
Pretty simple. Except Biceps threw in a bunch of more rules…he is such a rule monger…


It was a rather simple process to make the game and a bonus was the miniscule financial investment. Like $4.00 or so. The whole idea was a real win-win.
Now since you have witnessed all of this DIY Family Board Game-let me tell you how I made it!


Here’s what you’ll need to make your very own board game:
An old, neglected board game (I don’t understand Parcheesi, so it was sacrificed)
15-20 sheets of Card Stock (for the question cards, I used gray)
4-6 Sheets of Card Stock (to cover the board, I used a light tan)
Rubber Cement
Markers
Old Family Photos
Stickers (optional)

To play the game:
Game Pieces (I used a mini tree and popcorn box I already had on hand and hot glued it to a penny)
Dice
Timer (I bought mine at a educational supply store for $3)
Playdough (not pictured-it dried out because of inadequate lid tightening and I need to buy some new ‘dough. Deal with it.)


Rubber Cement the card stock to the game board. Pay heed to the folds in the board and cut your card stock accordingly.


Once the board is covered and the rubber cement is dry, cut out family photos to decorate the board with. These photos became our “launchpad”-meaning, if you landed on them you got some sort of bonus roll/move.


Glue your photos down, making a definitive “START” and “STOP”.


In between the “START” & “STOP”, create a meandering and colorful path around the board, spicing up the path with the occasional photo (Launchpad).


Now, paint, cover with a fabric or whatever decor you desire to the outside of the game’s box. Add additional stickers, sayings, or more photos that mean something to you and yours.


Here is an example of our rule sheet printed out on card stock. They are your typical multiple player board game rules with specifics thrown in for our family.
You may copy these rules for yourself, make up your own, or just make them up as you go along-that could get exciting.


Up until now, things have been smooth sailing for you. Now comes the slightly more difficult task of creating questions. We tried to make sure our questions had a specific answer, were known by most family members, and slightly obtuse.
For example, instead of: “What is Grandpa’s first name?”
Asking: “What was Grandpa called as a boy following a disturbing fishing incident?”

We also added another twist-kind’ve a “wild card” known as “Sock-Fight!” on my family’s side and “Breaker-Breaker!” on Bicep’s side. These “wild card’s” cause a head to head challenge with the other team. If you beat them at a skill; drawing, sculpting or charades, you get to go again. If you don’t beat them, you loose your turn.

We spent a long time collaborating on the questions, re-wording, re-writing, making a template on my computer and then printing them off onto the card stock. (Someone is a perfectionist-but I won’t name any names). I then skipped over to a copy center and used their cutting machines to make each card precisely the same size- 2 1/4 x 2 1/4.


And that, my dears, was our DIY Family Board Game. The family loves it because it’s about them. I love it because it’s become a family heirloom that is added to each year with a marriage, a birth, or just another embarrassing moment.
As far as homemade gifts, this one was a dead-ringer.

Read more

Arts & Crap Changes!

I’m back!
Sing it from the mountain tops! After 8 months of being gone from the blogging world, I am finally back up and running. I didn’t choose to be away, fate chose it for me. It was a rough loss for me back in January when my blog failed via the platform, Iweb.

If I could cut Iweb in two, I would.
Or at least pinky shear the programmer’s button up short sleeved shirts.


I had built the site myself in Iweb and for some reason, after a year of blogging with that platform, Iweb decided it had had enough. The ability to update my site, add posts, change anything, was a distant memory.


I pinched my pennies for several months and hired a web designer to build my site (correctly) for me. Once the framework was in place, I had the duties of importing all of my old posts-a task that required copy and pasting each bit of text, each picture, each title…you get the idea. I lost some of my “pretties”, but sacrifices had to be made.

I have a few exciting things to catch you up on from my eight months of absence. I’ll be expanding on each of these items over the next couple of months. But, I thought you’d like a bit of an overview to wet the ol appetite.

So, here are a few changes that have gone on since you last heard from me:


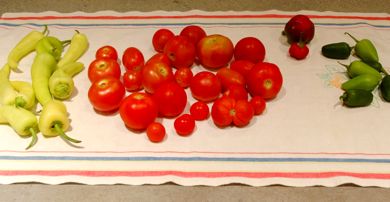
I planted my first full-fledged garden this year. The harvest included, but is not limited to: green beans, spinach, tomatoes, dill, basil, zucchini, yellow squash, potatoes, red and white onions, carrots and tons of peppers…
I’ll share with you some organic and natural ways to keep pests away from your garden, ways to improve the quality of your soil and cheap things you can use to stake up your plants.


I, with the help of Biceps, built a composter for my garden-one that spins ’round and round. It’s a lot of fun to watch it go “round and round”….and to watch it help my plants grow big and strong. I save all of the kitchen scraps and yard waste, throw it in the barrel and give it a push. I’ll teach you how to make your very own.


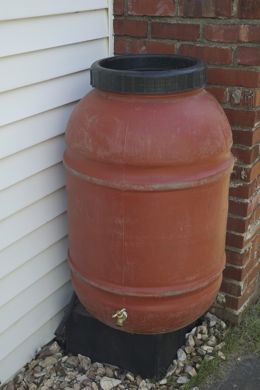
I also made two rain barrels to capture the water running off of our roofs. Did you know that 1″ of rain on an average sized roof (1500 sq ft) can equal 900 gallons of usable water? That’s a lot of water….

There’s plenty more where that came from, but no need to cram everything in. I’ll be sharing with you each of these tutorials with step-by-step instructions, along with pretty photos.

I am ecstatic to be back in the saddle again. The crafting saddle, that is.

Read more

Rad Rubberband Guns and Mayhem

Biceps and I went the home-made route for our gifts this year. The ladies were easy. But the men? We toiled over what to make for those jokers. With ages ranging from one to a sixty something, it’s difficult to make a gift they could all enjoy. But the Lord offered His wisdom to us, bringing us an epiphany.
What do all men love, no matter their age?

Weaponry. And the bigger, the better.
With that epiphany came the conclusion that our ‘Man Gift’ would be a Rubberband Gun. It was cheap, it was easy and most of all-we were able to do it together-so it was fun.


Here’s what you’ll need to make a Mayhem Inducing Rubberband Gun:
Foam core (or a like material to be used as the gun stencil)
Plywood
Palm Sander and Medium Grit Sand Paper
Microfiber Cloth or lint free rag
Oops Paint/Stain
Skill Saw or a Jig Saw (not pictured)
Scroll Saw (depending on the intricacy of the design)
Clothes Pin
Rubberband
Tape Measure


You’ll also want:
5 Minute Epoxy
Brad Nails
Foamy Brushes

And, we added a few optional accessories that aren’t necessary, but are pretty stinkin’ cool:
For the strap:
Three feet of 1” canvas webbing (from the Army Surplus Store)
Two Drywall Screws and washers per gun to attach the strap

Name or initials:
Spray Paint
Stencils


Using the foam core, draw and cut out the stencil of the desired gun design. Trace the design onto the plywood. Cut the basic design out of the plywood using the jig saw or a skill saw.


If the design is intricate or has tight curves (heh heh), I recommend using a scroll saw for the finishing touches.


Once the design is cut from the plywood, sand the wood smooth with the palm sander.


Remove the dust with a lint free rag or a micro fiber cloth.


Apply the stain with the foamy brushes and let dry. I like to wear gloves, but you may like that dirty nail look that is virtually unremovable for weeks, even when you have an important meeting….


Once the stain is dry, cut in the paint with another foamy brush and let dry. Either paint or stain the clothespin during this process-depending on your preference.


If applicable, line up your guns while they are drying and revel in their glory. I know that’s what we did.


Disassemble the clothespin and apply 5 minute epoxy to the bottom side of the clothespin.


Glue the bottom side of the clothespin to the desired spot on the gun. We glued our clothespins 17” away from the release point. Brad nail the bottom side of the clothespin to the gun for added strength. Reassemble the clothespin once the epoxy is completely dry.


The next two steps-applying a name and adding a strap-are optional. We were making fourteen of these suckers, so we decided to put names on each gun in order to keep them straight within the family.
Tape the stencils to the gun using a quick release tape or blue painters tape. Mask off the rest of the gun to protect it from overspray. Spray the name with several light coats of spray paint.


The strap was made with a three foot piece of 1” canvas webbing. Use a washer to protect the screw from going completely through the strap.


Screw the strap into the desired spots on the gun.


Here is one of our many finished products. So stinkin’ cool.


And here is the small arsenal of gifts once completed, taking over our home.


Biceps insisted he test out each of the guns.


I was caught in the line of ‘friendly fire’ several times.


He protested his innocence. And he’s so dang cute, he’ll get away with almost anything.


Each recipient fully tested their new weapon. At my house. For hours. With exuberance and glee. I suppose it’s my fault. I had a part in making them.
Merry Christmas, boys. Merry Christmas.

Read more