Archive for category: Arts & Crap

DIY Nursery Mobile-Cloudy with a Chance of Rain

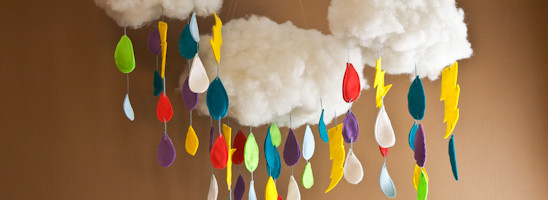
The baby belly is growing, the pants are shrinking, and the DIY in me has come out with full force. I wanted a colorful and whimsical mobile for above the crib for Baby G. However, I didn’t want to pay the price from some fancy store that also sells $54 burp rags.


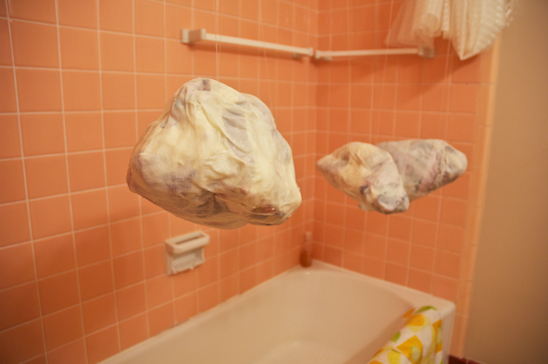
Cloud Mobile-Far Away
So, after gathering my trusty hot glue gun, a roll of paper towels, fishing string and colorful felt…I got to work. I spent about $4 to make this mobile. Granted, I had a few of these things on hand. If you have to start from scratch-I estimate about $10-15 to complete this project. Not bad for a pregnant woman. Not bad at all.


Cloud Mobile-Ingredients
Here’s all that you’ll need to make your very own Cloudy with a Chance of Rain Mobile:
Newspaper
Masking Tape
Roll of Paper Towels
Flour
Thick Fishing Line and quilting needle (or a very tough needle)
Pillow Stuffing
Hot glue gun and glue sticks
Colorful felt and thread
Ric Rac, Ribbon, or something similar
White swag hooks (from Lowe’s or Home Depot, etc)
 

Cloud Mobile-Newspaper Balls
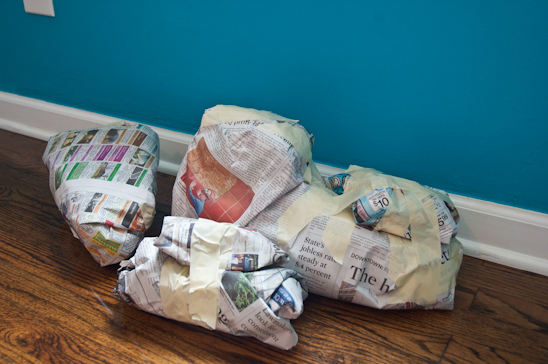
First, make “clouds” from balled up newspaper. Make them the appropriate size for the space. I chose to make a large, medium and small cloud. Use masking tape to secure the newspaper together.


Cloud Mobile-Paper Mache

Next, use a one part flour to 5 parts water mixture. Heat the water up on the stove and slowly whisk in the flour until it’s the consistency of a thick soup. Let cool.

Dip paper towels that have been cut in half into the soupy mixture and apply to the newspaper clouds, one at a time. Cover the entire cloud with a thin layer of paper towels.


Cloud Mobile-Fishing line

While the newspaper and paper towels are still wet, use the quilting needle to pass a long piece (about 4′ total) of fishing line through the top of your cloud, about 3-4″ down from the top. Allow an equal amount of fishing line on either side (about 2′). If the cloud is larger, I recommend having two places that you pass fishing line through. This will be what the mobile hangs from.


Cloud Mobile-Drying

Tie the (2) 2′ pieces of fishing line together and use a coat hanger to suspend the clouds. Let dry overnight.


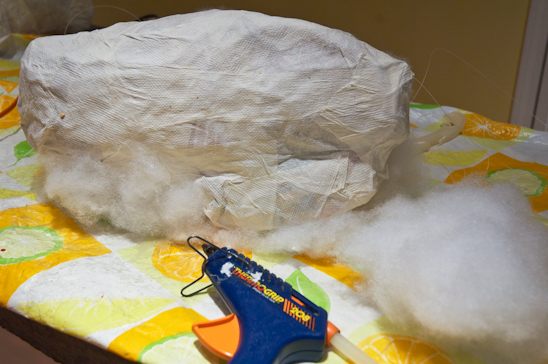
Cloud Mobile-Hot Glue Stuffing

Once the cloud is dry, cover the entirety of it with the pillow stuffing by using a hot glue gun. Be careful not to burn your fingers as I did, over and over and over….


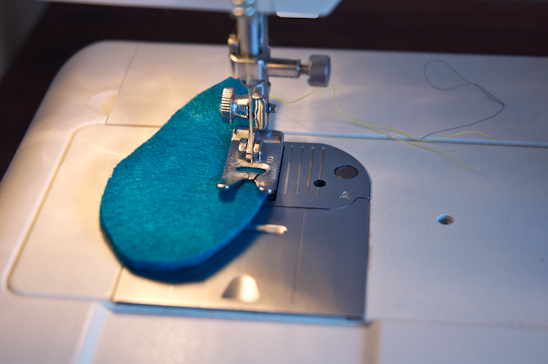
Cloud Mobile-Sewing Raindrop

Next, cut out of the felt: raindrops, umbrellas, lightening bolts, cats and dogs or whatever else your little creative mind comes up with to hang from the bottom of the cloud. I cut out two pieces per item to give it a little more strength and dimension.


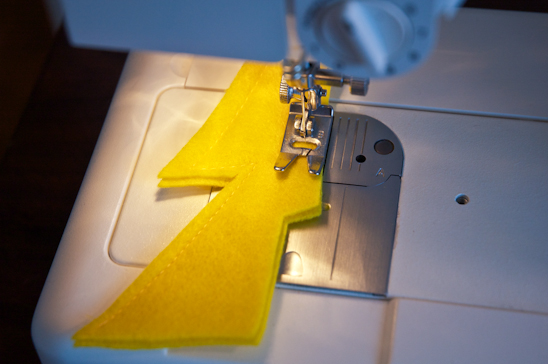
Cloud Mobile-Sewing Lightening Bolt

Sew the two pieces together around the outside of the object.


Cloud Mobile-Sewn Pieces
After you have sewn all the pieces, arrange them in the order you’d like to see them “drop” from the cloud.


Cloud Mobile-Ric Rac
Attach the pieces to one another using a hot glue gun. I chose ric rac, but you can use ribbon or anything else that you fancy.


Cloud Mobile-Completed Bottom Side
Part the stuffing at the bottom of the cloud so that you can attach the ric rac with a hot glue gun. I used a wooden skewer to push the ric rac into the bead of hot glue to avoid burning my fingers-again.


Cloud Mobile-Close Up
Hang each cloud from the ceiling on a swag hook, using the fishing line you sewed through the top to secure it to the hook.


Cloud Mobile-Far Away

Stand back and enjoy your handiwork. I know that Baby G. is going to love it!

**See what else I’ve made for the nursery: DIY Plaster Animal Heads


Linking up to these Parties:
My Repurposed Life

The Shabby Nest

Just Wingin’ It 

French Country Cottage

My Romantic Home

Bacon Time


Read more

DIY Plaster Animal Heads

I am in the throes of decorating our nursery. I know that our baby won’t care what the room looks like. Heck-as a baby-I removed the paint my father laboriously put on my nursery walls with a wet wipe.

However, since I will be spending an inordinate amount of time in this room, I wanted some pretties to look at. And, of course, I didn’t want to spend very much doing so-thus my DIY Plaster Animal Heads. If you have the patience of a cucumber and a few hours each day, you too can have very inexpensive animal heads custom made to your liking!


Plaster Heads Begin
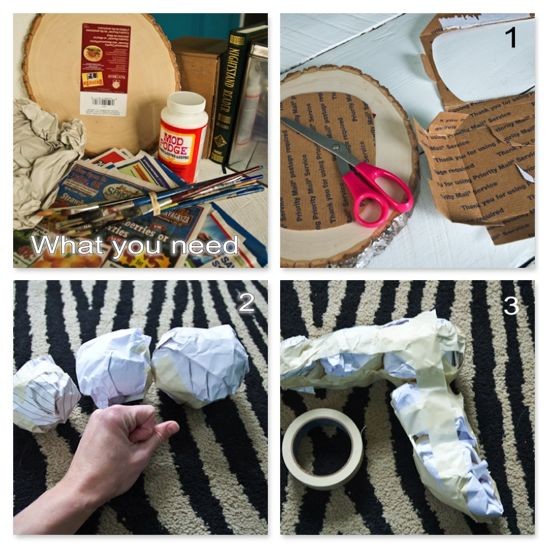
Here’s all that you’ll need to make your DIY Plaster Animal Heads:

Newspaper, Packing Paper
Paper Towels
Masking Tape
Cardboard
Mod Podge
Tissue Paper, Book Pages
Paintbrushes, Paint
Glitter, other accessories to decorate if desired
Plaque (I bought mine from a hobby store)
Brad Nails, Hammer
Flour, Water

Step 1:
Cut out a piece of cardboard that will be the backer to the animal head. Make sure it’s smaller than the plaque that’s been chosen.
Step 2:
Make balls out of newspaper or packing paper that will be the animal head and neck. Tape the balls together individually.
Step 3:
Tape the entire head and neck together.


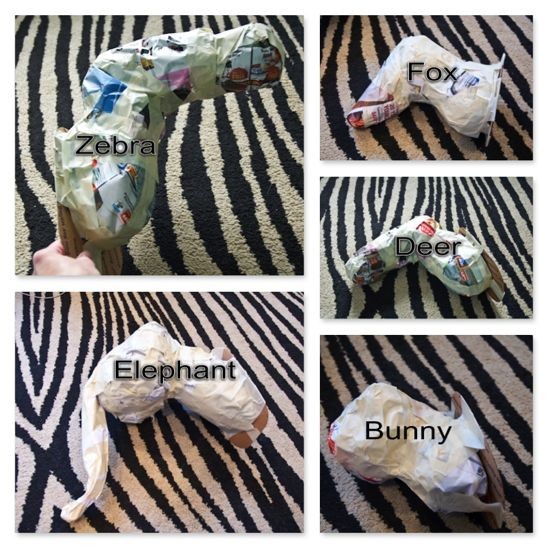
Plaster Step 2
Step 4:
Add a final layer of newspaper to smooth out any valleys and build up any areas that are needed for the contour of the head. Use masking tape to attach the newspaper and the cardboard backer to each head.


Plaster Step 3
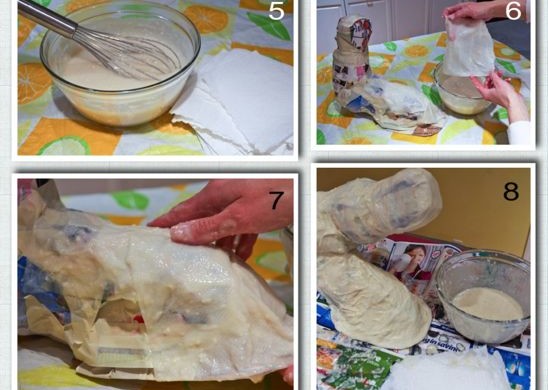
Step 5:
Use 4 parts water to 1 part flour to make the “plaster”. Heat up on stove and slowly whisk in flour until the consistency is a thick and soupy. Let cool.
Step 6:
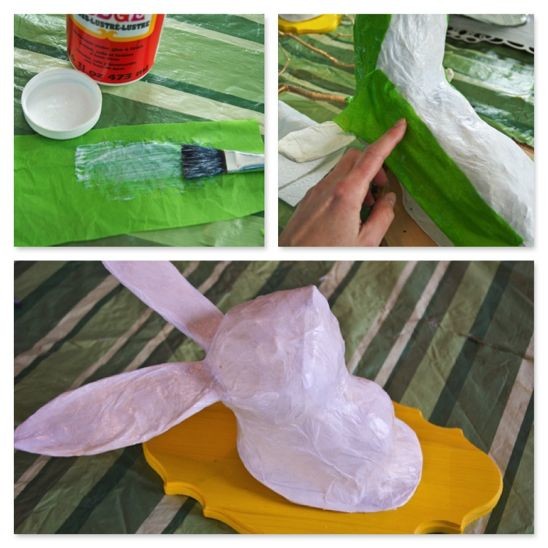
Cut paper towels into 3″ x 4″ rectangles, or somewhere close to that size. I cut my select-a-size in half. Dip into the soupy plaster and squeeze off the excess.
Step 7:
Using one paper towel at a time, add a single layer of the paper towels to the head and cardboard backer.
Step 8:
Cover the entire head and cardboard backer with the plaster paper towels.


Plaster Step 4
Step 9:
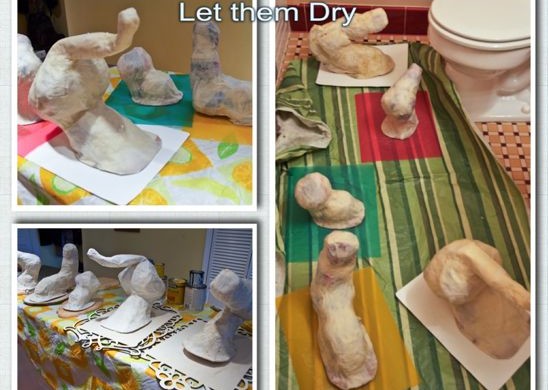
Let the head(s) dry completely overnight or for several hours. It was very cold out, so I placed my heads in a small bathroom and used a space heater (safely) to speed up the process. Rotate the heads and make sure the cardboard backer is completely dry as well.


Plaster Step 5
Step 10:
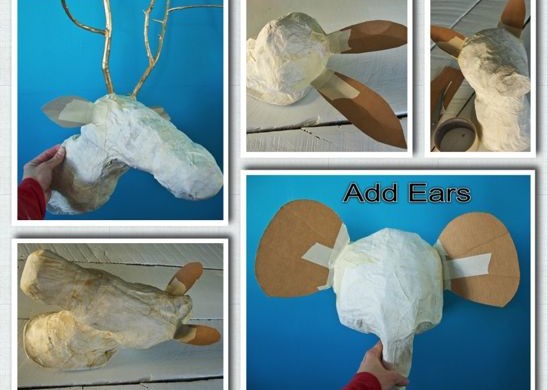
Cut out ears for each head and use masking tape to attach to the heads.


Plaster Step 6
Step 11:
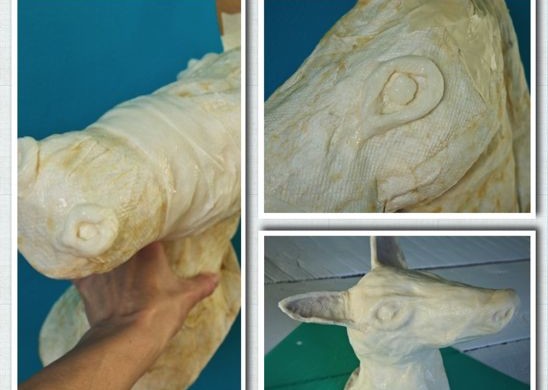
Use another round of plaster and paper towels to build up eye and nose formations. Cover the entire head once more, along with the cardboard backer and the ears with another layer of paper towels.
Let the head(s) dry completely overnight.

While you’re waiting on them to dry, paint your plaques!


Potholes and Pantyhose
Step 12:
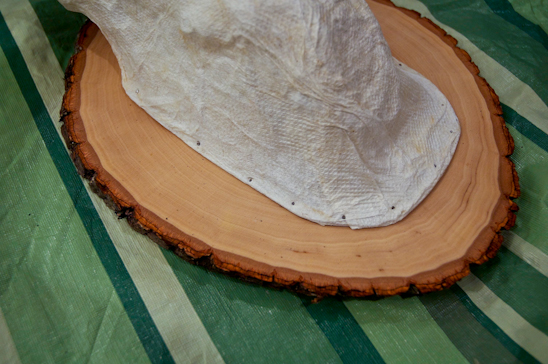
Once the head(s) are completely dry, attach to the painted plaque by gently using brad nails and a hammer. (I went the extra mile and added a little hot glue to the cardboard backer before attaching it to the plaque. I don’t think this step was necessary, but it made me feel better.)


Plaster Step 8
Step 13 Alternate (1):
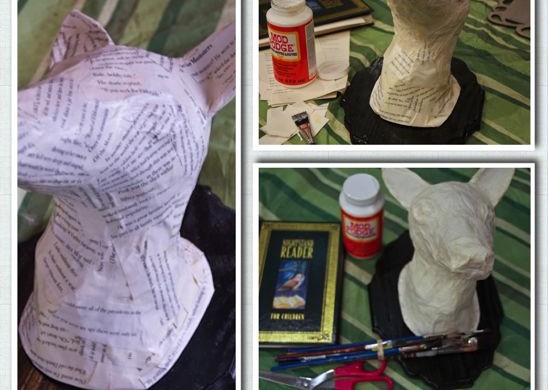
Here comes the fun part-decorating the heads! There are many ways to do this. Here you can see that I used mod podge and the pages of a book to cover the entire head. After cutting out a stack of small pieces from a book, I brushed a thin layer of mod podge on the back side. I placed the piece on the head and brushed another thin layer over the top. I repeated this process until the whole head was covered.

I had five heads, so I covered two with book pages.


Plaster Step 9
Step 13 Alternate (2):
Here, I used the same mod podge process, but utilized fun tissue paper instead. I covered the three remaining heads with tissue paper.


Plaster Step 10
Step 14:
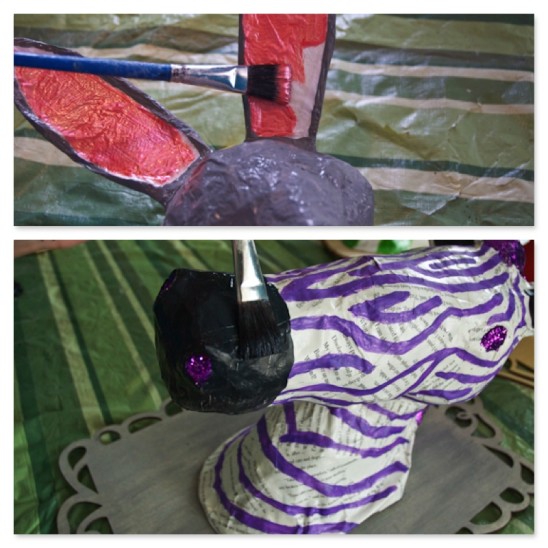
Now, it’s time to paint! Get creative and crazy. Add glitter, rhinestones, mirror pieces, wires for whiskers, feathers, or whatever you have on hand. (Let dry completely between coats of paint).


Potholes and Pantyhose
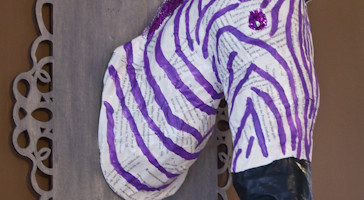
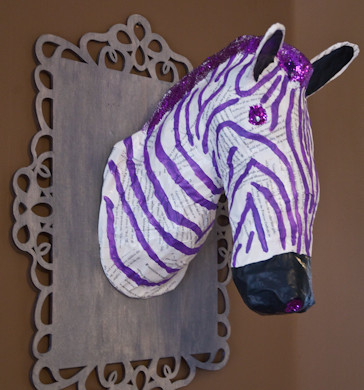
Here are my finished heads. This one I call Frank the Zebra.


Potholes and Pantyhose
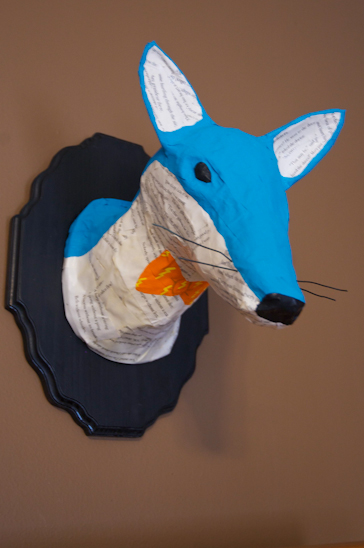
This is Lightening McQueenFox.


Potholes and Pantyhose
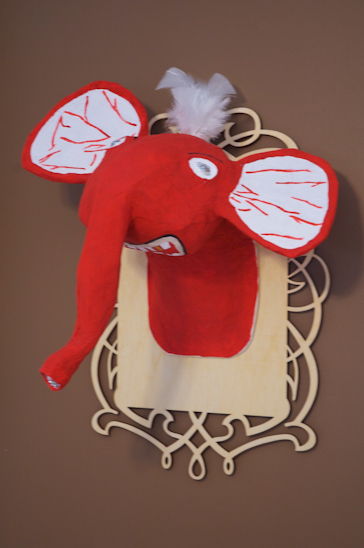
This is Goldy the Elephant.


Potholes and Pantyhose
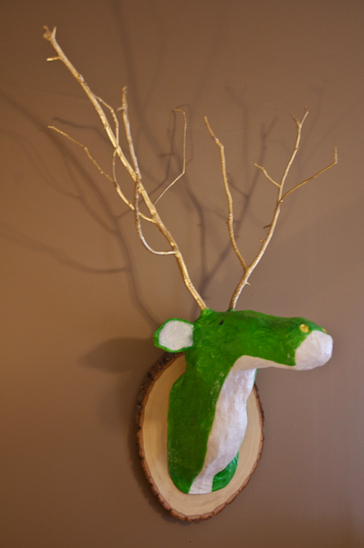
This is George. Just George.


Potholes and Pantyhose
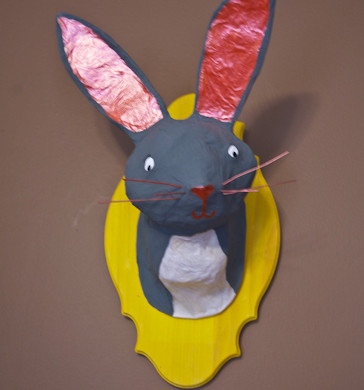
And this is Twinkles the Bunny.

I figured that I saved about $700 making these myself. Not bad for a few days’ work. If you made an animal head, what would it be?

Read more

Baby & Nursery Preparedness on a Budget

Apparently, there is a lot to do to prepare for the birth of your first. Little did I know the path we were on when we first found out we were with child.

Here are a few things I never saw coming and to be honest, slightly blindsided me:


Stretchy Pants

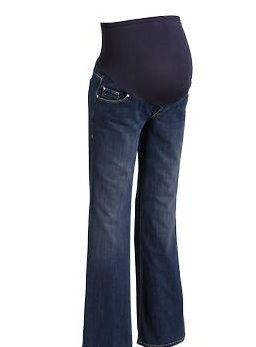
1. I would have to buy stretchy pants-like really insane, elastic stretchy pants.
2. I would be using cocoa butter religiously (and the smell always makes me want cookies) on my ever increasing belly.
3. People would touch my stomach. These are people I don’t know and people I do know and people I wish I didn’t know.
4. I would develop a strange brown “racing stripe” down the center of my stomach.
5. I would actually find baby clothes with tiny animals on them-cute.

However, these are minor things to adjust to compared to preparing a nursery for this tiny lad/lass. I’ve always thought, “Give the kid a dresser drawer to sleep in, some milk to drink and a clean diaper. Call it done.”

But….


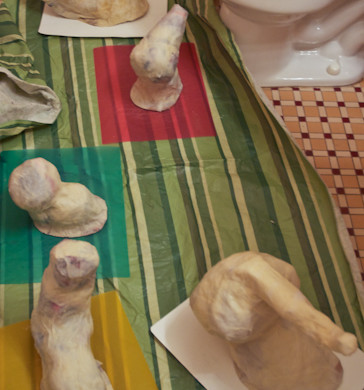
Animal Heads-Paper Mache
…then I start to imagine what kind of a sweet setup I could give to the wee little one, without spending all of their college tuition on a silly room they’ll never remember. (HAH! Like we’re paying for your college! Get a job! Cut your hair!).

With my imaginings, I lay awake at night and plot my grandiose nursery plan. The next morning, I start creating things out of almost nothings. Here’s the beginning of the wall decor for the nursery. I will share a tutorial on this as soon as it’s finished and I make sure the project is actually doable.


Felt-Mobile, Nursery
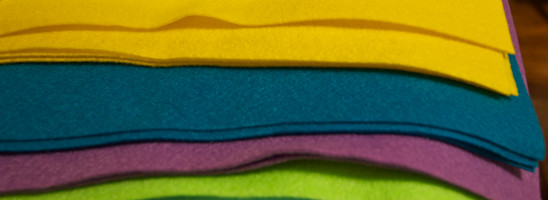
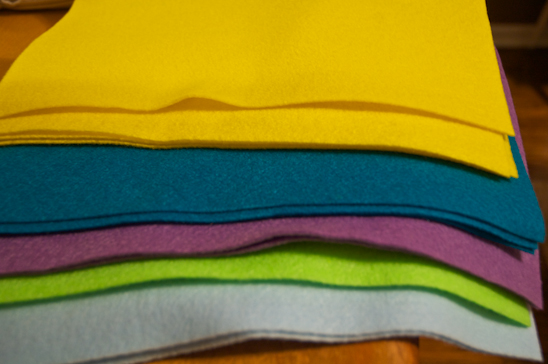
The mobile to hang over the crib came after much deliberation between Biceps and I. We settled on a concept-with which I will share soon. All I needed was some stuffing, some felt, some more paper mache know-how, and a few coat hangers.

PS-Is that felt? Well, it is now!


Curtains-Nursery Decor
Something you must know about me-I hate curtains. Number one: the cats love to destroy them. Number two: they are stinking expensive. Number three: there are never any store-bought curtains that Biceps and I can agree on.

However, when the dollar spent is low enough, Biceps will like almost anything. Enter cheap, heavy duty drop cloths and a little Rebekah-whimsy. This too will be a tutorial I will share-as soon as it’s done. Patience, grasshopper.


Potholes and Pantyhose
And lastly, I must introduce some sort of wooden feature into this baby’s room. Why? Because it brings warmth, it reminds one of nature and of God’s creation…and it’s also inexpensive.

So, maybe this kid will get more than a dresser drawer to sleep in-but they aren’t going to be spoiled, that’s for sure. We all have to make sacrifices, kiddo. And, if I have to wear stretchy pants that sag down to my knees by the end of the day, you can pretend to like your room. Deal?

Read more

Winner-Sawdust & Diamonds Giveaway!

We have a winner! A sweet reader-Krista M.-has been randomly chosen to receive her most favorite, most loved, most oohed and aahed upon piece of jewelry.

I will be contacting you, Krista, to put you in touch with the artisan of all that is Sawdust and Diamonds Jewelry.

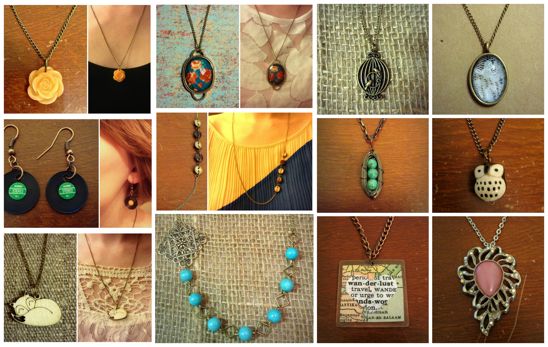
And for those of you that weren’t able to enter, or haven’t had a chance to drool over this adorable website-please go there now! Check out a few of her lovely pieces below.


Rachel's Website
Get to know the artist, Rachel Watson:

I’m a California girl living in Oklahoma with my sweet husband, Dan. I love reading, writing, painting, people-watching, singing, eating, and creating things. Creating is how I unwind. I teach high school kids all day and grade papers all evening. Getting out my beads, wire and tools is my reward at the end of the day. A couple years ago I started making my own jewelry for myself and my friends. When enough people approached me about buying it (one day I sold the necklace off my neck!), I decided to start a little online store. It has been such a blessing to create things that people enjoy and to be able to afford my crafting habit. It’s also been a way for me to raise support for my friends who are adopting or are doing missions work overseas. I use whatever I can find to make jewelry: retro pins, dictionaries, magazines, lace, buttons, charms, etc. Every sale I make is exciting to me, and allows me to keep on creating! The most important thing about me, and the reason I have joy and hope no matter what happens, can be summed up in the words of this well-known hymn:
“I once was lost, but now I’m found, was blind, but now I see.” (Rom. 5:8). Crafting is my hobby, but Jesus in my everything. 
Read more