Author Archive for:Rebekah

What a mess! Atlanta Hotels are weird….

Touring for years with my hubby musician, I’ve seen a lot of weird stuff. I’ve also had a hand in making some weird stuff happen to the bands we are on tour with. But, that’s a whole other story.

Let me give you a few fine examples:
1. A Cockroach-the size of a coin purse-flying out of a shower head and onto me at a not so fine hotel.
2. A gigantic plastic cow on a flatbed trailer being hauled by a convertible Dodge Dart.
3. A person that no one knew showed up in our bus, plopped down on the couch, and proceeded to drink our tequila. It wasn’t until I began asking around that we all realized the man was a stranger-a sneaky tequila drinking stranger.
4. A church steeple drove by our window as we sat in a Dairy Queen. Not kidding.
5. An RV burned to the ground on the side of the highway.

That’s enough for now. I’m sure I can rustle up a few more, but we’ll save those for later.

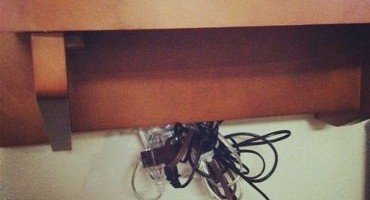
So, here’s a look at one of the weird things that I have witnessed at a hotel in Atlanta, Ga. This was underneath the nightstand that sat in between the two queen beds.

Why? Why was this necessary? How many things could possibly be plugged in to make such a gigantic mess?


Up close, you realize the insanity of the situation. I tried to undo the bunch of wires, hoping to bring organization to my life and peace to my frazzled mind.
However, it was thoughtfully zip-tied together.
Biceps stopped me before grabbing my fingernail clippers to cut through the plastic zip-tie.
And he reminded me that we were only there for a night. And to go to sleep.

Read more

Man Hands?

Dear Readers:
I have shared with you my inadequacies as a human as I begged for help with my hair debacle. I’ve shown you my messy kitchen and have revealed to you my loneliness after the guest go home.

Now, I am guilty of something even more sinister and grotesque.

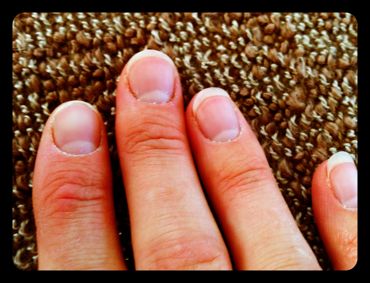
Exhibit A:
These are not man’s hands as you would suppose (or surmise). Whatever adjective works for me.
These are my hands.
Let the record show: Awful cuticles followed by poorly misshapen nails and extreme skin dryness.

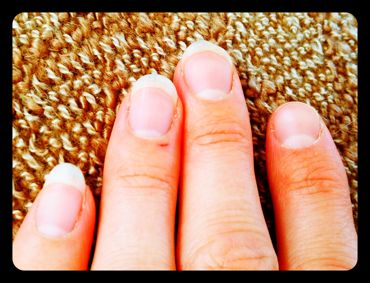
Exhibit B:
Scrapes, scratches and pulled off hangnails contribute to the debauchery.

Let the record show: Nothing is being done to rectify the situation. The defendant is displaying a lifestyle of grouting tile, washing dishes without gloves, sanding wood and anything else women with nice hands don’t do.

The verdict: I am guilty of a heinous crime-Hand Abuse and must serve 1-2 days in intensive therapy to improve the Hand Abuse situation.

Case closed.

Read more

Christmas Clean-Up

It’s time for it to come down. The tree, the holly, the mistletoe, the lights. All of it.
Granted, I have been listening to and enjoying Christmas music since before Thanksgiving. But, it’s time for all of it to be packed up into boxes and stored away in the attic.


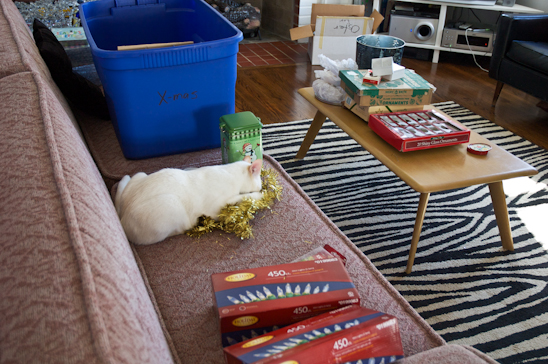
I have had my fill of keeping the cats away from the tree, closing them off from certain parts of the house, or cringing when I hear an ornament hit the floor.
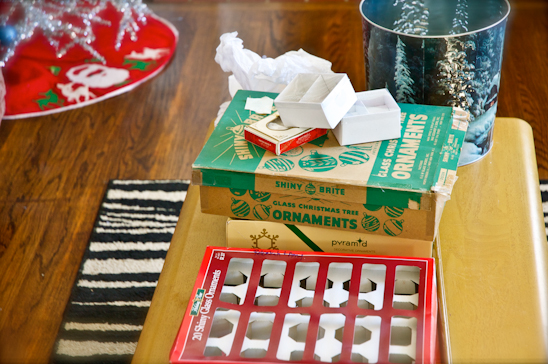
So, I start off by corralling all of my Christmas miscellany onto the dining room table. There are jars, platters and dishes full of bulbs, balls, and tinsel.


After pouring a glass of wine, I turn on Billie Holiday and assess my opponents.


I can never remember how I got all of that into there.
Max and Bianca entertain themselves as they jump in and out of the empty boxes and chase the run-away tinsel.


Certain guilty parties incriminate themselves over and over…


…and over.


Our Christmas ornaments span the years-beginning with my first out-of-college roommate and I co-investing in maroon and gold ornaments purchased from Wal-mart. We spent $5 between us to decorate our tree. That was high-living for us back then.


Now, black and white Ikea balls, along with sparkling blue and silver ornaments have been added to the Christmas decor mix. Throw in a dash of Grandma’s vintage ornaments, vintage deer from the flea market and our yearly ornament purchase, and I am running out of uses for all of them.


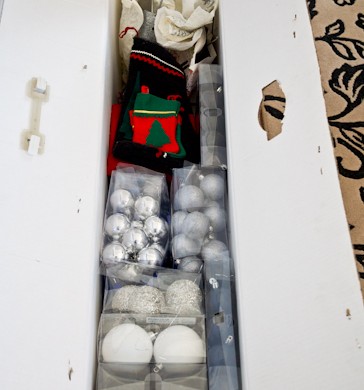
Soon, everything is packed away, taped up and ready for next year’s frivolities. It almost feels as if Christmas had never happened.
Except for the tinsel I keep finding squirreled away in nooks and crannies due in part to my weird cats Bianca and Max.
I don’t think they can let Christmas go either. I suppose we are good for each other.

Read more

Easy Lace Cape-Shirt

My lovely sis-in-law gave to me a set of lace curtains that she could no longer use. What’s a girl to do but make a shirt from them? (This idea works fine with a lace tablecloth, too.)


Within an hour or so, I had a sweet new shirt that goes with just about anything. This may seem like a lot of steps, but it’s just that I’m a little overboard on details, sometimes.


Here’s what you’ll need to make your very own Lace Cape-Shirt:

Fabric Lace-at least 40″ in width, 25″ in length
Thread to match
Scissors
Tape Measure
Straight Pins
Sewing Machine
Heat ‘n Bond Tape
Iron
Lace Edging


First, fold the material in half from top to bottom.
Then fold the material in half from the left side to the right side.
To make the circle that will be your cape, begin by measuring 20″ from the corner fold across the top fold. Place a straight pin at the 20″ mark.
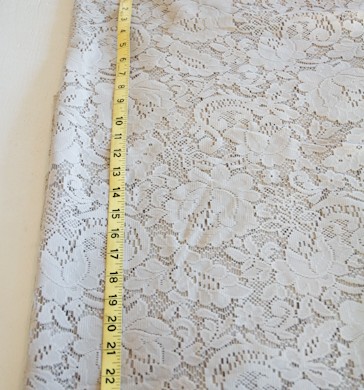
 

Measure 24 1/2″ from the corner fold down the side fold. Place a straight pin at the 24 1/2″ mark.


At a 45 degree angle from the corner fold, measure out 23″. Place a straight pin at the 23″ mark.
Alternately on either side of the 45 degree angle, measure 20 1/2″ at a 22 1/2 degree angle, and 24″ at a 67 1/2 degree angle.


Following your pin marks, cut out the quarter circle shape.


At the corner fold, measure down 2″ and across 2″. Cut out the tiny quarter circle shape. This will be the start of the neck hole.


Unfold the quarter circle to the left, leaving the top folded. This should now be the bottom half of a circle.
Measure and pin 6 1/2″ across the top fold of the lace, centered over the 2″ mark already cut for the neck hole. Increase the neck hole by cutting along these guides making the hole now 6 1/2″ wide.


Measure 2″ down from the already snipped portion of the fabric on only ONE side of the shirt. To increase the neck hole on only the FRONT side of the shirt, deepen the plunge the additional 2″.
Leave the back side of the shirt as is.


With the front of the shirt folded to once again create the quarter circle, measure down from center 4″.


Cut the 4″ slit on ONLY the front side of the shirt.


I used a hem stitch to finish off all of the edges of my lace. You can do whatever you want, but this seemed to work the best for me. So there.


Sew all of the edges on the shirt, including the neck hole.


Once all of your edges are sewn, fold the shirt once more with the neck hole in the front, a fold across the top, creating the bottom of a circle.
On each side, measure 10″ in across the top fold and pin (yellow pin in picture). Then measure from that pin 13″ down and pin (white pin). From that pin, measure back towards the edge 7 1/2″ (pink pin).
(This shouldn’t change the location of the 13″ pin, it’s just a double check that you measured correctly).
Sew two 1/4″ “stays” at the 13″ mark with a quick zig-zag stitch through both pieces of material. This will keep the cape in the right place on the body.


I decided to trim out the neck hole with lace edging. I followed the package directions on the Heat ‘n Bond to apply the edging to the shirt.


I liked using a darker color to offset the gray lace. But, the same color of lace would be just as pretty to make a plainer shirt.


Tah-dah! That’s all there is to it. Slip the Lace Cape-Shirt on over a bold colored cami and call it a day. Below is the back of the shirt.


Simple. Cute. Cheap. Fun.
That’s the way I like my crafts (or crap, whatever…).

Read more