Author Archive for:Rebekah

Holy Cute Pudginess

Softening Harsh Light & Removing Imperfections with Photoshop
I have five super cute nephews. No nieces, just nephews.
(I guess it’s up to me to produce some females in this family.)

I love to photograph my cute little nephews any chance I get.
This little guy, the youngest of my five nephews, can instantly melt your heart with those sweet dark brown eyes.This straight out of the camera shot was a little dark, however. And the background had too many distractions in it. Using photoshop, I did a little quick fixer-upper.
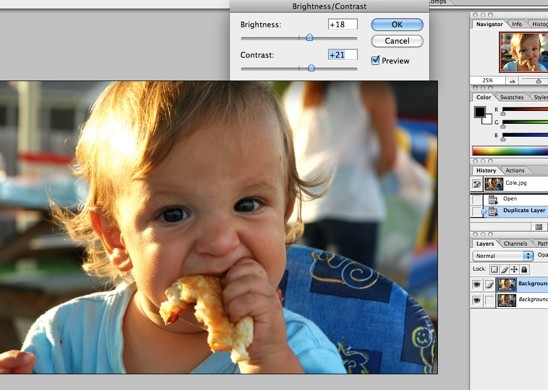

After making a background copy, I clicked on the ‘Image’ tab and then to ‘Adjustments’. I chose to increase the brightness and the contrast of the photo just a smidgen.
Now you can really see those cute pudgy cheeks.


I wanted to soften the harsh sunlight cast on the left side of his face. Clicking on the ‘Filter’ tab and then down to ‘Distort’, I chose the ‘Diffuse Glow’ function. I played with the sliders until I was happy with my image.
The ‘Diffuse Glow’ is rather flattering to skin tones. I recommend it for your portraits.


His eyes were still a little too dark for me. I wanted to try and make them pop, even though they are a dark brown naturally.
Using the lasso on the left hand side, I drew around his eyes. I then went to the ‘Select’ tab and clicked on ‘Modify’ and chose to first ‘Expand’ my selection. Then I chose ‘Smooth’ in the same tab.


For this next function, I have to give props to Pioneer Woman.
With his eyes selected, I clicked on the ‘Filter’ tab, scrolled down to ‘Sharpen’ and then over to ‘Unsharp Mask’.
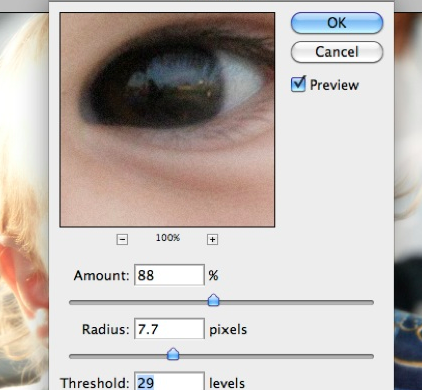

You can see the amount, the radius and the threshold that I chose to increase the brilliance of his eyes.
You can play with these sliders until you like the look of your eyes. But, don’t get crazy-you can make people look possessed if you go too far….
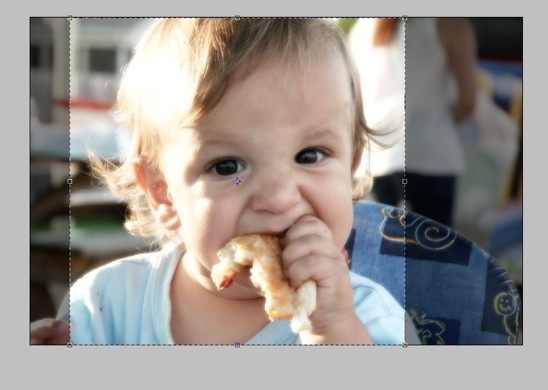

I decided next to tone down on all of the distractions behind his cute little face by cropping the photo.
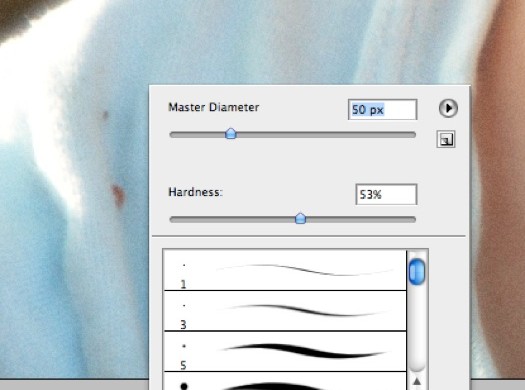

Now it was time to get rid of the tiny imperfections. I chose the ‘clone’ tool on the left hand side and cloned out the food particles on his shirt.
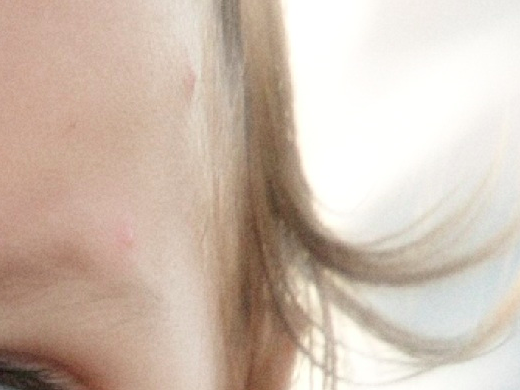

And then I ‘cloned’ out the baby acne on the right side of his face.


This is the ‘after’ with just a few quick fixes. And below is the ‘before’.
But, he’s just so dang cute, no matter what I do.

Read more

The Big Girl Playhouse

There’s this crazy couple that we know that wanted a bigger storage shed.
Husband of said couple requested something large enough so that he wouldn’t hit his head on it.
He also had a budget.
Wife of said couple wanted a dreamy, glass-encased, whimsical, outdoor, greenhouse-inspired ‘space’.
She had no budget.

The planning process was an interesting one.
I was just excited after many meetings and dinners with said couple, to finally put our design into action.


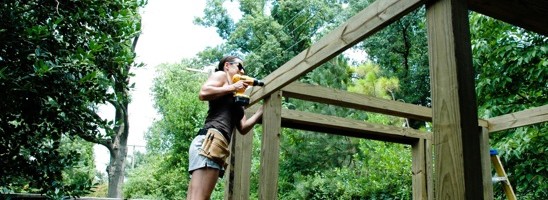
After clearing the land, we used a torture device called an ‘Auger’ to dig (8) four foot deep holes for our support posts.
I hated the Auger by the end of the day. I even kicked it once. Then I drug it behind my van to teach it a lesson all the way back to the rental place. Alright, so really I towed it back to the rental place. But don’t think I didn’t dream about dragging it back. ‘Cuz I did.
We leveled, and measured and leveled some more, before setting the gigantic 12’ posts into the earth and backfilling them with earth.
I was very bruised and tired by this point.


We attached pressure treated stringers around the top and bottom of the structure, cinching in all the free-flowing posts. I kept telling the posts to ‘Get in line!’, but they didn’t listen for the most part. Stubborn posts. We added 8’ header/beams across the top. These were also 4×6 pressure treated posts.


Attaching the last beam to the top stringer was our goal today for quittin’ time.


I was thinking about last night’s leftovers waiting for me in the fridge as soon as I got home.
And a nice shower.
And maybe a glass of wine.
And Cowboy.


And although I felt victorious about meeting our goal today, I think I was more excited about going home to my leftovers and a glass of wine.
Leftovers…yum.
Next step: rafters and raisin’ the roof. Woot woot.

Read more

The many sides of my Musician Hubby

The first time I saw Biceps, I thought there was no way in heaven that he would be the man for me.
As he performed, he dominated the stage and intimidated this little corporate girl to no end with his ‘tough guy’ side.
(You can read more about How I met my Hubby if you are bored one day.)


That’s him far left with his old band, Philmore. His uber serious side.


That’s him now lead singing for his new band. This is his intense side. Almost eight years have passed between this photo and the one above. During this time, I have learned all about the different sides to this man.


Like his banana-costume-wearing side.


His powerful and dare I say it–hot side?


His tender side. He’s loving on a puppy that has probably never felt love before in a barrio in Reynosa, Mexico.


Hello, Handsome Side.


Hello, Sweetheart Side.


Studmuffin Side.


Weirdo Side.


I love each of his different ‘sides’. But I do have a favorite side.
It’s the one that said, ‘I do’ to me almost ten years ago in a little chapel in front of our God, our family and our friends. I am thankful for this ‘side’ the most.

Read more

Organize My Weirdness, Mr. Bookshelf

Hubby and I enjoy garage sales. In fact, I rubberneck quite often when I see the notoriously illegible sign indicating a sale is happening somewhere in the general area. I think I enjoy seeing other peoples’ craziness on display more than anything.

It makes me feel normal for owning a Metamucil coffee mug.


I made this beauty you see here for only $10. And that’s because I didn’t haggle. The garage sale was benefitting the Boy Scouts. Which I call ‘Boy’s Scouts’. But I also call the big box bookstore ‘Barnes & Nobles’….


Anywho, my $10 bookshelf looked like this but had been used vertically instead of horizontally. So, take your computer and tilt it 90 degrees. Ok, return your computer to its full and upright position. Thank you for flying with Rebekah.
What you’ll need for this project:
One ugly bookshelf

You’ll also need:
Scrap Plywood for new shelving (if needed)
A 2’ level
Painter’s Caulk and Caulk Gun
Skill Saw
Drill with Phillips drill bit & a drill bit smaller than your wooden
shelving pegs
2” drywall screws
Wooden Pegs to hold in your new shelves
Palm Sander and 80 grit sandpaper (unless your wood is in bad
shape, then you’ll want to start with a 40 grit and work your way
up)
Tape Measure
Speed Square (if you have one)
Hammer & 2” brad nails
Primer, Leftover Oops paint-sassy color preferably…(I had a deep red on hand. Hello, sass!) and a Paintbrush


I hoped to fit my shelving right above my desk. I wanted it to basically go wall to wall in my barren office. My new $10 bookshelf was a little too long, so I broke out the skill saw.

Using my tape measure and speed square, I determined the amount I needed to cut off of one side to fit on my wall. I then used my skill saw to cut that sucker down to size. Don’t mess with me, Mr. Bookshelf.


Using my tape measure and speed square, I determined the amount I needed to cut off of one side to fit on my wall. I then used my skill saw to cut that sucker down to size. Don’t mess with me, Mr. Bookshelf.


I decided that I only needed one shelf each for the other two cavities. I determined where I wanted the shelves to sit, and drilled out two holes on each side and then inserted my wooden pegs into the hole, lightly tapping them with a hammer. These pegs will hold up the shelf.
I then took this opportunity to sand down any burrs or rough edges on the shelf.


I caulked up all of the seams within the shelf to make it have that ‘built-in’ look.


Next came priming and painting. Which was fun considering it was at least 95 degrees at this point.
I love sweating into my paint.


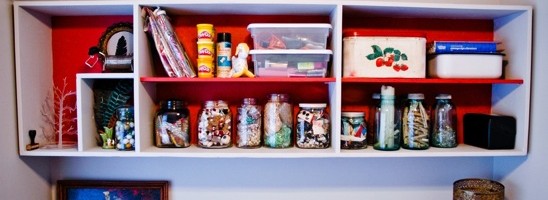
I used my level and my Hubby to hang the new shelf at an appropriate height. We screwed it straight into the wall with drywall screws, hitting the studs. I touched up the screw heads with my Oops red paint.

After all was dry, I pulled my aptly named ‘Craft Bin’ from the closet and begin organizing things into jars, bins and tins. Feathers, glitter, glue sticks and beads were flying everywhere.

It was one of the most entertaining nights that Cowboy and I have had in awhile.

PS-Do you think I should add doors to my bookshelf? I can’t decide.

Read more