Author Archive for:Rebekah

Bloomin’ Bloomington, In

During the cold and burry winter, its often difficult to convince myself to leave the hotel room and play ‘tourist’. I find the trip out of doors was worth it as I peruse my new photos later that day.

We suited up for a brisk walk around Bloomington, In. Of course, this involved getting a cup of coffee first. Nothing can be done without coffee.


The town square was quaint and came complete with an old theater (still functioning), several coffee shops (thank God) and old bookstores.


Even though I spilled my coffee on my very cute homemade Sweater Mittens, I was very happy with my decision to leave the hotel room. The coffee washed out of my cute mittens, thankfully. There was a lesson learned-make dark colored mittens for coffee consumption.


Anywho, the town was preparing for Christmas with festive window displays, cinnamon latte’s and….


…twinkle lights.


Lots of lights. This town knows how to party. Too bad I’ll be sleeping when they light these suckers up. Maybe with another cup of coffee, I can stay up past my bedtime and watch the glory unfold…
Or maybe I need another cup of coffee just because. Either way, I am stimulating the Bloomington economy and there just isn’t anything wrong with that.

Read more

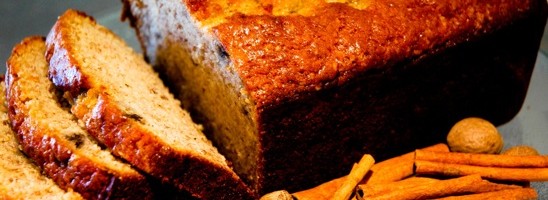
Beautiful Banana Bread

I love this recipe-it’s taken me years to get it just right and it’s so dang easy. I have inadvertently discovered a secret to making your banana bread super moist-causing demand from neighbor’s and Grandmother’s everywhere.

Yum. Grab your wooden spoon and apron.
It’s time to bake.


Here’s what you’ll need:

5 1/2 Bananas
1/2 Cup Sweet Cream Stick Butter (I use unsalted butter)
2 Beaten Eggs
2 Cups Bread Flour (you can use all purpose, too)
1 Cup + 2 Tbs Organic Sugar (I prefer this, because it browns nicely)
1 1/2 tsp Baking Powder
1/2 tsp Baking Soda
1/4 tsp Salt (or omit if using salted butter)
1/4 tsp ground Cinnamon*
1/8 tsp ground Nutmeg*


*Grinding your own cinnamon and nutmeg really sends this banana bread over the top. But, if you don’t have them on hand-don’t worry your pretty little head about it. Just use the store bought spice and no one will be the wiser.


Preheat your oven to 350 first and foremost.
Next, peel your naners and mash the puddin’ out of them with a potato masher.


Melt the 1/2 Cup of butter in the microwave. Add the two eggs to your melted and beat thoroughly with a fork.


Pour the butter and eggs into your banana bowl. Mix thoroughly with a wooden spoon.


In a separate bowl, add the 2 Cups of flour.


And the 1 Cup + 2 Tbs of sugar.


Next, add the 1 1/2 tsp of Baking Powder and the 1/2 tsp Baking Soda.


If you are using salted butter, do not add the salt. If you are a purist like me and buy unsalted butter, add 1/4 tsp salt.


If you are using fresh nutmeg and cinnamon-it’s time to get your ‘grate on’. Add either the fresh 1/8 tsp of Nutmeg and the 1/4 tsp cinnamon or the store bought kind to the dry ingredients.
Stir the dry ingredients with a fork thoroughly and then make a well in the center.


Add the banana mixture to the dry ingredients all at once.


Stir with a wooden spoon just until the batter is moist. There will be lumps-and that’s ok. Sometimes, life gives you lumps…


Grease the sides and bottom of a 9” x 5” loaf pan. If you use another sizes of loaf pan, just decrease the amount of time the bread is in the oven. Fill the pan 2/3 full.
Bake for 45-55 minutes or until a toothpick comes out clean.


Cool in pan for ten minutes on a wire rack or trivet. Run a knife along the sides of the pan to release the bread. Flip the pan over onto a wire rack, tapping the bottom of the pan to remove the bread.


Make one for Poppa Bear, Momma Bear and Baby Bear.
Cool on a wire rack for ten more minutes. Now, here comes the secret part. Thoroughly wrap the bread in saran wrap-while it is still warm and let it sit overnight. You can go a step further and place the bread inside of a ziplock bag. This traps the moisture in the bread and makes it sooooo moist.


If you absolutely cannot wait until the next day to eat it-which usually happens around here if Biceps has anything to say about it-at least let it sit for an hour or two inside of the saran wrap.


Trust me, it’s worth the wait.

Read more

Using Lightroom Presets

Once in awhile on tour, I have just a minute to edit a photo and publish it, or possibly be away from the internet for days. I typically don’t use presets in Lightroom, but they do come in handy in these instances.
Here are a few quick examples of what those presets can do.

This is the original photo.


I like to import most of my photos using the preset, ‘Strong Contrast’. It gives a punch to the color in the photo and offers deep blacks.


This preset, ‘Creative: Selenium Tone’, adds the retro black and white feel with sharp contrast and a hint of blue.


I love this preset, ‘Creative: Direct Positive’.
It’s a nod to high fashion photography: a yellow hue is added to green, both the color and the lighting is intensified, and it strikes a sharp contrast between blacks and whites.


Using the preset, ‘Creative: Aged Photo’, you can turn a modern photo into something reminiscent of the past, but with sharp detailing and deeper blacks.
I like to mess around with my presets-adding color filters or increasing exposure just to see what craziness I can come up with. It’s really fun to do with portraits.
I hope this inspires you to have fun in Lightroom when your time is short and you can’t get into an intense photoshop edit!

Read more

Magical Mantel Decor

Truthfully, my ‘Magical Mantel Decor’ isn’t really magical.
It can’t grant you three wishes.
It cannot get rid of that zit before the big holiday party.
It can’t make you lose ten pounds.
But, it is pretty and shiny and oh, so very easy to do.

And that, to me, is a recipe for ‘Magic’. Plus, this decor is inexpensive. Therefore, Biceps thinks our Mantel Decor is magic to our budget.


All that you need for your own Magical Mantel Decor is:
Metallic Spray Paint and a drop cloth/plastic sheet
Desired Christmas Ornaments
Tinsel (not pictured)
Felled tree limbs-or go and cut them off of your living tree, while apologizing to it. That’s what I did.


Spray the tree limbs with the metallic spray paint. I recommend doing this out of doors, unless you like that fuzzy headed feeling. Let the limbs dry.


Place tinsel on the mantel before arranging the silvery tree limbs. Hang glittery Christmas bulbs from the limbs and intersperse them on the mantel itself.


And try not to drop any of them.


Stand back and take in the amazing thing you just created. Smile at your geniusness, laugh at your dusty pocketbook, scoff at stores selling ‘mantel decor’. You, my friend, have conquered your mantel.
Be proud-or humble. Whatever you think Baby Jesus would recommend.
(PS-I have had several peeps asking me about the MIRROR above my mantel. Here’s the link, if you would like to see a tutorial on how to make it for yourself!)

Read more