DiY Recycled and Cheap Rain Barrel
Taking on the responsibility of gardening this year brought about several financial questions that Biceps and I had to discuss.
One-How can I garden with my cost being minimal while also yielding the best produce?
Two-What kind of cute garden accoutrements can a girl justify buying in order to really enjoy the gardening experience, i.e. pea green garden clogs, flowery leather gloves, etc.?
Our first experiment was making our very own and very cheap “DIY Spinning Composter”.
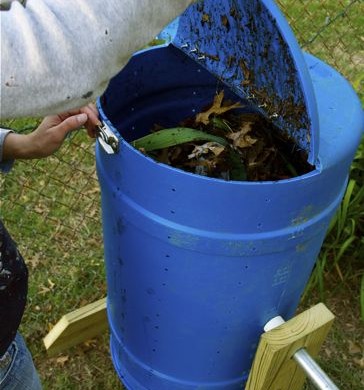
It took a couple of hours and a couple of bucks, and voila-rich, lovely compost. Mmmm….
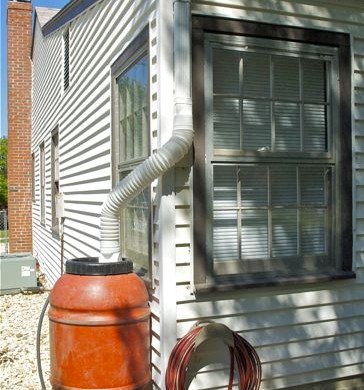
Our next experiment was making our very own DiY Rain Barrel.
Did you know that with only ONE INCH of rain, a 1,000 sq. ft. roof will produce 600 gallons of water? What the heck! We decided to make two rain barrels for the back of our house. If I had my way, they’d be surrounding the house….
(Of course, there are many stores that sell rain barrels-but that seemed too easy. Plus the price tag of $80-$300+, made most of them outside of our “cheap” budget.)
We started off by buying a recycled pepper barrel from Atwoods for $35.
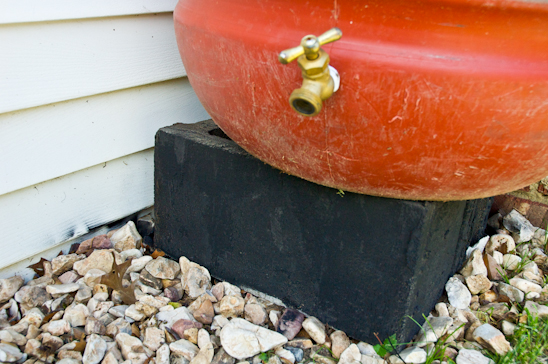
It came complete with a spigot…
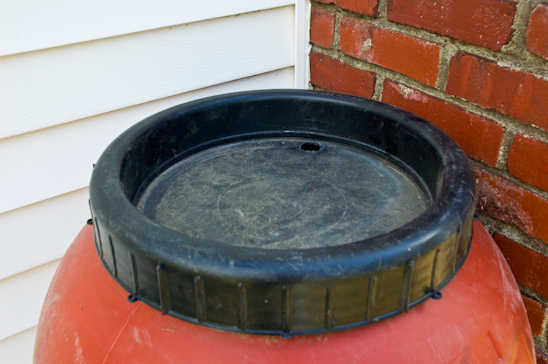
…a lid that screwed on and a bonus-it’s very own peppery smell.
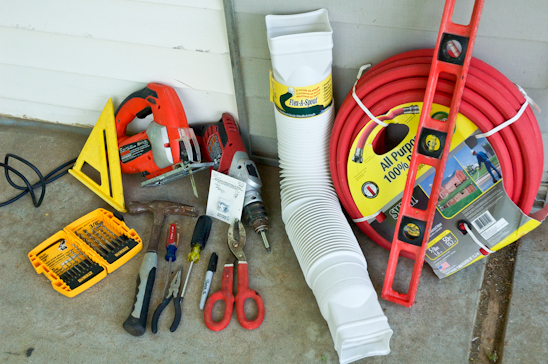
And the rest of the necessary items needed we purchased for less than $10.
Here’s what you’ll need to make your very own rain barrel:
Drill and drill bits
Hammer
Metal Cutting Shears
Jig Saw with wood blade
Phillips & Flathead Screwdrivers
2′ or 4′ Level
Old window screen
Hose (Buy a new one, recycle an old one)
Flex-A-Spout (Lowe’s, Atwoods, Home Depot)
(4 ish) White sheet metal screws for gutters (Lowe’s, Atwoods, Home Depot)
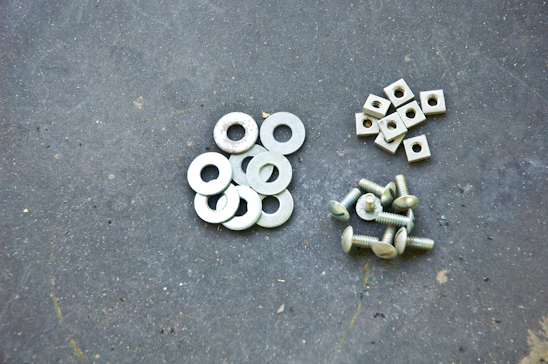
…1″ Bolts with washers and nuts (we have a coffee can full of these, but if you must purchase them, you might spend $1-2)
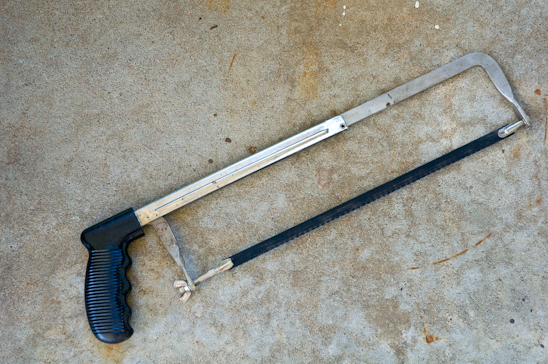
…and a Hand Saw with metal blade

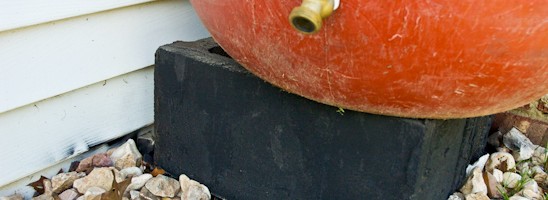
We raised our rain barrel up 6″ in order to have gravity take control of the water flow. If you are placing your rain barrel on a slope and watering below, you can skip this step. I would recommend raising it as high as you can safely-(NOTE:1 gallon of water weighs about 8.35 lbs, so a 55 gallon barrel full of water weighs approximately 460 lbs.).
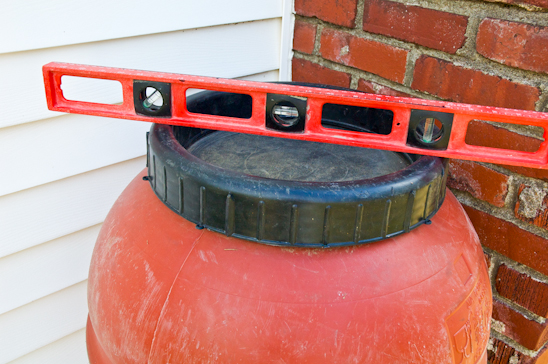
Level the barrel to avoid any topsy-turvy action.
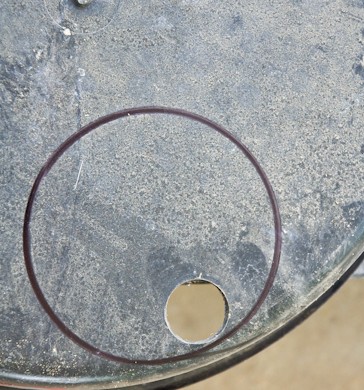
The first step was to trace where I would cut a hole (I used my coffee can) in the lid to allow the water to flow from the downspout and into the barrel.
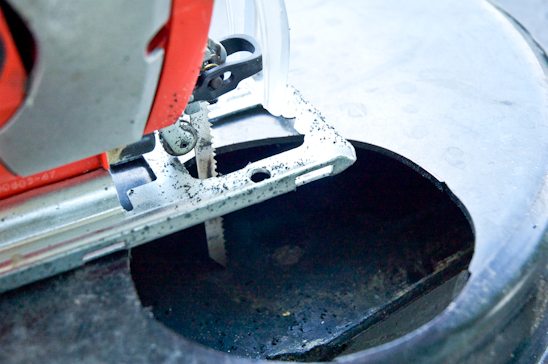
Using my jig saw, I cut out the traced circle.
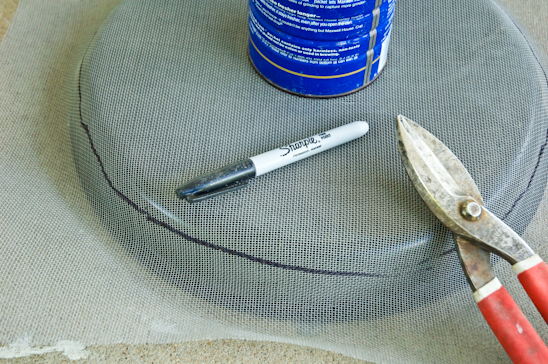
Next, I cut out a circle of screen with my metal cutting sheers to cover the entire top of the lid. The screen will catch tree limbs, nuts, and roof debris before it enters the barrel.

I pre-drilled five holes around the top of the lid. This is where the bolts will go to hold down the screen.

I laid the cut screen on the top of the lid and pierced through the screen with a hammer and a nail, into the pre-drilled holes. This will allow the bolts to go through easily.
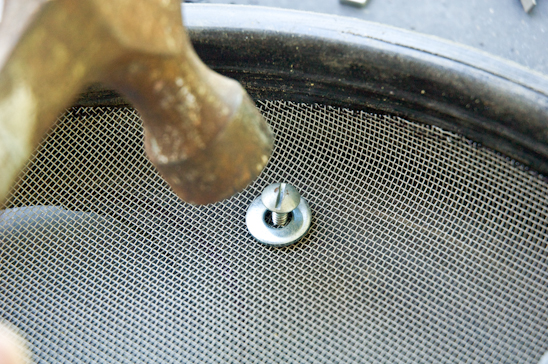
The bolts and washers came next. I pounded the bolts through the pierced and pre-drilled holes in the screen. On the underside of the lid, I tightened the bolts by adding nuts.
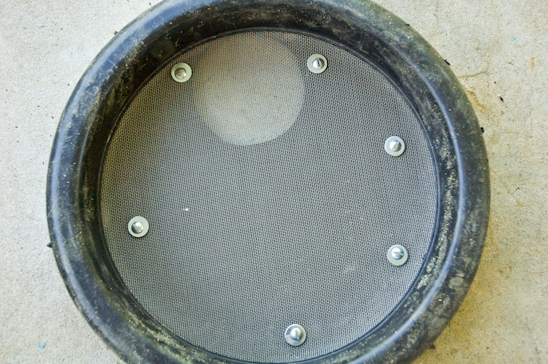
Here’s what my finished lid looked like.
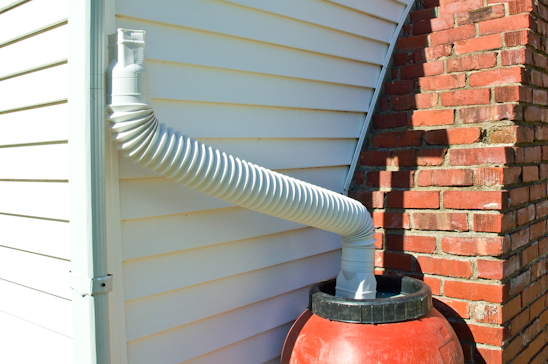
Next, I determined where my Flex-A-Spout would need to attach to my gutters while still reaching my barrel.
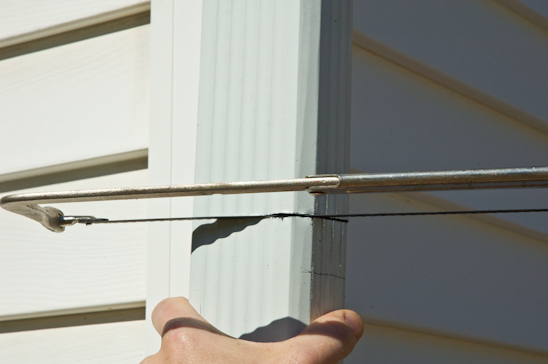
After marking on my existing downspout where the cut would be made, I got to work with the hand saw.
To be honest, Biceps is cutting so that I can take the picture.
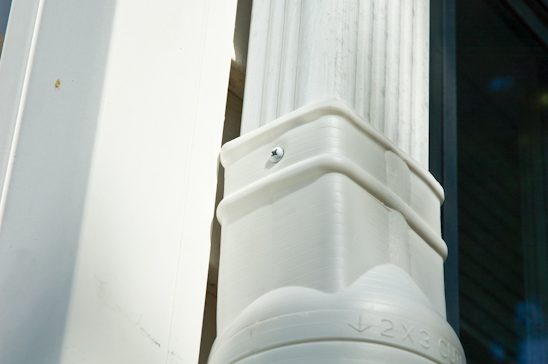
I pre-drilled through my Flex-A-Spout and into the existing downspout before adding the white sheet metal screws on all four sides, cinching the two spouts together in perfect harmony.
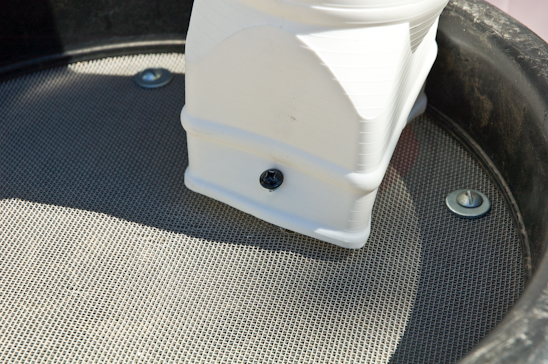
For good measure, I screwed the end of the downspout into the rain barrel lid with a 3″ exterior screw. I didn’t want it to be flopping around during a high wind and embarrassing itself.

I would recommend drilling out a large hole at the top of the barrel for overflow. I even attached a hose to this in order to feed the overflowing water into another barrel or trashcan during an intense rain.
Attach the hose to the spigot, and voila-you are done!
Now you don’t have to freak out each time you want to water your garden or fill up your bird bath. Or maybe you weren’t freaking out, but still would like to have a rain barrel.
Either way, it’s win-win.


This is such a great post. I think I will share it on some of my facebook pages. I am your new follower.
Have a great day!
http://www.garlicmom.blogspot.com
Great idea for the rain barrel. We just moved to Texas where they are experiencing a great drought. Gonna have to find a way to make use of your idea.
I became a follower to keep up with your other great ideas.
If you get a chance sometime you’ll have to stop by my blog.
Melissa
http://redflycreations.blogspot.com
p.s. I love the name of your blog!
I’ve been wishing for rain barrels! Thanks for posting your instructions… I think I can accomplish this!
That’s awesome, Rebekah! Thanks so much for sharing your great instructions!
Thanks for this awesome tutorial! I’ve been wanting something like this for awhile. I just sent the link to hubby at work…we’re so doing this!
♥Linsey
I love this idea, and will definitely be making one! I’m actually going to pin this right now, as long as you don’t mind! Thanks for sharing!
I don’t mind at all, as long as you give credit to Potholes and Pantyhose! Thanks!
This is going to be one of my first projects when we move. Thanks for posting!
This is great. I can’t wait to try this out. Such a great idea and so practical. I would love it if you would link this up on our blog over at http://junkintheirtrunk.blogspot.com/2011/11/link-it-up-wednesday.html
Thanks
Excellent! I would love to tackle this project in the spring. And by “I”, I mean “my hubby”
Awesome tutorial! I’ve wanted at least one of these for awhile now, but there just so expensive. Living in TX we need to save every drop of rain we get.
I’d love it if you would consider sharing this project on my Thingamajig Thursday Party.
http://radcrafter.com/2011/11/radcrafters-thingamajig-thursday-party-1/
Alida
This is great! I would LOVE to have rain barrels. Thanks for the tutorial!
Thanks for linking up at {Junk in their Trunk}…this is a great idea! We would love to see you stop by tomorrow for our 2nd link party!
Thanks for linking up last week!! I’d love it if you would stop by again tomorrow for party # 2.
Alida
http://radcrafter.com
[…] also reminds me that right now my rain barrels are brimming with free water for my garden. Free. I love that word. (Learn how to make your own […]
What a great idea! We have been pricing rain barrels locally and they run over $200. Thanks for linking to the Open House Party.
Hugs,
Sherry
Great way to get free water and ya’ll did a great job of making it! I’m thankful we get all the free water we want from our deep well we have and it’s the water that Ozarka taps into daily about 5 mi from our house out in the country!! They make us mad b/c they’re going to suck the life out of OUR WATER some day!! I hope I’m not around then!! Till then, we have GREAT water! Absolutely wonderful water to drink straight from the tap and we have it tested every year and always get the best rating you can get on it! It does have a tad too much iron in it but you’d never know it!
Seeing as how Ozarka’s trying to get as many truck loaded daily, we’ve ALWAYS used as much as we wanted to to water our whole place with!! I’m also happy we don’t have to resort to barrels or anything else. I’m very picky about how things look and we’d have to run lines underground so as not to be seen near our house! Yea, I’m really way, way too freakin’ picky about how everything looks outside!
We just are in bad need of rain right now! Missed another opportunity for rain this morning. Cloud and storm went right past us! We got about an inch last week and then the freakadoodle wind blew so hard for 3 days in a row that I KNOW it sucked all the moisture away that we got! We’re so far behind on rain it’s unreal, but for the past couple of years, we have had EXTREME weather and that can be very scary. Extreme weather?? lol!! Gah! I can’t even write!! I mean our weather is either way too hot or wayyy too cold and nothing on schedule like it used to be and you can’t count on when anything is really going to happen like we did have for literally years and years!! That’s how the whole country is, though, so I’m sure we’re not alone in that respect!!
You and bicepts did a hot diggity dog danged job with your water project!! You get an A++!!!!
Dee
YEAH! I love getting A++’s!!!
[…] fear of boring you, I’m ending with this post. My DIY Recycled and Cheap Rain Barrel. This is a simple solution to gathering your roof water. The tutorial is rather simple, the process […]
thank you so much for posting this along with the composter instructions – both are now on my to-do list for the spring! we have been composting for years but have been manually turning over our {gigantic} pile by hand or using our tiller. we’ve also been trying to collect rainwater without barrels – not as easy as with them i’m sure.
We’ve been mulling over doing this for a while, and yur right, the price for one seems a bit overboard! Now, where in the heck can I find a reclaimed pepper barrel? Hmmmm….must use Jedi mind skills on that one…cuz our water bill goes OUT THE ROOF in the summer just trying to keep the zinnias from croakin’…
We found ours at Atwoods-which is a farm supply store. There are only two around these ‘har parts, so we had to drive a bit. But, it was worth it-$30, with a spigot already attached. Boo yeah.
So pretty! <3
[…] the meantime, I know that my two DIY Rain Barrels are filling to […]
[…] #2: DIY Rain Barrel […]
Nice work – we have three 50 gallon water barrels that we love! This year we added a solar powered water pump. We have several blog posts on it. Here is our newest one: http://sistersplayinghouse.blogspot.com/2012/07/solar-powered-water-pump.html
Thanks, I’m stopping by~ Can’t wait to see what you guys came up with. We need pumps as well-but one thing at a time around here…
[…] Spinning Composter is filled to the brim and ready to fertilize my soil-naturally. My Rain Barrels are full and ready to offer free rainwater for the garden. The dutch clover is protecting my soil […]
[…] save money on water by using Rain Barrels, making my own garden critter deterrents and utilizing my kitchen scraps to create […]
[…] are in the beautiful black earth, soaking up the nutrients from my composter. The gathered rainwater is providing the moisture and my song is providing the incentive to […]
Hello Rebekah:
I sent you an email earlier today. I LOVE THIS project and I want to feature it (and you) on our site in July. Can you check out the email I sent you and reply when you have a free moment? Thanks in advance.
Deirdre
[…] Credit: Rebekah Greiman of Potholes and Pantyhose.com […]
[…] Credit: Rebekah Greiman of Potholes and Pantyhose.com […]
[…] You can see how Rebekah transformed a recycled pepper barrel into her own private water reservoir here. […]
[…] Credit: Rebekah Greiman of Potholes and Pantyhose.com […]
[…] Credit: Rebekah Greiman of Potholes and Pantyhose.com […]
[…] You can see how Rebekah transformed a recycled pepper barrel into her own private water reservoir here. […]
[…] Photo Source: https://www.potholesandpantyhose.com/2011/10/diy-recycled-and-cheap-rain-barrel/ […]
[…] as watering your lawn. While you could always buy one, making one is cheaper and more fun! The blog Potholes & Pantyhose provides a step-by-step guide. If you’re curious about other ways you can save water, check out […]
[…] DIY Rain Barrel: This diy seems easy and it is . Basically you need a barrel that tales the water coming down from your roof. So you save around 1,300 gallons of water during rainy seasons. If you want to make this click this link DIY Rain Barrel […]
[…] DiY Recycled and Cheap Rain Barrel […]
[…] DiY Recycled and Cheap Rain Barrel […]
[…] Credit: Rebekah Greiman of Potholes and Pantyhose.com […]