‘How to do it Like a Woman’-Sanding Hardwood Floors-Part Uno
GO here to see Part Deux!
There are so many projects to be done around the home, had I waited on Hubby to do it all by himself, would never have been done. You may be apprehensive about tackling something as ominous as hardwood floors. I am not apprehensive about almost anything, so let me be your guinea pig on things such as this.
You can sit back, sip some tea and learn from my mistakes.

When I first heard of this task, I ran the other way and hid in a dark corner for several hours. There was whimpering involved.
I mean, we’re talking scary, noisy machines that could inflict pain.
I could permanently damage the wood by sanding too deep.
I could pick the wrong stain and have to live with it that way FOREVER!
And, then I realized….these are just floors. Boo-hoo if I screw it up.

What you’ll need (get a pencil out):
Knee pads & dust mask for your own comfort
Polyurethane
Stain (if desired-I didn’t desire)
Pole Sander & 220 Grit pole sander pads
Lamb’s Wool Applicator (bahhh…)
Palm Sander and 110 Grit Sand paper
Mineral Spirits/Paint Thinner and rags

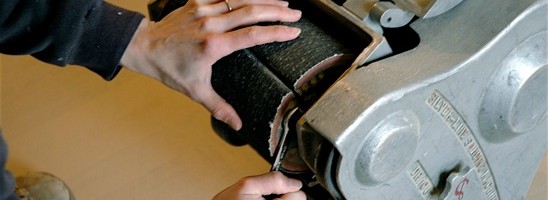
This is a belt sander. I recommend testing this 500 pound machine out before you leave the rental joint, haphazardly load it up into your truck, drive 45 minutes to your destination, haphazardly unload it and somehow get it inside, attach a new piece of sandpaper and realize it doesn’t work right…

You’ll need to rent a belt sander and an edger.
You will need to also buy three grits of sandpaper at the rental place. Usually they’ll start you at 100 grit, then 80 and finally 36.
For new wood you can start at 80 like we did and then move on to 36.
You’ll also want:
Paint trays and liners for the poly
Rubber gloves to apply the poly
Foamy brush to get the poly in small places
Wood fill & applicators for wood fill
Sheets of Plastic & Blue Tape
Let’s Get STARTED!!!!

Tape off all doorways, cabinets and anything else you don’t want completely covered in a thick, fine layer of icky brown dust.
I would recommend blue painter’s tape-however, when you run out, you may use masking tape as I did…

With the belt sander UNPLUGGED, insert your first piece of sandpaper. Since there are so many different kinds of sanders, ask the rental company how to put the sand paper in. Or, you can email me and I can show you how with this particular model.

Always sand in the direction of the wood grain with the largest grit sandpaper first. Because this wood was new, I started with an 80 grit.
Gently make contact with the floor while the machine is in the ‘ON’ position and you are moving forward. Walk slowly towards the other side of the room.
When you are a foot or so away from the wall (or another end point), lift gently up on the machine while still moving forward. Turn yourself & the lifted up machine around like you are mowing a lawn. Head back, baby, in the other direction. Do this until all of the floor is sanded.
Transitioning gently onto the floor with the belt sander will prevent large dips/ruts from being taken out of the wood.

Now, that your floors have been sanded all the way through….time for the edger! Strap on your knee pads and get ready to bulk up on your forearm muscles.
You will use the edger to get right up against your walls and inside of your closets. This thing is a little tricky, but with the right positioning, it won’t get away from you.

Use your palm sander to get into those tiny places even the edge can’t get into.
Don’t I look lovely? I had brown boogers. Gross.

Because we were sanding new floors, after the first sand at 80 grit, we were able to wood fill all of the nail holes and knots in the floor next.
If you are sanding old wood floors, you will do wood fill after you have sanded/edged twice: once with the 100 and then the 80 grit.
After the wood fill has dried (read directions on the packaging), sand and edge the floors again, removing all of the wood fill with your last grit of sand paper.

This is how you will look after all of the sanding is completed. Now, go to bed and get some rest.
Blow out the brown boogers as much as possible.
Tomorrow is a big day-we’re going to finish this project and make your floors so shiny and new!
GO here to see Part Deux!


Leave a Reply
Want to join the discussion?Feel free to contribute!