‘How to do it like a Woman’-Finishing Your Hardwood Floors-Part Deux
I bet you’re a little sore today after Part Uno.
Don’t fret, today is an easy day. A fun day. You are going to make those dusty floors look brand spanking shiny and new!
HURRAH!

From our list in ‘Part Uno’, this is what you will need today:
Shop Vac
Rubber Gloves
Polyurethane
Stain (if desired, I did not desire)
Paint Tray & liners
Foamy Brush
Lambs Wool Applicator
Pole Sander & 220 Grit Pole Sander Pads
Mineral Spirits/Paint Thinner and rags
A good attitude

First things first; using your shop vac, suck up all of the dust particles from every square inch of your newly sanded floors.
This step sucks! heh heh.
I recommend dust mopping the walls and vacuuming off ledges and shelves, as well.

Spread a generous amount of the paint thinner/mineral spirits onto your rag and take a big wiff of it. Now that you are dizzy, wipe the entire floor with your smelly rag. This removes the fine particles left behind by the vacuum.

Guess what?! If you want to apply a stain, this is the time to do it. Use a lintless rag to apply your stain evenly to the floor.
If you are like me and aren’t applying a stain, it’s time for Round 1 of polyurethane! Grab your rubber gloves, make a bird out of them (shown above) and get pumped.
You can skip the ‘bird’ step if you like.

Gently stir your poly in a clockwise rotation with a clean stir stick.
Don’t pull up from the bottom or stir quickly. This will create air pockets in your poly. And that is not good…
You will want to stir your poly (both in the can and in the paint tray) from time to time throughout the application process.

Pour your poly very gently into your paint tray. I recommend using a liner in your paint tray or you will have a sticky mess on your hands and everywhere else.
Dip the Lamb’s Wool Applicator gently into the poly, pulling back until the applicator is full.

Start in the furthest corner of the room and plan how you are going to get out of the room. (Don’t poly yourself into the corner. That’s just embarrassing.)
Using even strokes, gently pull the lamb’s wool applicator towards you, following the direction of the wood. Repeat this until the floor is coated with polyurethane.
It’s easy to miss spots or leave puddles. Review your work as you go, using different viewing angles.

Let the first coat of poly dry. Follow the amount of time recommended by the manufacturer.
Every poly is a little different. I’ve always said that.

After the floor has had enough time to dry, use your pole sander and your 220 grit sand paper to smooth out any bubbles or high spots from pooling poly (can you say that 10 times fast?) following the direction of the wood.
You can also rent a buffing machine, but I like to get a shoulder workout. And, I’m cheap.
Vacuum the floor thoroughly after you are done sanding.

Now, it’s time for Round 2 of polyurethane!
(Follow the same instructions from Round 1 for applying the poly).

Let ‘er dry. YEAH!!!!
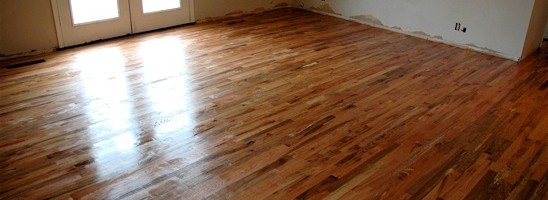
You are finished. Look at that floor! And you did it all by yourself. Follow your manufacturer’s instructions on dry time. Usually you can walk on the floors 2 days or so afterwards.
You did a great job.
And THAT’S how a woman does it.


What kind of floors did you put in? They are stunning! Great work – you’re inspiring
Heather-
If I remember correctly, they were 1 1/2-2″ oak. But, I would have to ask the ol hubster that question. We’ve put in so many of these floors and refinished even more, it’s hard to keep track!